
 The Acer AspireOne 10.1″ netbook is a handy secondary computer to have around. It’s quite capable of browsing the web, email and viewing photos. Most casual users could likely happily use it as their primary machine. Tablets have all but killed this market, I’m hopeful that the Google Chromebook will bring help back this form factor.
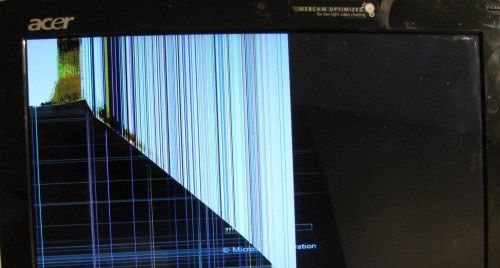
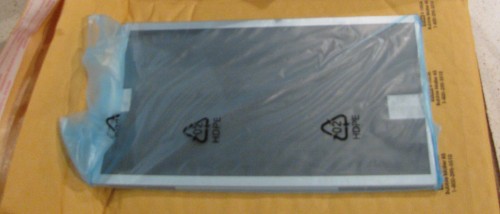
Unfortunately being a secondary computer means that it gets left around (on the floor) and stepped on. This was the sad fate of this particular netbook. It turns out that replacement screens are relatively inexpensive making it well worth fixing. First step was to boot the netbook connected to an external monitor to confirm the resolution of the panel and make sure nothing else was wrong. Armed with that, and a compatibility list I was able to find a good price for one from a Canadian seller on ebay. Shipping was very fast and the screen came well packaged: boxed and inside a padded envelope.
Disassembly is quite easy, this YouTube video covers it quite well. Below you’ll find some photos and my notes on the process.
There are two plastic ‘dots’ on the left and right of the screen, carefully pop those off with a blade and set aside for later. This will provide access to two screws, remove them. Now work around the bezel carefully to pop it off the front of the computer. There are small plastic tabs that hold the bezel on, I used finger nails but a guitar pick or credit card can be used to gently pry around the edge.
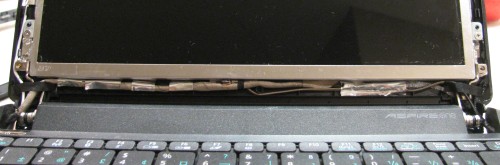
The screen itself is held on by four black screws that hold it in a metal frame. The screws are from the side inward, the last picture in this post has a close up of one of them. Remove these to release the screen.
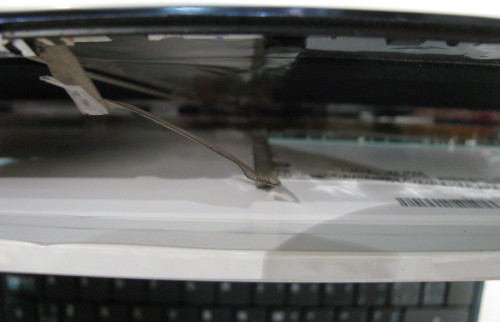
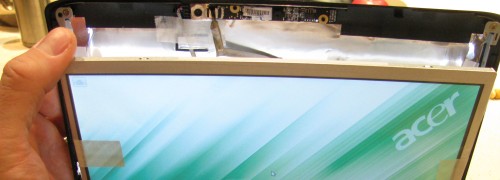
The picture above is looking down from the top edge of the screen. You can see the web cam cable which is taped to the back of the screen. You’ll want to gently unstick this as you flip the screen down. I used a screwdriver to help do this, use gentle pressure.
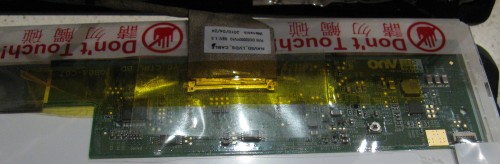
At this point the screen should be flat down resting on the keyboard. There will be some tape protecting/holding the screen ribbon cable. Gently remove this and the ribbon cable should easily part from the connector. Set the tape aside as you’ll want to use it for the new screen.
At this point we’re going to work in reverse, reassembling things with the new screen attached. The ribbon cable is a bit finicky to get seated but the tape helps keep things together.
Before reassembling the screws, I did a power on test to verify that the new screen was working and that the ribbon cable was properly attached. From here it’s simply a matter of pushing the screen back into the metal frame, re-installing the 4 black screws, snapping the bezel on and the final 2 screws and plastic dots.
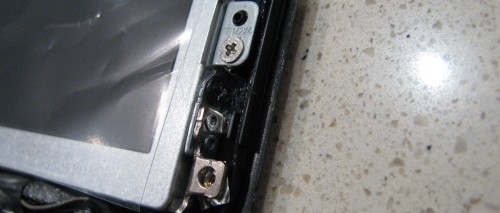 Both above in my post and in the video removing/re-installing the screen is discussed as just the 4 black screws. I found that the side of the case made access to the lower screws problematic. I found loosening the metal frame by partly removing the silver screws (seen just above the black one) helped get the screen back in easily.
The whole process took about 45 minutes start to finish, this was my first LCD screen replacement. I’d rate this as pretty straight forward and something most people could accomplish with a bit of patience. The hardest part was managing the ribbon cable.
You don’t tackle an easy job, obviously. It is not for the faint of heart and patient and good eyes sight is mandatory. I am always amazed how you manage these DIY.
Great job, and excellent tutorial…. You do us proud…..
Thanks for using our site to take compatibility information and buy the product elsewhere… It’s not like we’re paying anybody to generate those lists.
Jacques, I’m sorry you feel that way. I suspect many people reference the information you put on the web to assist people in purchasing a screen from your company and don’t bother to credit you / link to your site.
Like many consumers today I take advantage of the web to do comparison shopping. I will pay more for a product if I can get faster shipping, or work with a company that seems more trustworthy. I’ll point out for readers that acerparts.ca while more expensive, list themselves as an authorized Acer service and parts supplier: http://www.acerparts.ca/about-our-company.html
To the point of the compatibility information — Another 5 minutes of looking around on the web and I came across this useful advice on screen replacements: http://vitalcomputerrepair.com/laptop-screen-compatibility-guide/ – which basically says that almost every 10.1″ screen uses the same panel.
The ebay seller I used also has a website: http://www.screencountry.com/ and while they don’t offer up a compatibility list, they have a product selection tool which will help you locate the matching panel. It’s no surprise that the LTN101NT02 part number is offered up in the details of the matching part. By using ebay I saved a few dollars on shipping (and I’m fairly comfortable buying stuff on ebay).
Sometimes the factory authorized repair route is the right one to take, other times you can’t justify the cost increase and are willing to take a bit more risk to hit the price point that fits. With a lot of hardware where there are pretty thin margins, you are getting what you pay for.
A few ‘get what you pay for’ links:
http://hackaday.com/2012/01/04/exposing-some-fake-electronics-with-too-good-to-be-true-prices/
http://www.raspberrypi.org/archives/2151
http://www.righto.com/2012/10/a-dozen-usb-chargers-in-lab-apple-is.html