 I’ve had a Squeezebox Classic (Squeezebox 3) for a couple of years, and over that time I’ve been very happy with the functionality and quality of the device. I’m glad that through the transition to Logitech they’ve managed to remain successful in their niche, and I still recommend them to folks looking for a quality media player.
You can’t buy the Squeezebox 3 anymore, but the Squeezebox Touch appears to be the closest comparable product. If that’s not audiophile enough for you, there is always the Transporter. More important than the media player is the encoding format you select for your music (nothing is going to make 64k MP3s sound good). Squeezebox supports FLAC if you’re really serious, and high bitrate MP3s are no sweat either. It also supports non-DRM Apple format (AAC), Ogg Vorbis and a host of others.
I’m a little back level on the server software, but it has been consistently good. The web interface is reasonable and there are some fairly good remote control apps for the iPhone and Android. I run the software on my file server, but there are ways of getting this running on various NAS units as well which is a nice combination.
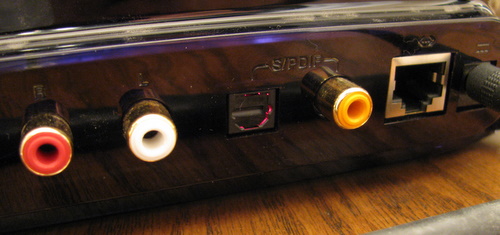
For various reasons the Squeezebox is at toddler level in our family room. This means over the last few months it has endured countless drops onto the floor. It seemed to handle these well, but the other day I noticed the screen was dark and it was no longer on the network. Initial attempts to reset / reboot the device failed to make any difference. When power was applied to the device, you’d see the TOSLink connector light up (see picture at top of this post), but that was about it. So I had to open it up.
 Inside the unit was very clean, and I didn’t notice any soldering quality issues that others had mentioned in the forums. Unfortunately, my first visit inside the box didn’t reveal any actual problems so it ended up sitting on the shelf waiting for me to find some time to investigate further.
Tonight I discovered what was wrong, I should also credit this forum thread for helping me. There is the main circuit board, and mounted on that is a daughter card. Slotted into that daughter card is the wifi card (you can see this stack of cards in the picture above). Apparently the unit will work without the wifi card installed, and it is a part that goes bad for some. I am glad mine is still working, but I run my device over wire anyways. What I didn’t realize the 1st time I looked was the daughter card had become separated from the main circuit board.
 Just to the left of my finger tip, you can see a rectangular white connector. I’m holding the board slightly up to show a separation between the two connectors. This is how the daughter card connects to the main board. To help you visualize the orientation, the RCA connector(s) are where the black box is to the right of my finger.
 Here is a second shot of the daughter card properly installed. If you look carefully you can see the rectangular connectors are well mated. That was all it took to fix things up. You’ll need a torx t10 or similar screwdriver to open up the device. There are 2 screws securing the cover, then a further 4 inside holding the main board to the case.


