
This post picks up right after you’ve finished all the steps to building your Printrbot Simple and turn it on and plug it into your computer for the first time.
There is an official guide you should follow – and it is worth reading through. I took some notes along the way and will share those here. There is also a forum post which covers setting things up that is worth reviewing as well.
As my home desktop is Linux (Mint 15 Olivia at the moment) following the official guide was a bit different than documented. They cover Windows and OSX, but the software is supported on Linux too.
First up you’ll want the mono-complete package installed as the RepetierHost software is .net based and the mono package provides support for that on Linux.
Then download the RepetierHost software and run the configureFirst.sh script (it will want to sudo and prompt for the password).
The printer communicates with the computer via a USB serial connection. On my system the USB serial device shows up as /dev/ttyACM0. However, regular users can’t talk to this device – so we can run as root OR we can add our user to the serial group. I found a helpful blog post that explained how to do this – just one line:
$ a=whoami; sudo usermod -aG dialout $a
As there is a sudo in the command, expect to be asked for the password unless you’ve very recently run a sudo operation. You’ll either have to log out and back in to enable access, or simply reboot.

Now we adjust the printer settings as per above, and we should be in business. At this point I was connected to my printer! Very exciting to have software control of some hardware I put together.
In hindsight, reading the RepetierHost manual on installation probably would have saved me some effort I spent searching around to solve the USB serial problem.
Referring to the official manual on page 9 – “Configure Repetier Printer Settings”
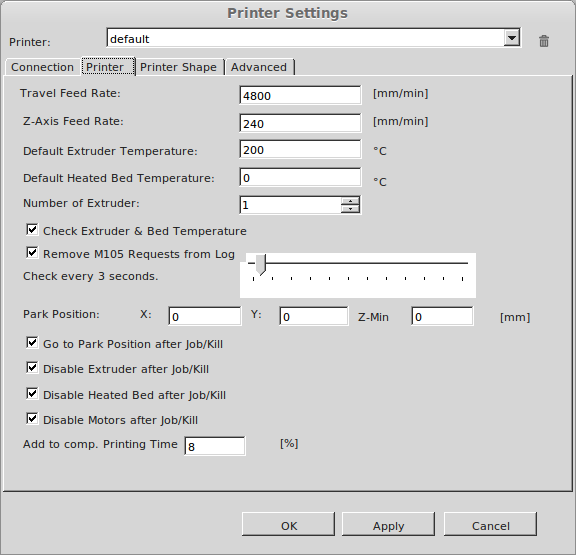
We’ve already covered the Connection tab, so now we’re onto the Printer tab as per above.
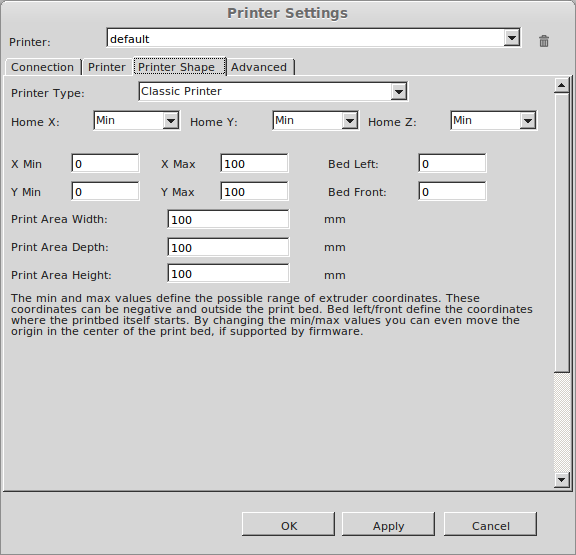
Then the Printer Shape tab.
At this point we’re done with the printer settings and want to configure Slicr which has a tab visible on the main RepetierHost screen. Go there, and click on Configure.
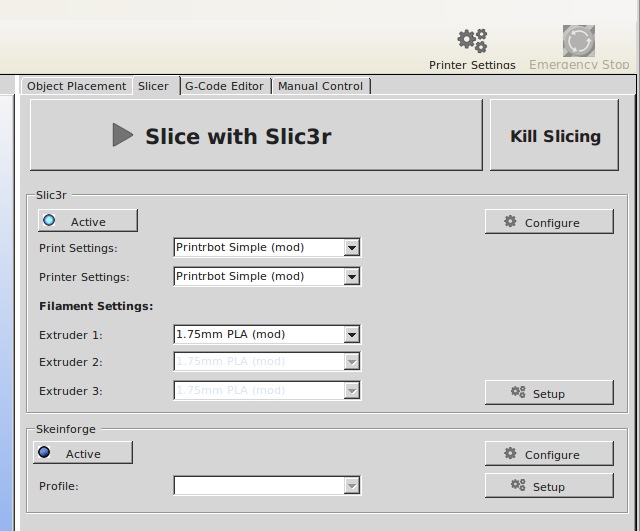
The Configure button we want is the top most in the screenshot, the lower button is for configuration of Skeinforge which we won’t be using at all.
This should launch a wizard to which we’ll answer the following questions:
- Firmware type: RepRap (Marlin/Sprinter/Repetier)
- Bed size: x:100 y:100
- Nozzle diameter: 0.4mm
- Filament diameter: 1.75mm
- Other layers: 200C
- Bed temp: 0C
Save the settings (click on the floppy disk).
Again, referring to the official setup guide we want to dive into the Slicr settings and make a few changes
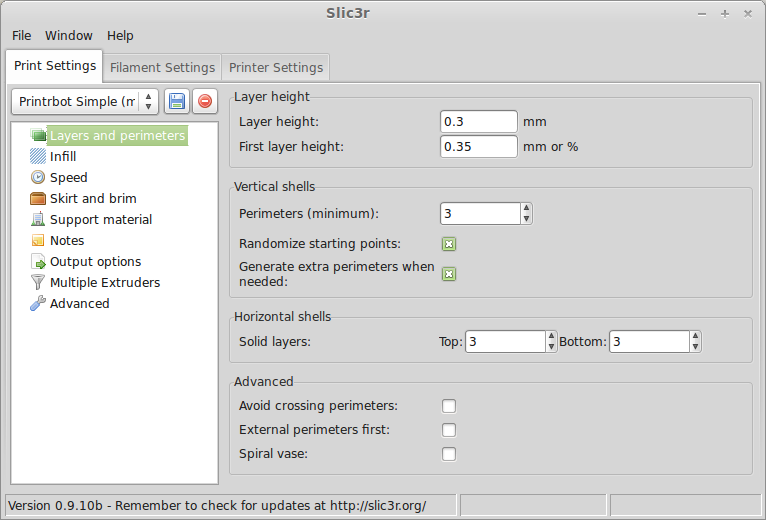
Layers and perimeters: Layer height 0.3mm / First layer height: 0.35mm, and make sure the check boxes are as shown.
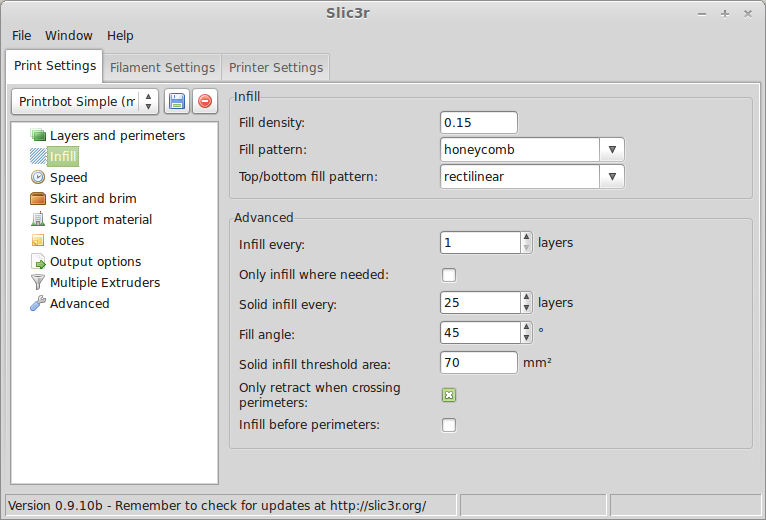
Infill, you can see some changes from the official manual here. I’ve adapted the settings as per this forum post.
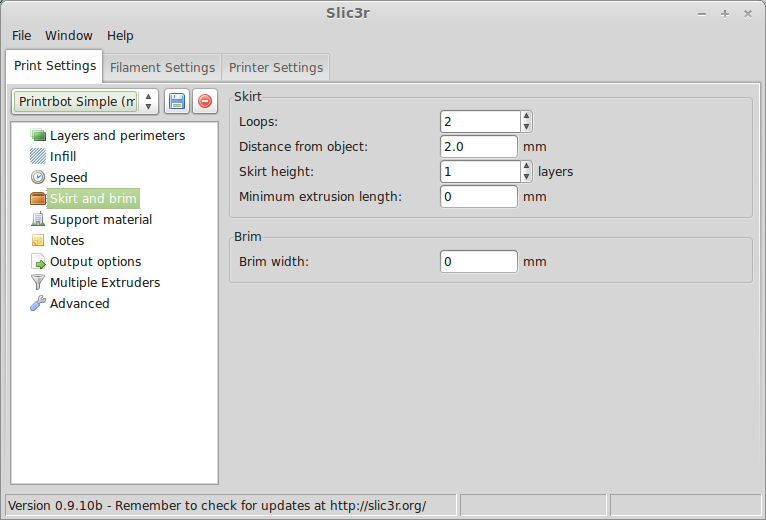
Skirt and brim – loops to 2 and distance from object tweaked.
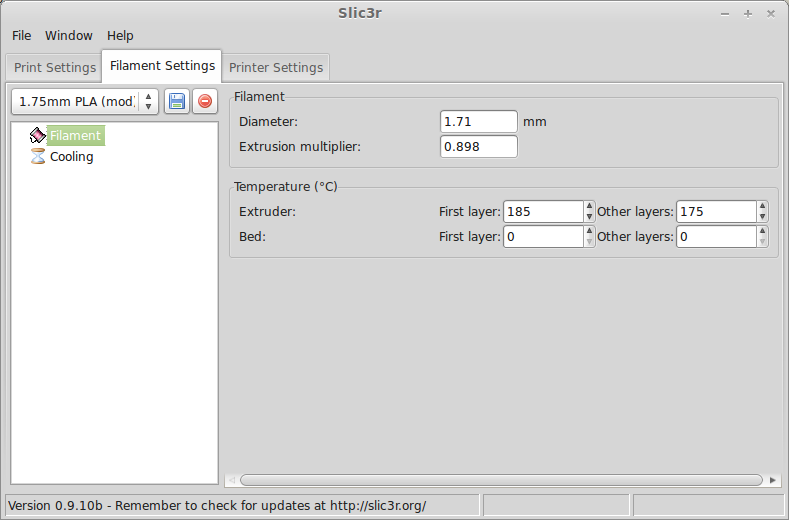
Now on the Filament tab a few changes as well (mostly based on the forum post).
Each of the tabs on the Slicr settings panel needs to be saved (and named) so we can apply them on the RepetierHost main screen.
At this point I hit a snag. The Z axis was way up near the top of the range and the RepetierHost software manual control wouldn’t allow me to move below the zero setting it was configured to.
Clicking the house button (home) will take the printer to the end stops, but as I haven’t calibrated my Z end stop yet that just means ramming the print head into the bed. I’d rather not do that. I dug around for quite some time to resolve this. The answer turned out to be simply: Install Pronterface and use it.
Once installed, Pronterface also refused to allow me to move below zero on the Z axis, but I was able to issue the G-code command “G92 Z50” (you enter this in the lower right corner of the interface as pictured below)
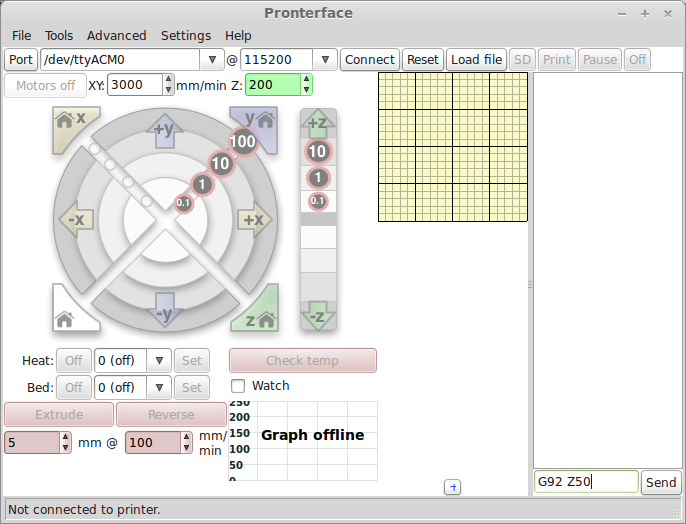
After the G92 Z50 command had been sent, I could shift the Z axis down. If you need to move it further than that, you can simply repeat sending the G92 Z50 command (as I did). This let me set the Z axis end stop “fairly close” to correct.
Now that the Z axis was (able to go) low enough I was able to switch back to RepetierHost and get things sorted out.
I leveled the bed relative to the hot end using a business card as a guide between the hot end and the printer bed. Added 3M blue tape to the bed. And set the Z stop to allow me to ‘home’ automatically.
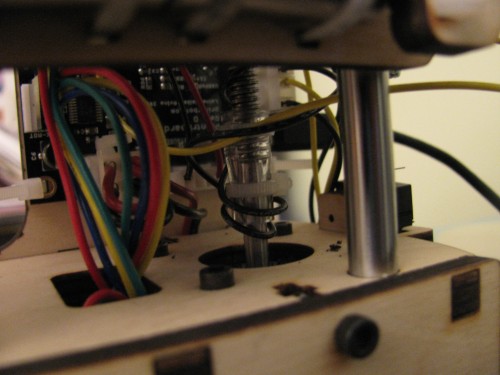
During some of my z axis manipulation.. I got the Y axis end stop cable twisted around around the Z rod. This was bad – I pulled the power to stop the grinding. and was able to unwind things and arrange the cabling to avoid the problem again.
I also noticed some of the wires coming from the control board were jamming the Z axis up / down movement. I bent those wires back out of the way. You’ll want to make sure nothing is in the way.
With the hot end all the way forward, you can see that there is some ‘give’ (at least in my build) to allow the hot end to move a bit up and down. Hopefully this won’t cause problems.
At this point I’m really close to being able to print, but there was one more stumbling block. The filament wasn’t feeding.
It doesn’t seem like the filament is making it down into the hot end far enough. When I pull it out.. it’s not soft at all, but you can feel that the hot end is very hot. By judging how far down the filament goes into the hot end it is apparent it’s not making it all the way down. I even removed the hot end and checked that the filament would insert into it properly.
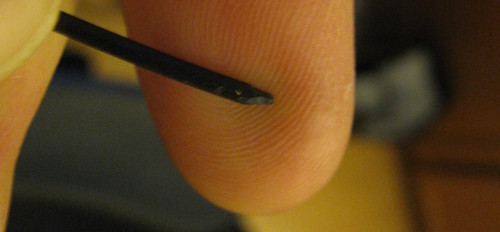
The trick was to whittle the end of the filament down a little bit to make it a point. Then I could manage to thread the filament all the way down to the bottom of the extruder (hot end).
Now I’m printing!