 With my recent server upgrades (wow was I lucky to mostly avoid the RAMpocalypse) it is now time to deprecate my oldest running server. Until recently this was my local backup server and amazingly it’s still doing just fine, I hope I can find it a new home. I doubt someone wants my NixOS complexity for a basic NAS device so I took a look at options to install so they could get a running start. TrueNAS was a good candidate, but it has fairly high hardware requirements. I then found openmediavault which will happily run on much more modest hardware and while ZFS isn’t supported out of the box, it’s easy to get there.
To get started go grab the latest ISO image for openmediavault. Then burn that to a USB drive so you can boot from it.
|
|
$ sudo dd if=xxx.iso of=/dev/sdX bs=4096; sync |
Initially I was missing the second command (sync), this tripped me up for about an hour. I did think that it was suspicious that the 1.2Gb file wrote to the USB stick so fast, but I figured that it was only 1.2Gb. This caused me to pull the USB stick before it had finished writing the data – and it failed silently. This resulted in my getting part way into the install then hitting an error something like:
There was a problem reading data from the removable media. Please make sure that the right media is present
Ugh, I tried multiple versions including a plain old Debian 13 install. Silly me. When I finally ran with the sync, it took a few minutes to finish instead of seconds.
Now armed with a valid bootable USB stick, it’s time to follow the openmediavault (OMV) new user guide. Stick with it through to the first boot on your new hardware which will allow you to visit the WebUI to manage things. When OMV boots, it will output information to the console with the IP address to help you connect to the Web UI.
During the install you are prompted to create a password, this password is for the root user. This is different from the WebUI admin password, which by default is “openmediavault”. Take the time now to go change that password by clicking on the user icon in the upper right and selecting “Change Password”.
Now is a great time to explore the WebUI, and run any updates that are pending. It’ll give you a feel for what OMV is like. If you only have a single data drive, or just want to completely follow the new user guide – that’s fine, you can stop reading here and go explore.
In this blog post we will dive into enabling ZFS on OMV. If you didn’t yet do this, we need to install the extras repository – following this part of the guide. Access the new OMV installation using ssh and log in as root, we’re going to do a scary wget and pipe to bash.
|
|
# wget -O - https://github.com/OpenMediaVault-Plugin-Developers/packages/raw/master/install | bash |
Once this is done, we will have access to more Plugins which include the ZFS support.
We need to change the kernel we are running to one that will safely support ZFS. To manage kernels we need to install the “openmediavault-kernel 8.0.4” plugin. Do this using the menu System->Plugins and searching for “kernel”.
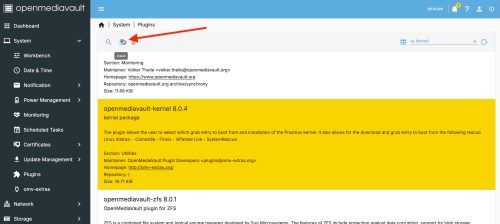 Select the plugin, then click on the install icon.
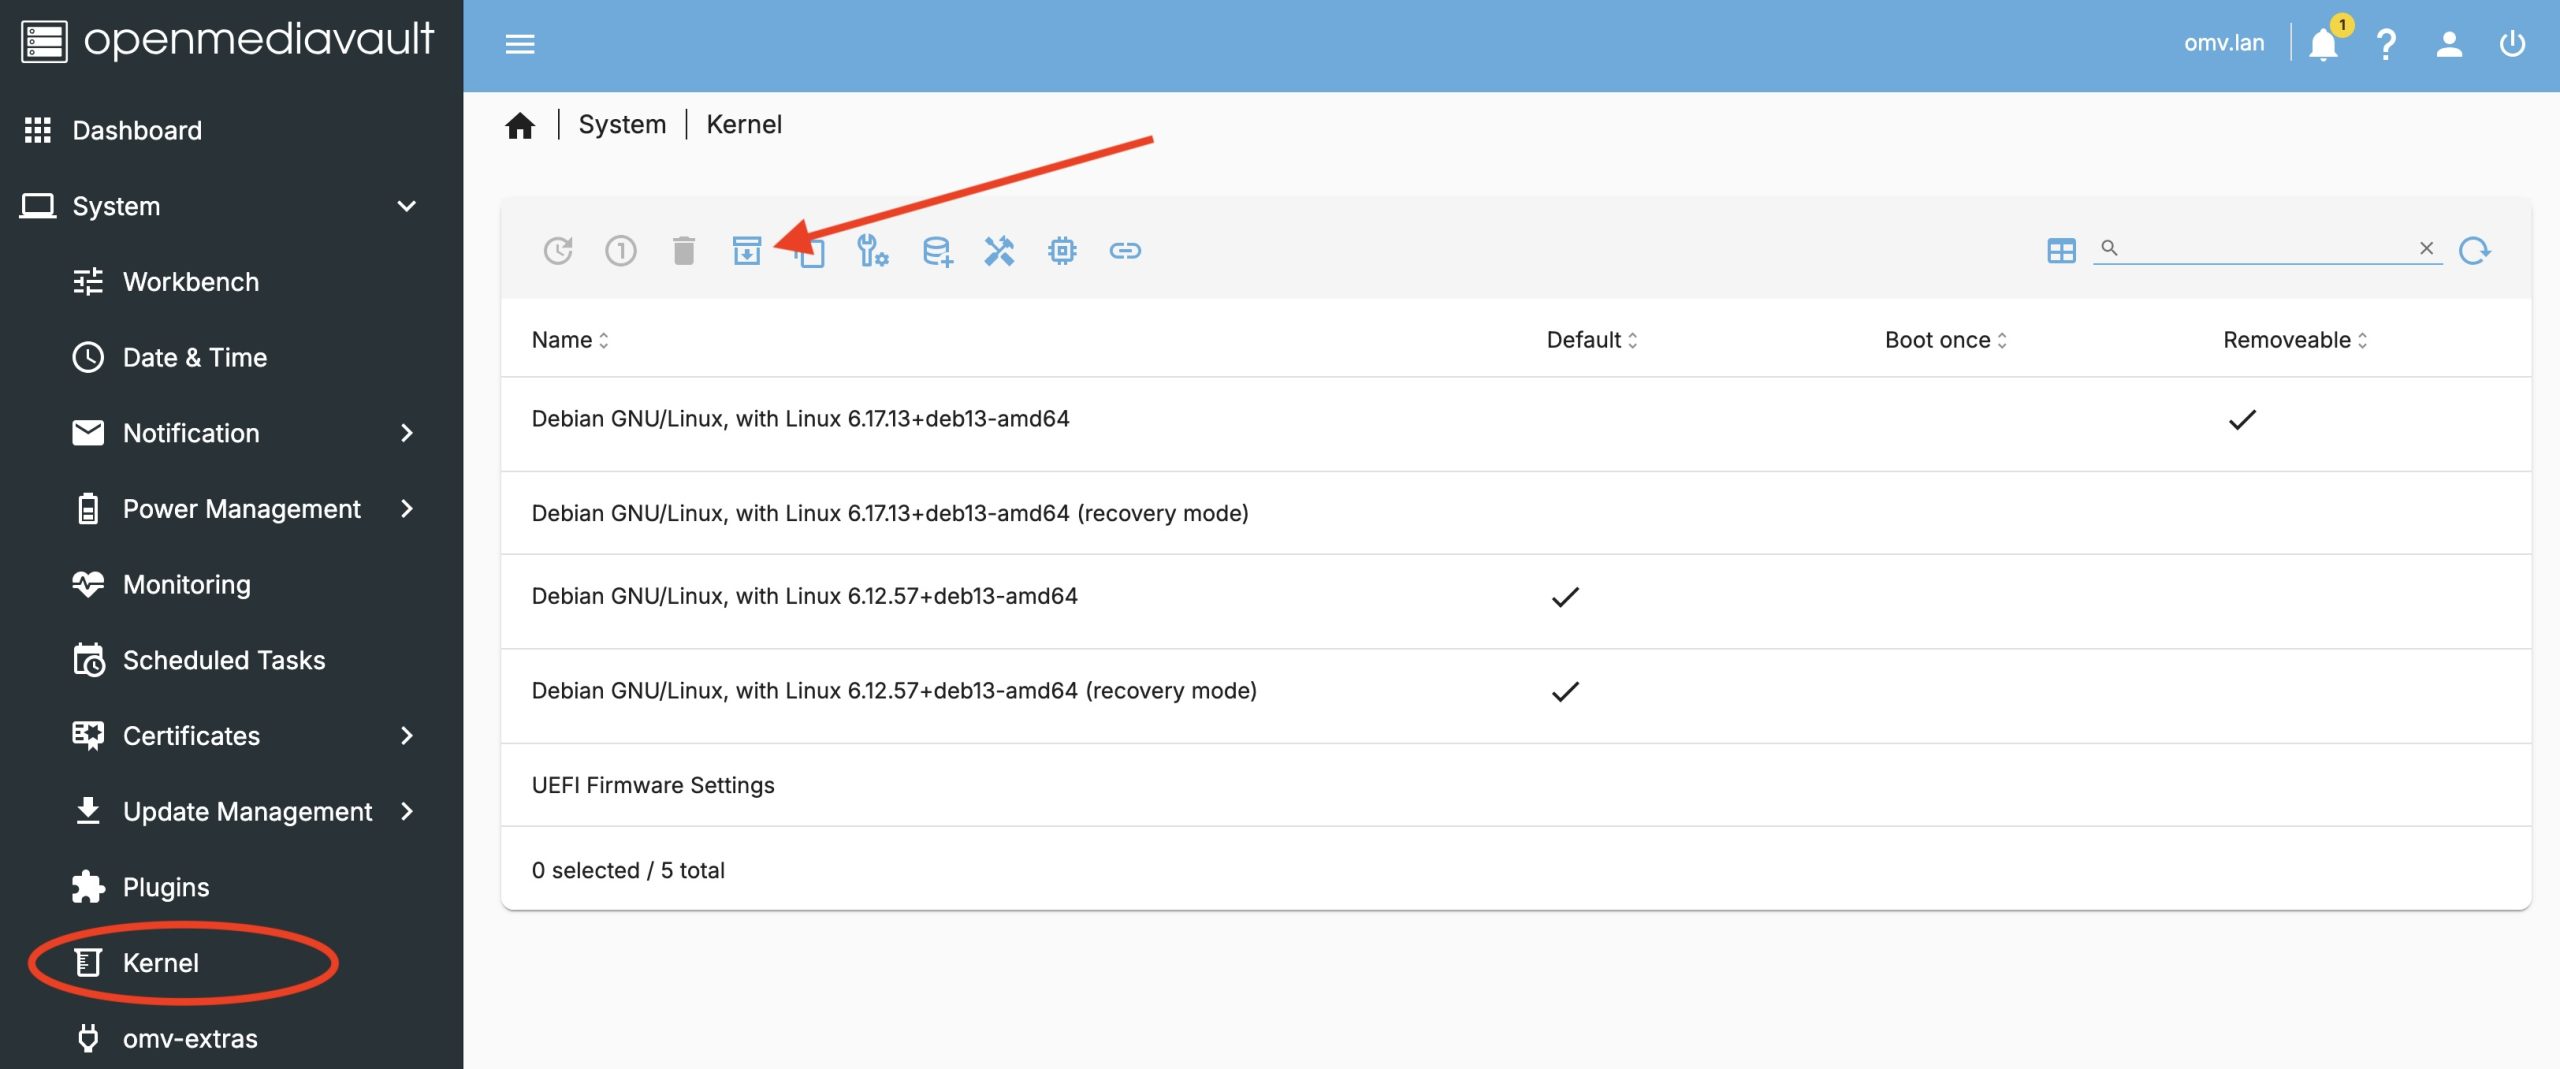
Now we have the System -> Kernel menu option allowing us to manage kernels. As of the date of this post, we want to install the recommended proxmox 6.17 kernel.
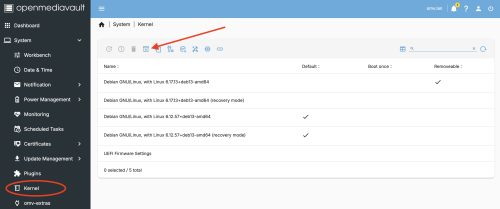 Start by clicking on the icon that I’ve indicated with the red arrow. Then select the 6.17 version and the install will run, this might take a bit of time.
Very important. Once it is done, reboot.
Post reboot I was able to check Diagnostics -> System Information to confirm that I was now running the new kernel. However, revisiting the System -> Kernel the new kernel was not marked as the default, so I did that. Also I took the opportunity to remove the old kernels I was not using to avoid future problems or confusion.
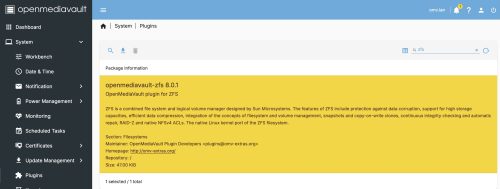
The next step is to install the ZFS plugin via the System -> Plugins menu. You can follow the documentation for OMV7, but I’ll outline the steps here. Search for ZFS and install the plugin.
 At the end of the install you are likely to get a “**Connection Lost**” error. This is OK, just do a hard refresh of the browser window. On OSX Firefox this is Command-SHIFT-R, you may need to look up how to do it with your browser.
 Under
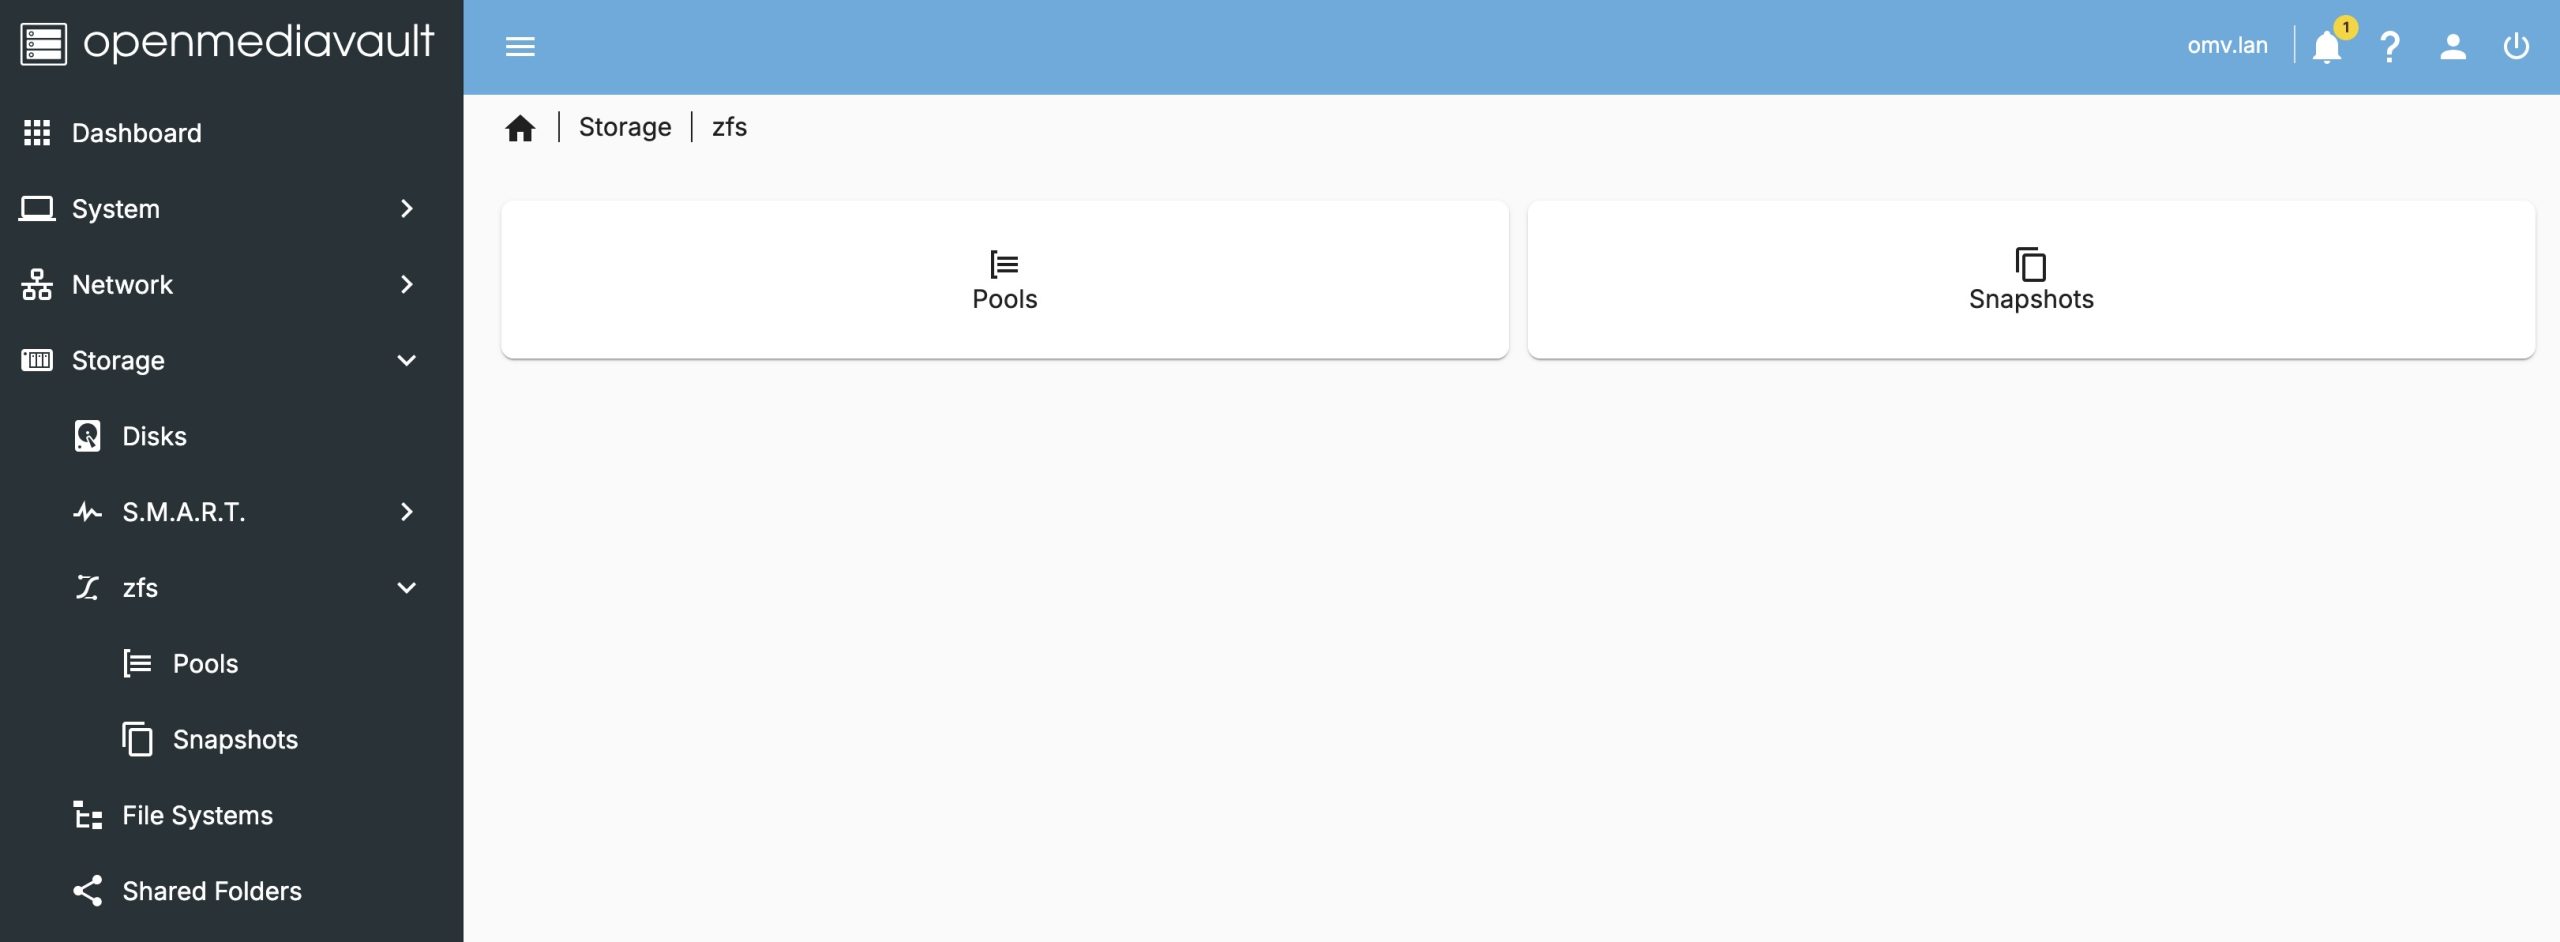
Under Storage we will now have a zfs entry. This will allow us to create a storage pool, and it will automatically mount it as well. You may want to read up a bit on ZFS, I’ll suggest starting with my post on it.
Before we create a pool, we’ll want to look at the available drives under Storage -> Disks. In my setup I have four 1TB drives: /dev/sdb, /dev/sdc, /dev/sdd, and /dev/sde. You may want to do a ‘quick’ wipe of these devices in case any old ZFS headers exists on the drive which could derail the creation step later.
Flipping back to the Storage -> zfs -> Pools we will add a pool.
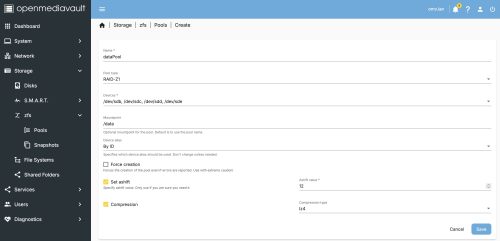 This is fairly straight forward but does encompass several ZFS concepts. I did find that after hitting save, I experienced a time-out (my machine is maybe slow?) and the plugin doesn’t accommodate slow responses. The ZFS filesystem was created and mounted and appears under
 Storage -> File Systems.
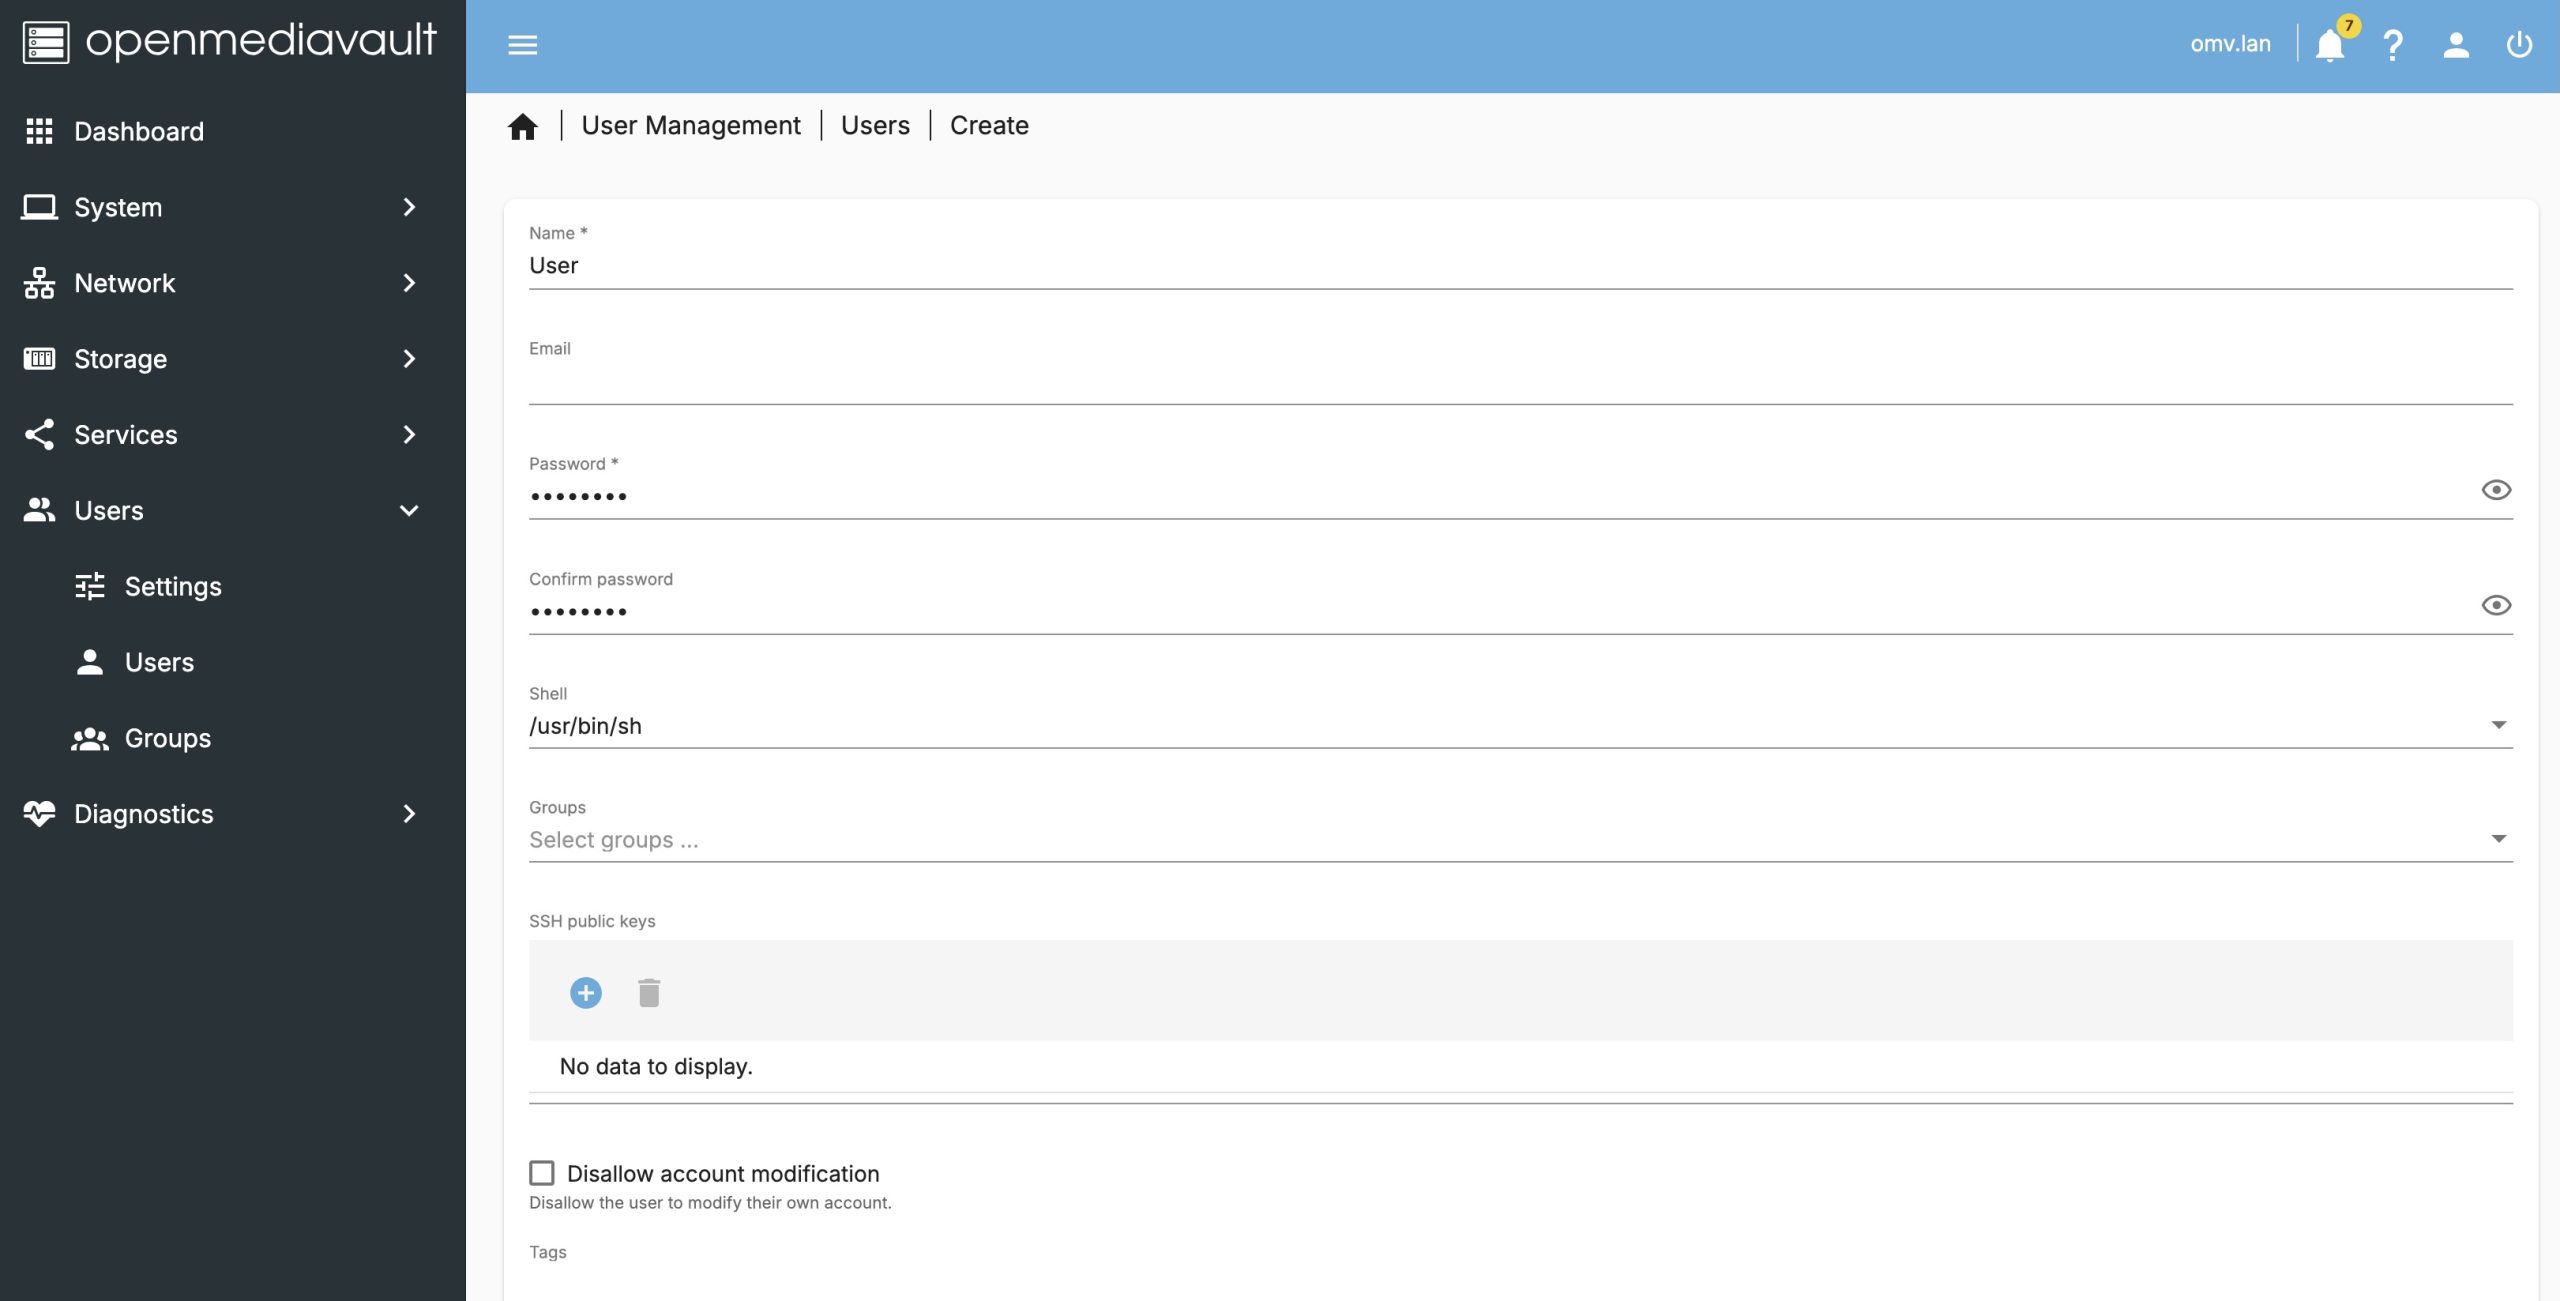
We’re close, we have a nice resilient filesystem on a server but we don’t yet expose any of this to make it Network Attached Storage. Let’s next create a user, which will make it easy to create read/write access remote files.
 Then we will create a network share, which declares our intent to share a given filesystem with one of the services that provide network visibility. Visit the
 Storage -> Shared Folders menu and we will create a share.
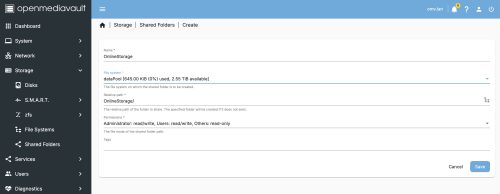 This process will create a sub-folder on our ZFS filesystem we created. We can check this by logging in over
 ssh and looking at the mount point.
|
|
root@omv:~# ls -lF /data total 1 drwxrwsr-x 2 root users 2 Jan 4 15:18 OnlineStorage/ |
During some of this configuration you will have OMV prompt you to apply the changes. Each time these prompts to apply pending changes, hit the check mark assuming you want to keep them. Clicking on the triangle will show you a list of changes pending.
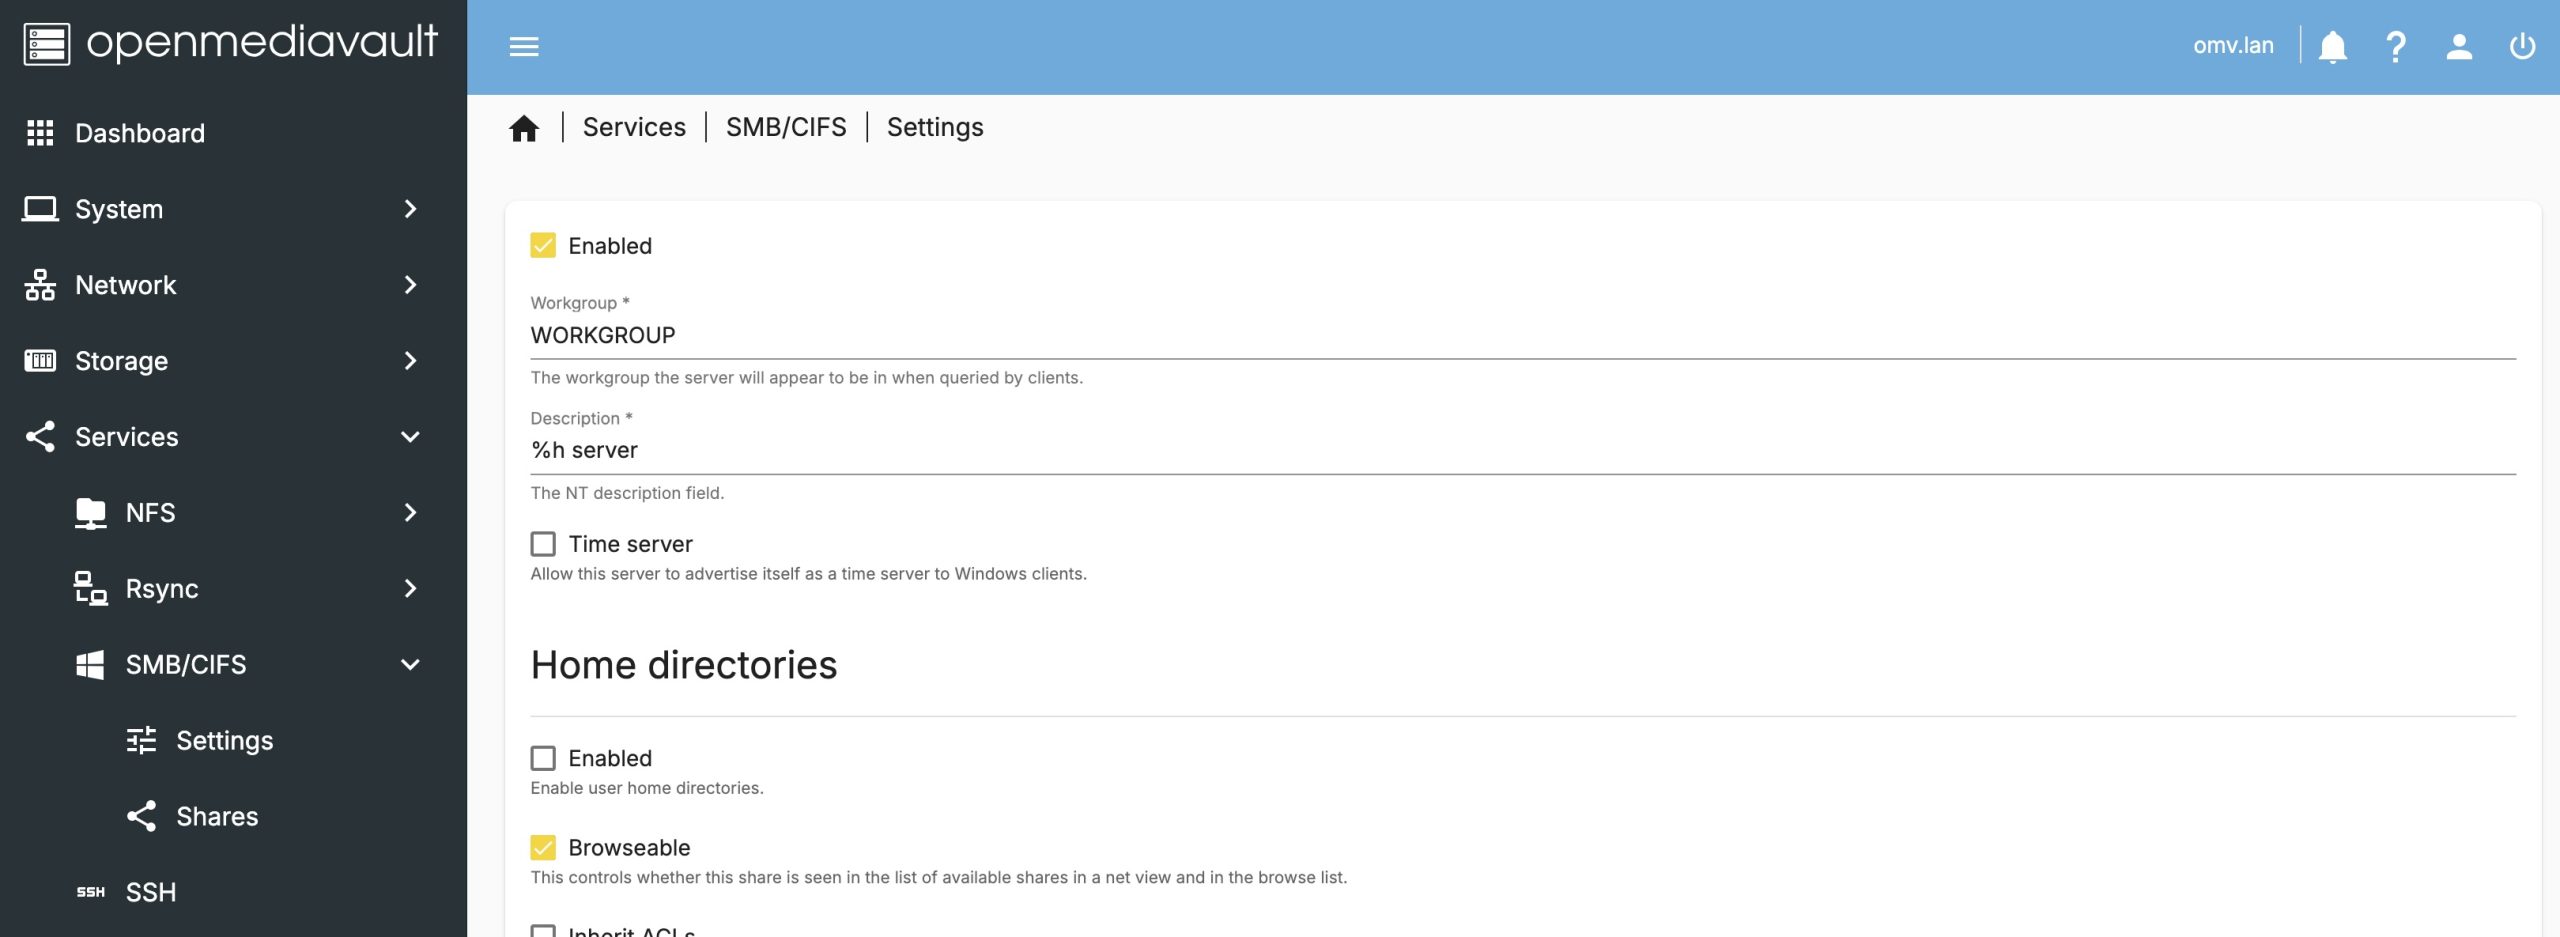
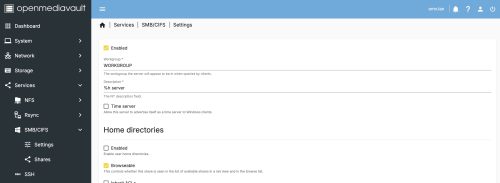
 The last step to make this file share visible on the network is to pick a service to offer it up, we will pick SMB/CIFS as it is one of the most common and compatible options.
First enable the service in the settings.
 Then create the share.
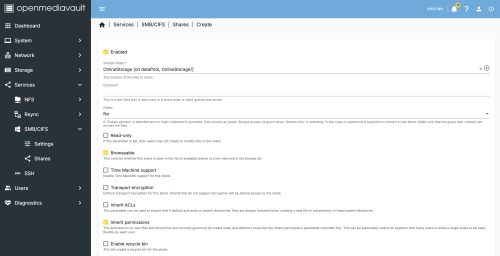 I will reference the OMV8 documentation as a good guide to creating this share, specifically the set of options you want to enable which don’t easily fit into a single screenshot.
At this point we now have a Samba share on the network. On OSX you can connect using the Finder app and hitting Command-K. Entering smb://omv.lan (or whatever your machine is named) and then providing the user credentials defined above.
There is lots more you can do with OMV. Set up a dashboard, enable SMART monitoring, add more Plugins. If you add the docker (compose) plugin this unlocks so many more possibilities. There is reasonable documentation and a forum, so lots of places to seek out help.


 I continue to read mostly eBooks, most from the local library. Goodreads does have some gamification happening, but I’ve been mostly ignoring this, still it’s pretty neat to see that I was a very consistent reader this past year. I read 35 books (just) for a total of 12719 pages. My average rating was 3 stars.