I’m a fan of running customized ROMs on my phone. There are three reasons: a) I like to tinker b) It provides added capability and longer currency for my phone c) I can get source for most of the code running on my phone. In this post I’ll talk about installing CyanogenMod 10, but a good part of this will be applicable to any after market ROM.
First I like to gather data about the state of the phone as it came to me. These details can all be found in the “About Phone” screen.
SGH-I727R

Android 2.3.5

baseband I727RUXKJ7

Kernel 2.6.35.11

Gingerbread.RUXKJ7

IMEI XXXXXXXXXXXXXXX

IMEI SV XX
I’ve omitted my actual IMEI, but you’ll want to record that as it is possible to accidentally wipe it out on some phones. Fortunately as this phone came to me in the actual retail box, the sticker on the box matched the details here too.
The next step is to spend some time reading up on how to modify the firmware (ROM) and how to restore to stock. I’ve said this before, but it’s worth saying again: there is a lot of mis-information out there about how to go about this. Primarily this is because people don’t really understand what they are doing and simply provide instructions that seemed to work for them, voodoo magic included. An example is this youtube video I came across – well, it does give you confidence that it can be done, but there is no need to root your phone before installing a custom recovery.
If you’ve done any searching at all, you’ll have come across the XDA Forums, I do recommend signing up and reading through the relevant forums. Learn to search for answers, and share what you do know with folks who don’t. The newb starting guide is a good place to start. Also since my primary target is CyanogenMod, usually a good place to start is with their wiki – however, in this case it wasn’t.
The first step is to get a custom recovery image installed. ClockWorkMod (CWM) is the preferred solution for CyanogenMod and I’m familiar with it. To install it we need a tool that will talk to the download mode of our phone, and we need to get our phone into download mode. The tool I prefer to use is heimdall, it worked well with my i9000 and it’s also friendly to Linux. The other option is Odin (download link), a Windows only tool.
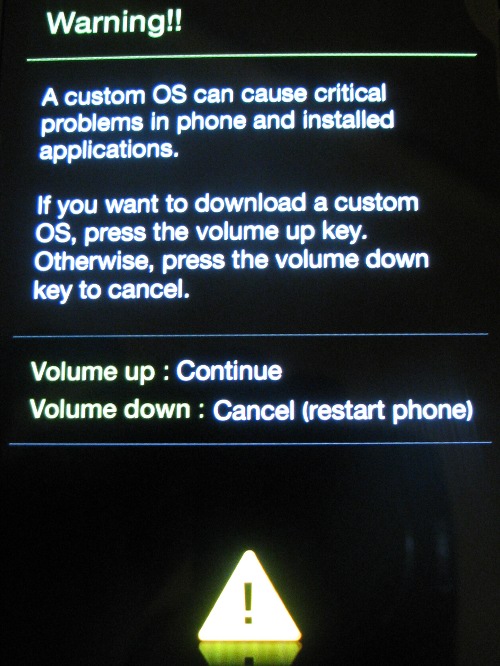
To enter download mode, the Rogers version is slightly different than the AT&T version – only volume down needs to be held with power (not volume up & volume down).
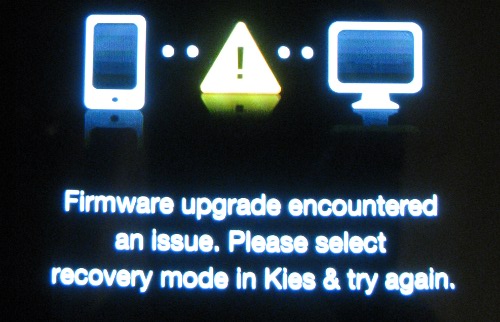
If you are successful you should be greeted by a screen as per above. Now assuming the USB cable is attached we can start the tool to send down the custom recovery image.
Sadly this is where I went off the rails a little, it turns out the version of heimdall (1.3.1) I had didn’t quite support the protocol being used by this phone. Upgrading to a newer version did fix the connection problem, but then it failed in another way I can only assume is also related to the protocol.
$ sudo ../Heimdall/heimdall/heimdall flash --recovery recovery.img

Heimdall v1.4 RC1
Copyright (c) 2010-2012, Benjamin Dobell, Glass Echidna

http://www.glassechidna.com.au/
This software is provided free of charge. Copying and redistribution is

encouraged.
If you appreciate this software and you would like to support future

development please consider donating:

http://www.glassechidna.com.au/donate/
Initialising connection...

Detecting device...

Claiming interface...

Setting up interface...
Checking if protocol is initialised...

Protocol is initialised.
Beginning session...

Session begun.
In certain situations this device may take up to 2 minutes to respond.

Please be patient!
Releasing device interface...
And that was it, my phone was busted.

I did try several times to recover using heimdall and failed. So it was off to Windows to use the Odin tool to fix things.
I initially tried to simply install a version of CWM and then proceed from there, but I made a few mistakes. 1) I didn’t have the right version of CWM, I can’t explain this but I do admit I was thrashing a little here. 2) I did have some partial successes which probably left things in a somewhat dubious state causing my grief later when I was doing the right things (see log below).
E:Can't open /cache/recovery/log

E:Can't open /cache/recovery/log

E:Can't open /cache/recovery/last_log

E:Can't open /cache/recovery/last_log
The solution is to return to stock and start fresh. Thankfully Odin was quite happy to flash the stock version I got via XDA.
I did locate the correct version of CWM via the CM10 thread on XDA, I found the TeamChopsticks install guide quite helpful. Once I had the right mojo, things went smoothly.
Starting from stock

Install recovery via Odin, boot into recovery

Wipe & factory reset

Format /system

Flash CM10 nightly zip

Flash google apps zip (optional)

Reboot
I like to have SSHD running on my phone along with rsync to allow for nightly backups to happen. Unfortunately CM10 isn’t yet shipping with dropbear pre-installed, and the CM7 version doesn’t seem to be happy anymore. I’ve switched to using the DropBear SSH Server app, the one downside is that it doesn’t auto-start on boot. I’ve been in touch with the author and this is on his future feature list.
A few notes on setting up DropBear SSH Server. The very first run will ask you to grant it super user privileges, it needs these so you need to say yes. Once the first screen is all green, you can test the server – the default root password is 42. Once you’ve verified it’s working, we want to fix the password under settings. I use keyed logins, and the app does support importing keys from files – but only one key per file. Once you’ve setup some keys, you can disable password logins entirely.
In CM10 you’ll probably want to enable USB Storage under Settings->Storage, then press menu to bring up ‘USB computer connection’ where you can opt in for USB storage (it is off by default).
Somewhere during the set of events I managed to end up in a state where the Radio version reported in About Phone was ‘unknown’. Phone calls worked fine, and I ran a couple of days without noticing this. I did later reboot into recovery and install a more up to date radio/modem firmware (I727RUXLF3). While I was in recovery I initiated a backup which I can return to if things get really messed up, this is handy as it is stored on the external SD card and is available even if I’m not somewhere with a computer and need to fix the phone.
CM10 has a new over the air (OTA) update system, I used it for the first time tonight to move to the latest nightly. Very slick, but there didn’t seem to be an option to back-up my existing state.
So aside from a few heart stopping moments where my brand new phone was totally fubar‘d, this was overall a pretty typical experience with a new device. Plenty of little details to figure out, a few new tools to install/configure/learn and the excitement of new hardware (and software). I’m really pleased with the i727, the screen still feels really big (but not too big). It’s fast and the battery life is very good. Google Now also recently added the ability to enter calendar events, resolving one of the few things I found it couldn’t do – and yes, Google Now is pretty darn cool.


