The Pixel 4a was a fantastic phone for me. I bought it new from Google back in the fall of 2020 when it was a current model. The end of support date snuck up on me, had it already been 3 years? I noticed in October I hadn’t had a reboot (and thus a security patch) in quite some time. The 4a had a surprise extra update in November – but this was clearly the end of the line.
The 4a was a change for me, for the most part I’d bought gently used phones at around the $200 price point that were 2-3 years old, and then used them for a year and a bit. This gave me a new toy regularly, and was fairly cost effective. Still, I was probably spending about $500 over 3 years easily -this helped me justify the purchase of a new 4a. Little did I know how much I’d enjoy having the 4a and not doing the upgrade dance regularly.
In the first weeks of 2024, my Pixel 4a was still performing well. I’d generally only need to charge it every second day. Yes, over time the battery had gotten a little worse – but not by much. The camera continued to be amazing. And wrapped in a bumper case and screen protector the phone itself was in mint condition. If it was still getting regular security patches from Google I’d have no problem continuing to use it.
Of course, LineageOS is an option. Migrating to this would give me a community supported version of Android 13. A few worries kept from from this path. I use my phone for work, and have the mobile device management stuff installed, I wasn’t convinced this would work smoothly with LineageOS.. but it has in the past (honestly I think I was looking for reasons to upgrade). The migration of apps also seemed daunting. While most things have a ‘cloud’ story and are linked to various accounts etc, some of the games I have don’t have a backup/restore story. The other pain is the lack of SafetyNet support, practically this means only Netflix won’t work for me (again, I’m looking for an excuse).
Honestly, looking back, if I’d gone through the migration effort and moved to LineageOS it would have all worked out. I would have had my security updates but been stuck back on Android 13. The work device policy is good with support for devices back to Android 12 currently. There is also a good chance the WorkProfile is still properly supported in LineageOS (it was in the past). I would have lost state in a few games, but that is minor.
Post Black Friday and leading into Christmas and Boxing week there were some crazy sales on mobile plans in Canada. CostCo was apparently offering a plan that was very low and provided a Pixel 7 on a 2 year contract for $1/mo. This has the result of many BNIB phones showing up on the local used market.
The Pixel 7 still lists for $799 directly from Google. Many of the used market phones where listing between $350-$500 still with the security seal in place. Relative to Google the local pricing is lower for a BNIB or refurbished options from retail stores.
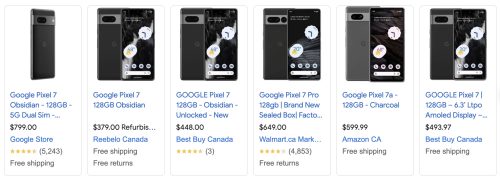
I found someone listing one for $300, and it check out as legit. He’d done a plan upgrade/renew back in October gotten a new Pixel 7 but already had one, so he had this sealed BNIB one to sell. I suspect he’d started at a much higher price, but the recent glut of new phones on the used market pushed his price down. There were other similar phones for $330 to be had. This price point made getting a phone upgrade a smart move for me as it still has 3+ years of support from Google.
There are plenty of phone comparison sites, but let me run down things that I see as trade offs.
- I’ll probably miss the back fingerprint sensor, the in screen optical one is “ok” but not nearly as reliable.
- The 4a has a 3.5mm headphone jack, this is a useful way to interrupt bluetooth connectivity nonsense with my car/ bluetooth headphones. I can use a USB-C adapter, but it’s not the same.
- The Pixel 7 is bigger, there are pros and cons to a larger phone.
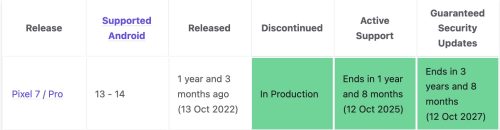
- As stated above, the Pixel 7 is still currently supported. This is a big win.
- The camera is better in the Pixel 7, but the 4a certainly held it’s own. Very minor difference.

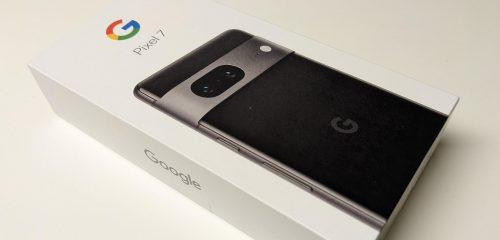
The Pixel 7 is a very pretty phone, I’m not a fan of the all glass back, but it is very sexy. Of course, the first thing is to buy a case and screen protector before I even take it out of the box. I grabbed a case very similar to the one I’ve had on my 4a from Amazon. I headed to eBay to get a screen protector from a seller I’ve used previously. This meant a few day wait, but that wasn’t a big deal.
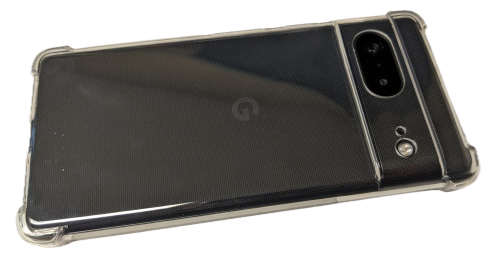
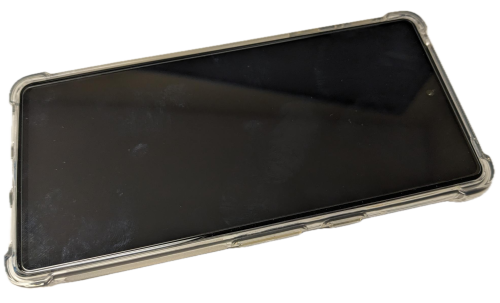
All good – now it’s wrapped and ready to roll. The bumper case has these nice extended corners which add protection, but also give you something to grip onto. There is a subtle roughness on the sides too, making the phone less slick. The screen protector doesn’t have any cut-outs for the camera, this is similar to the one I had on my 4a and it had no negative impact for my use.

The phones are significantly different in size, with the Pixel 4a on the left and the Pixel 7 on the right. I’ll point at a comparison article if you want to look at the specifications side by side. I was interested in the in pocket weight, including the case. The 4a is 175g vs the 7 at 231g – yikes, 32% heavier. This is enough that you notice the difference, but I’ve gotten use to the added heft and size.
Continue reading “Google Pixel 7”