Bosch Error 43

It’s happened more than once, the over full pot of boiling water on the stove – you add whatever it is that you’re going to boil and splash. Boil over and water on the stove top. With a gas stove sometimes the burner will go out, others you’re lucky and you just get some really hot water on the hot top of your stove.

Not a big deal.. until you have too much water as we did the other day. It ran down the front of the stove a little, some even made it to the floor. Clean up the mess and forget about it.

Except this one time recently, the stove display started blinking the lock icon.

Searching found stuff like: remove the stove from power for 5 minutes, then plug it back in to reset.

When I tried that solution, you could hear the oven doing a reset cycle and trying to lock/unlock the door several times. Sometimes it would stay locked, and I’d do another power cycle and then it’d stay unlocked. Things did not improve. Still the flashy lock.

I found a service manual that was close, but the removal of the front panel was different than shown there. I needed to remove some obvious screws from just under the lip – then pull the stove out to get to a pair (on each side) of screws that held the front panel on.

After disassembling the panel, it was clear we had some water down there – but not much. I cleaned up the board verified things were dry and re-assembled. Still the lock problem.

Two days later, the oven light started to go on by itself. You could turn it off — and shortly after it’d turn itself back on. The following morning, a power cycle resolved the Error 43. I was able to cook some bacon in the oven. During this, the oven got a bit funky. The light wasn’t coming on when you opened the door — then it would intermittently come on and off when you opened the door.

My theory is that the heat of the oven was helping dry out the moisture from wherever it got to. After finishing with the bacon, the flashing lock was back.

One more power cycle the next day – and the oven seems to have started to work “like normal” again. I’m fairly confident at this point that the issue was some water got into one of the switches (probably the locking mechanism) and was shorting out a sensor there. However, as the door light was also affected, I suspect there was multiple sensors affected.

Thankfully it was ‘clean’ water (vs. a mucky sauce) and seems to have dried up removing any issues.

Lesson learned: don’t let water accumulate on the cook top of your Bosch stove/oven. If you do get Error 43 – be patient and dry it out. A power cycle will help once things are dry enough.

Flour Tortillas

I’m a huge fan of Mexican food and while Fajitas are more Tex-Mex they are still yummy. The Lone Star is a local restaurant that is known for their Fajitas, and for me the shells really stand out. It turns out you can make as good (or arguably better) tortilla shells at home.

I tried several recipes until I came across this one. In all honesty they don’t vary that much, this is very basic cooking. With my thanks to the original authors, I’ll replicate it here with my notes:

3 cups unbleached flour
2 tsp. baking powder
1 tsp.  salt
4-6 Tbsp. vegetable shortening or lard
1 1/4 cups warm water (from the tap)

This should make a dozen tortillas, I often double the recipe and have loads of leftovers for the next day. In the batch I did for the photos I substituted one cup of the flour for whole wheat flour. I prefer just using unbleached flour, but this is a good way to make it a bit healthier. If you’re looking to replicate the Lone Star, make sure you go heavy on the shortening and skip the whole wheat flour.

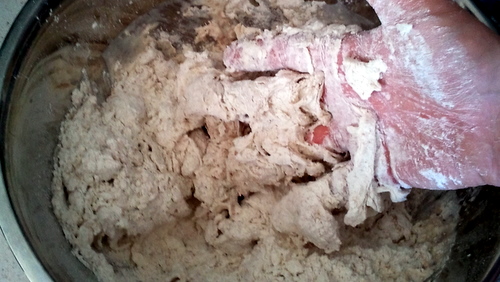
Mix the dry ingredients in a large bowl. Cut in the shortening. Once this mixture is well mixed, add the water all at once.

I mix it by hand and consider that one of the secrets to getting this to work well. Overworking the dough mixture will result in them being hard to roll and tougher when you eat them. Initially it should be really sticky, as you work (knead) the dough it will blend more and the stick should mostly go away. Give the dough 10mins or so to rest.

Now’s a good time to put a large frying pan on the stove, you want it to be really hot. Make your 12 balls of dough.

I use a large rolling pin and work directly on our counter tops. You shouldn’t need any additional flour to keep things from sticking, but don’t be afraid to use a little if you’re having trouble. Remember that rolling is a lot like kneading, so you want to avoid over-rolling it but these dough balls need to be smashed paper flat. I find that a little bit of counter stick helps me roll it out. My pattern is roll in one direction, pick it up and flip + rotate 90 degrees and roll the other way. Don’t worry about them being perfectly round, just make sure they are really thin.

It does take a bit of getting used to, but you should be able to roll and cook at the same time. Nearly continuous as it’ll take you almost as much time to roll as it does cook.

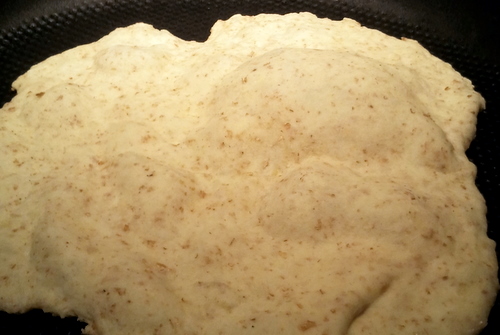
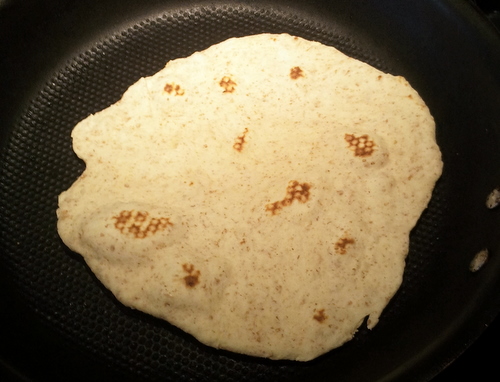
If your tortillas are thin enough, and the pan is hot enough – you’ll be rewarded with bubbles forming in the tortilla after a brief time in the pan. That’s when you want to flip it.

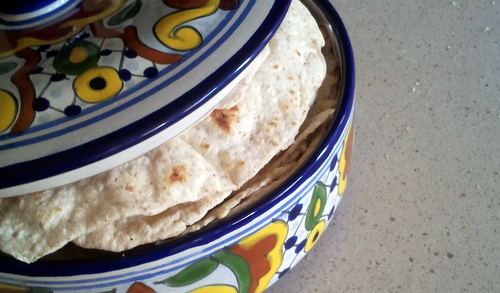
The last photo is a nearly done tortilla. They will be a bit dry and stiff coming out of the pan, we have a tortilla warmer that I stick them into and once they sit covered for a little they get nice and soft. Any covered container will work for this.

It takes some practice to get the pan heat right. I often start with it too cold (I haven’t let it heat up properly) and end with it almost too hot (smoking). The recipe is very forgiving, I often have the kids help and even with that chaos things work. If you’re having trouble getting it to go right, try some brand new flour. I’ve used old flour and bread products in general never seem to work with old flour.

How To: Reliquify Honey

This may be old news for many, and a couple of quick web searches show plenty of good advice on this matter.  Still, I thought it was very cool when I actually tried it out so I thought I’d write it up.

Liquid honey tends to crystallize after a period of time, often much less time than  you will be able to consume all of it. The process for fixing this is quite simple:

  1. Find a container that the honey jar will fit into
  2. Put the honey jar in the container
  3. Fill the container with boiling water
  4. Wait
  5. Repeat until you’ve got completely liquid honey

I tend to wait about 10 minutes before repeating the cycle. It usually takes 2 or 3 cycles for me to render the entire honey jar liquid again.  If you stop before its done, it will much more quickly re-crystallize (days vs. weeks).  Sometimes I turn my jar upside-down to get full coverage.  Paper labels probably won’t make it past the first round of this (this explains why my jar is naked).

Continue reading “How To: Reliquify Honey”