BlackBerry Bold 9700: JVM Error 102

My brother in-law’s BlackBerry 9700 suffered a new problem this time JVM Error 102. A quick google search turns up more 600,000 results – so this is I assume a pretty common problem. In his case it seems entirely random – he had it plugged in to charge and when he went to unplug it, it was stuck on an all white screen with JVM Error 102 with one choice: reboot. It seemed the device was stuck in a reboot cycle, always hitting the same error.

I followed the instructions on this page, but I’ll also repeat them here to cover exactly what I did. Sadly this requires a Windows machine (I used XP).

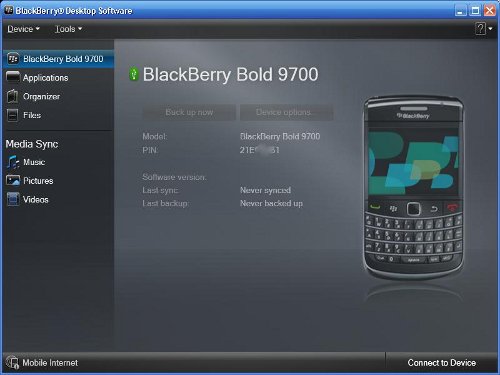
If you don’t already have the BlackBerry Desktop Software installed and running, you’ll need that. If you’ve never had the BlackBerry connected to your Windows machine, it may also need to install some USB drivers, my Windows XP was able to figure out what was needed automatically. Hopefully you’ll be in a state as shown in the picture at the top of this post, able to see the device but not able to do anything.

Now you need the JL_cmder utility. The utility is just a script driving the JavaLoader program. With the BlackBerry Desktop Software running, also run this script. If you are having trouble with this part, I’d advise you to stop trying to solve this yourself and get some help. You’ll need to be comfortable with command line programs to succeed.

If you see some output like the following when using JL_cmder:

RIM Wireless Handheld Java Loader
Copyright 2001-2007 Research In Motion Limited
Connecting to device...debug: HRESULT error dur
ing Open: 80040154
Error: unable to open port

Then you’ve probably failed as I had to install the BlackBerry Desktop Software, or it isn’t running, or you’ve got a driver problem, or maybe there is a more serious problem with your BlackBerry. Once I had installed and was running the BlackBerry Desktop Software this problem went away for me.

Now you want to grab the eventlog. This will open a notepad with the contents of your log. In my case there had been many failed boots, so the error was repeated many times. Here is the last complete entry:

guid:0x97C9F5F641D25E5F time: Wed Dec 31 19:00:00 1969 severity:0 type:2 app:System data:System Startup
guid:0x97C9F5F641D25E5F time: Wed Dec 31 19:00:00 1969 severity:0 type:2 app:System data:VM:FSNHv=1
guid:0x97C9F5F641D25E5F time: Wed Dec 31 19:00:00 1969 severity:0 type:2 app:System data:VM:CVER=5.0.0.351
guid:0x97C9F5F641D25E5F time: Wed Dec 31 19:00:00 1969 severity:0 type:2 app:System data:VM:PSIDv=266951
guid:0x97C9F5F641D25E5F time: Wed Dec 31 19:00:00 1969 severity:0 type:2 app:System data:CMM: verifyHash failed for net_rim_device_apps_games_wordmole_graphics_480x360-6(3437)
guid:0x97C9F5F641D25E5F time: Wed Dec 31 19:00:00 1969 severity:0 type:2 app:System data:VM:+BORK
guid:0x97C9F5F641D25E5F time: Wed Dec 31 19:00:00 1969 severity:0 type:2 app:System data:JVM Error 102
guid:0x97C9F5F641D25E5F time: Wed Dec 31 19:00:00 1969 severity:0 type:2 app:System data:Invalid code in filesystem
guid:0x97C9F5F641D25E5F time: Wed Dec 31 19:00:00 1969 severity:0 type:2 app:System data:JVM:INFOp=21e0b6b1,a='5.0.0.351',o='5.1.0.98',h=4001507

You can see there is a verifyHash failure in the log, I’ve marked the file name of the offending file in bold (your log won’t have the bold marking in it – that’s your job, to identify the problematic file). So there isn’t any good reason this file was corrupted and not another, but luckily it is clearly a non-critical file. I was amused by the appearance of the Unix epoc in the log file.

Now that we know what the problem is, we’ll just remove the file. I’ll stress that the filename is going to be unique to your problem. Reading the error log is a critical step. Using a command shell we’ll execute the following:

JavaLoader.exe -u erase -f net_rim_device_apps_games_wordmole_graphics_480x360-6

Doing this caused the device to reboot. If it doesn’t reboot on it’s own, you might need to manually reboot/reset the device. That’s it you’re done – you should have a working BlackBerry at this point.

Follow up steps – you should synchronize with the desktop software to back up your device. It may be wise to push a firmware upgrade to the device, even the same version you had (assuming you were fully up to date) – this will replace all other files which may have been corrupted. I didn’t do this, but I’d hope the desktop software makes this a straight-forward process.

Kingston RAM

RAM is one of the most important aspects of your computer system, but spending a lot on fast RAM is usually not worth it – better to get more RAM that is cheaper. I’ll frequently just buy whatever is cheapest that meets the specs I need.

Back in 2006 when I bought a refurbished Mac Mini (G4) from Apple it came with 512MB of RAM. The PPC Mini was limited to a single RAM slot, and 512MB was ok – but not really enough.

For Macs there was RAM specially tagged as compatible, or I could go the aftermarket route and just buy some RAM with the same specifications. If my memory is correct, the price delta was 30% or so. In the end, even at the premium price (about $100) the 1Gb of RAM I needed wasn’t a huge expense so I went for the guaranteed to work. The memory arrived, it worked fine until just recently.

The mini stopped booting, running a memory test resulted in it indicating the RAM was bad (I thought maybe the hard drive had gone). As Kingston has a lifetime warranty I figured it was worth seeing if I could get a free replacement (vs. a $30 price for a new unit at todays RAM cost).

Wow! Kingston’s support/warranty process is amazingly good.

I called and almost immediately got a real live person. It was really hassle free, they asked why I thought the RAM was bad and I said I had run a self test on it – and that was it. I was immediately in line for a RMA #.

The RMA process is really slick. Once you get the right documentation from Kingston (via email!) – you only need to package the RAM and drop it off at a FedEx location. Kingston picks up the cost of shipping it both ways.

The shipping was fast (and free to me):
Oct 4, 2011 9:45 AM Delivered FOURNTAN VALLEY, CA
Oct 4, 2011 8:57 AM On FedEx vehicle for delivery COSTA MESA, CA
Oct 4, 2011 8:03 AM At local FedEx facility COSTA MESA, CA
Oct 4, 2011 5:59 AM In transit LOS ANGELES, CA
Oct 4, 2011 4:04 AM Departed FedEx location INDIANAPOLIS, IN
Oct 4, 2011 2:04 AM International shipment release INDIANAPOLIS, IN
Oct 4, 2011 12:27 AM Arrived at FedEx location INDIANAPOLIS, IN
Oct 3, 2011 10:44 PM In transit MIRABEL, PQ
Oct 3, 2011 8:04 PM In transit OTTAWA, ON
Oct 3, 2011 6:23 PM Left FedEx origin facility OTTAWA, ON
Oct 3, 2011 5:16 PM Picked up OTTAWA, ON

A brand new stick of RAM arrived on my doorstep on October 12th (again via FedEx). It was amusingly over packaged (as you can tell from the photo at the top of this post). Of course it works perfectly.

Sure I paid Kingston a premium form Mac specific RAM, but that was back in 2006. To get such red carpet service 5 years after I bought something is really amazing. Their warranty also covers the regular ValueRAM etc, so you should get similar great service. They usually have very good pricing on their RAM, but given my experience with the warranty even if they aren’t the best price it will be tempting to spend a few bucks more to get Kingston.

HTC Desire S-OFF

HTC phones have a security flag, this flag is normally “ON” and is indicated on the bootloader screen as S-ON. The purpose of the security flag is to prevent unsigned firmwares from being installed. Clearly if you want to modify your phone with custom firmware you need to be in the S-OFF state.

To access the bootloader screen: start with the phone in a powered off state; hold the volume down button; then press the power button. This should result in you entering the bootloader screen. Menu navigation is via volume up/down and the power button for select.

My HTC Desire was in S-ON, yet still running custom firmware. This was done by Unrevoked3. It switched the phone to S-OFF, installed a custom recovery image, then switched back to S-ON. I believe since the recovery image has the ability to install firmware you can dodge the firmware signature check (effectively bypassing hboot). Really the only reason to have S-ON is to make the phone look more like stock.

There are multiple ways to achieve S-OFF (including Unrevoked3), but what I primarily wanted to do was change the partition table to allow for more application storage on the phone. The partition table is part of the hboot, so changing this is a bit scary since if you mess up hboot you have no easy path to recovery. The good (and bad) news is that S-OFF is also achieved by flashing a new hboot.

Custom partition table hboots are hosted on the AlphaRev site. It is a information dense site. If you plan to do this, read all of it carefully. If you really don’t understand what it’s talking about, read some more or consider asking someone for help. This is not something you want to get wrong.

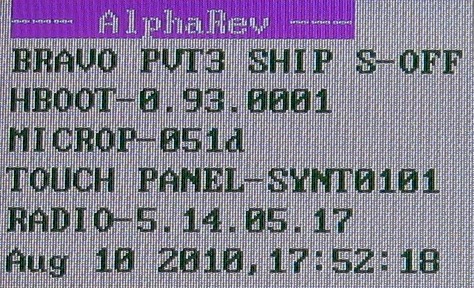
As with anything like this – do a backup of your stuff. Download the iso from AlphaRev and burn a CD, you’ll be booting your PC into the custom linux based image to do the changes. The tool is well scripted and pretty clear. Do not panic, and read what is on the screen carefully. Once the AlphaRev tool is done, you’re phone will be in S-OFF state and should have a bootloader screen similar to what is at the top of this post

Now we’re in S-OFF mode, we can flash an hboot with a custom partition table. If you had already achieved S-OFF you could skip the above steps and just start here to customize your partition table. Here are the steps I took:

  1. Boot into your recovery image (ClockworkMod Recovery) and do a backup
  2. Verify the MD5SUM of the hboot file you downloaded
  3. Place the phone in fastboot mode (bootloader)
    $ sudo ./fastboot flash hboot bravo_alphaspl.img (filename may differ)
  4. Reboot the phone
    $ sudo ./fastboot reboot-bootloader
  5. Erase the cache
    $ sudo ./fastboot erase cache
  6. Boot into your recovery recover image
  7. Wipe everything using recovery
  8. Restore the backup you made

If your phone is stuck in S-ON, then fastboot isn’t an option.

The benefits of the custom partitions is significant. The NexusOne had 196MB of internal storage, the stock HTC Desire only 148MB. With the custom partition table hboot, I now have 288MB. The trade-off is the partition table I’m using now won’t fit the stock ROM, but reverting to a different hboot is easy enough by repeating the steps above.

You’ll notice that the AlphaRev process customizes your splash screen. If you’re not happy with this they provide a link to the stock splash screen. Enter the bootloader again, and issue:

$ sudo ./fastboot flash splash1 desire_stock_splash1.img

And you’ll be back to looking like stock. Creating your own custom splash screen is also quite easy to do. If I get inspired to change mine, I’ll write up details on how – but a bit of searching will get you the answer too.