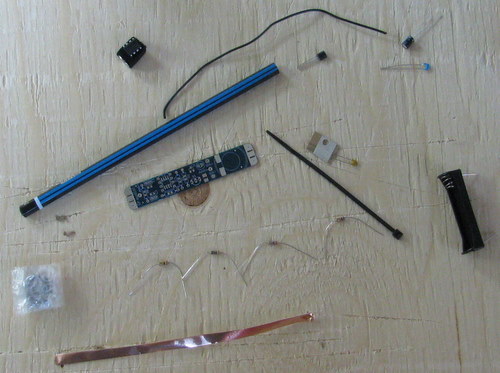
 As a kid I had a couple of those 50 in 1 electronic project kits, it was great fun to build the various projects outlined in the instruction book. I’m still pretty keen to bust out the soldering iron, especially since I got a really nice one this year for fathers day. Along with the iron, I picked up a Drawdio kit (parts pictured above).
 My 6 year old built the kit with me, and you can see we also had some extra help. You’ll note the use of safety goggles was mandatory.
Aside from the contents of the kit, we needed a soldering iron, solder, cutters, 3rd hand and of course goggles. The web based directions for the kit are very detailed and cover all you need to know. They suggest a multi-meter but I didn’t find I needed one.
 My daughter handled the soldering iron but I was the one with the solder. This tag team worked well for most of the kit. Later in the build I took over some of the fiddly bits (the 555 timer and speaker).
Below is the final build picture. It took about an hour start to finish. The Drawdrio doesn’t need to be used with a pencil, you can optionally wire it into a lot of different things. Beyond being an easy starter project to put together – it’s a great way to teach electrical conductivity concepts.
 A few tips. You’ll want to make sure the battery you use has a full charge. Be patient with getting a drawing to make noise, you’ll find you need a very dark line to make it start playing. Once started, it’s easy to keep things going ‘by ear’ adjusting on the fly as it comes in and out of electrical contact. If you’re looking for more copper tape, any stained glass store will have it in stock.
[Edit: check out the original Drawdio site by the inventor – Jay Silver]

Hey,
Interesting perspectives on Drawdio. I invented Drawdio, and this semester I’ll be interviewing some people on their experience with it and thoughts about Drawdio, the Maker movement, DIY, etc. If you’d be interested in being interviewed (probably by phone or text chat) please let me know.
Thanks!