
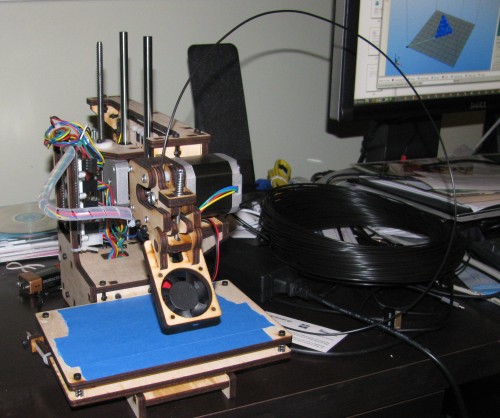
Last time I almost finished the build, but got hung up waiting for some glue to dry. There isn’t much more to put together.
The last few steps went very smoothly, I didn’t have much to do and I only had a couple of notes that I’ll add to the bottom of this post.
The part count was pretty good. I was missing 2 – M3 16mm bolts, non critical as the fan took 4 and I just used 2. I had some extra parts: 1 – M3 20mm bolts, 3 – M3 hex nuts, 1 – M3 locking hex nut and 2 spare zip ties (having ‘wasted’ about 5 during the build).
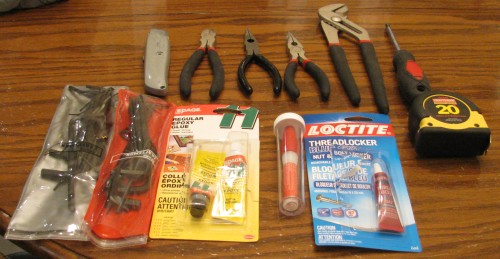
In terms of tools here is my list: phillips screwdriver, tongue-and-groove pliers, utility knife, krazy glue, epoxy, metric allen key set (2.5 mm, 1.5mm), imperial allen key set (1/16″), loctite threadlocker blue 242, 2 pairs of needle nose pliers, wire cutters, tape measure.
Having access to a computer near the build is also very valuable for reading the directions / looking stuff up.
Read on for details about the last few steps.
Step 60 – I spent time looking for the hot end power extension and had even reached the conclusion that it was a missing part. Then I realized I had followed the recommendation that it be hooked up to the circuit board back on step 16.
Step 63 – Better instructions for orientation of hot end + wire management would be a good idea, I fiddled a lot with this before I was confident the zip tie was going to provide some strain relief.
No where in the directions does it mention hooking up the y-axis end stop.
Nor are the x or z motors connected to the main board. Someone also mentioned that as the x and z motors are concealed, it’s tricky to know which connector is which. Marking them would be a good addition.