
Until very recently the phone in my pocket was a Nexus 4 that I bought used 2+ years ago, it’s seen a couple of battery changes and a full brain transplant (motherboard) swap. It’s running Android Marshmallow, but there is a Nougat version available – so it still feels current. Phones feel like they’ve hit the same plateau that computers have, sure there are newer and faster models — but for most needs models a couple of years old are just fine.
The Nexus 5 hit my magic price point of ~$160 on the used market, even for the 32Gb version – making it too tempting an upgrade for me to pass on. The stock firmware only offers 6.01 (Marshmallow) but the Nexus 5 is still a well supported device in the custom ROM space. I’m a big fan of CyanogenMod but that’s come to a fairly spectacular end recently. I’m eagerly waiting for it’s successor LineageOS to get their infrastructure in place and regular builds happening.
Installing custom firmware on the Nexus 5 is similar to any well supported Nexus device, Google really did a good thing allowing the hardware to be friendly to developers. Read on for the detailed steps.
Two key references: The CM details on the phone (hammerhead) and the CM install instructions for hammerhead – and thank goodness for archive.org helping preserve the internet.
We’ll assume that this phone is fully stock, and the bootloader is still locked. Also, that you’re computer is running Ubuntu (16.04).
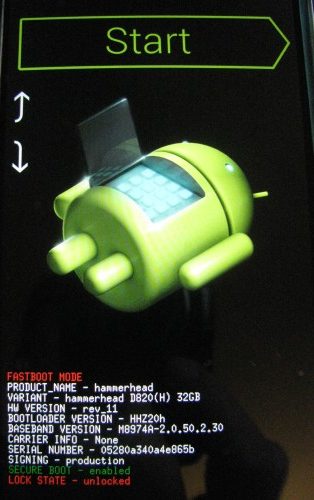
To start, we need to get the phone into the bootloader (fastboot mode). Hold down power button and volume down button until we get to the bootloader screen. [yes, the picture shows the unlocked state – it was taken after we did these steps]
On your Ubuntu machine, you need to install the fastboot tools.
|
1 |
$ sudo apt-get install fastboot |
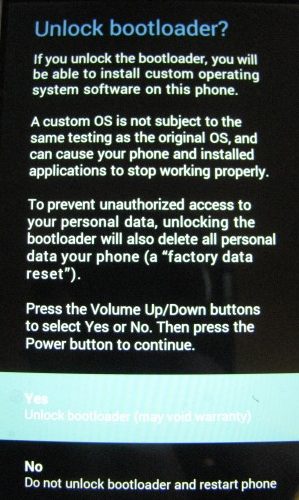
Plug your phone into the Ubuntu machine, and issue the following command to unlock the bootloader.
|
1 |
$ sudo fastboot oem unlock |
Now that the bootloader is unlocked, we can install a recovery image. I like TWRP, so we’ll get the version of that for hammerhead and install that. Always verify the digital signature of the download, it’s easy and avoids hard to diagnose issues. Installing is done from the Ubuntu machine using fastboot.
|
1 2 3 4 5 6 7 8 |
$ sudo fastboot flash recovery twrp-3.0.2-0-hammerhead.img target reported max download size of 1073741824 bytes sending 'recovery' (14524 KB)... OKAY [ 0.798s] writing 'recovery'... OKAY [ 1.119s] finished. total time: 1.917s |
At this point I took a mis-step, or something went sideways. You can skip this section (bullets) but I’ll still document what I did.
- Now use the volume keys to ‘Restart Bootloader’
- Once it reboots, now pick ‘Recovery mode’
- This should boot us into TWRP – but no.. I’m in a boot loop while it tries to run Open Recovery script?
- Well.. tried again. Hold power & volume down until we get the bootloader screen.
- Re-install the TWRP recovery with fastboot
What I should have done was immediately enter ‘Recovery mode’ — which I did and I’m good to go.
In TWRP – under ‘Wipe’ choose ‘Format Data’ to create a working filesystem. This will allow us to copy the custom ROM onto the phone for installation.
Now we can mount the phone as a filesystem on the Ubuntu machine and copy over the custom ROM. In my case it was CyanogenMod 14.1 + gapps (nano). Once you’ve copied the files over (and did I mention verifying the checksums on the files is a good idea?) we can use TWRP to install the files. Install the ROM first, then the gapps package.
All should go well, now on TWRP pick “Reboot” and pick “System” and after a while, you should be in a new custom ROM.
Along the way I discovered that you can relock the bootloader – cool. I wouldn’t expect this to work with any system modifications, but if you wanted to go back to fully stock, this is a nice feature.
|
1 |
$ sudo fastboot oem lock |