
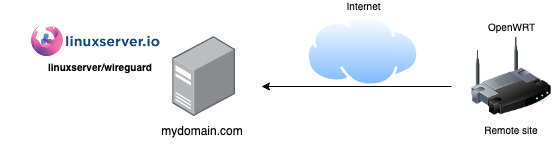
Previously I’ve written about running wireguard as a self hosted VPN. In this post I’ll cover how to connect a remote site back to your wireguard installation allowing that remote site to reach machines on your local (private) network. This is really no different than configuring a wireguard client on your phone or laptop, but by doing this on the router you build a network path that anyone on the remote network can use.
I should probably mention that there are other articles that cover a site-to-site configuration, where you have two wireguard enabled routers that extend your network across an internet link. While this is super cool, it wasn’t what I wanted for this use case. I would be remiss in not mentioning tailscale as an alternative if you want a site-to-site setup, it allows for the easy creation of a virtual network (mesh) between all of your devices.
In my case my IoT devices can all talk to my MQTT installation, and that communication not only allows the gathering of data from the devices, but offers a path to controlling the devices as well. What this means is that an IoT device at the remote site, if it can see the MQTT broker I host on my home server – will be controllable from my home network. Thus setting up a one way wireguard ‘client’ link is all I need.
I will assume that the publicly visible wireguard setup is based on the linuxserver.io/wireguard container. You’ll want to add a new peer configuration for the remote site. This should generate a peer_remote.conf file that should look something like:
|
1 2 3 4 5 6 7 8 9 10 11 |
[Interface] Address = 10.13.13.4 PrivateKey = SECRETPRIVKEY= ListenPort = 51820 DNS = 10.0.0.8 [Peer] PublicKey = SECRETPUBKEY= PresharedKey = SECRETPRESHARE= Endpoint = mydomain.com:51820 AllowedIPs = 0.0.0.0/0, ::/0 |
This is the same conf file you’d grab and install into a wireguard client, but in our case we want to setup an OpenWRT router at a remote location to use this as it’s client configuration. The 10.13.13.x address is the default wireguard network for the linuxserver.io container.
I will assume that we’re on a recent version of OpenWRT (21.02 or above), as of this writing 23.03.2 is the latest stable release. As per the documentation page on setting up the client you’ll need to install some packages. This is easy to do via the cli.
|
1 2 3 4 |
# Install packages opkg update # 21.02 or above opkg install wireguard-tools luci-app-wireguard luci-proto-wireguard |
Now there are some configuration parameters you need to setup (again in the cli, as we’re going to set some environment variables then use them later).
|
1 2 3 4 5 6 7 8 |
# Configuration parameters WG_IF="wg0" WG_SERV="mydomain.com" WG_PORT="51820" WG_ADDR="10.13.13.4/32" WG_KEY="SECRETPRIVKEY=" WG_PSK="SECRETPRESHARE=" WG_PUB="SECRETPUBKEY=" |
Now this is where I got stuck following the documentation. It wasn’t clear to me that the WG_ADDR value should be taken from the peer_remote.conf file as I’ve done above. I thought this was just another private network value to uniquely identify the new wg0 device I was creating on the OpenWRT router. Thankfully some kind folk on the OpenWRT forum helped point me down the right path to figure this out.
Obviously WG_SERV points at our existing wireguard installation, and the three secrets WG_KEY, WG_PSK, and WG_PUB all come from the same peer_remote.conf file. I do suspect that one of these might be allowed to be unique for the remote installation however, I know that this works – and I do not believe we are introducing any security issues.
At this point we have all the configuration we need, and can proceed to configure the firewall and network
|
1 2 3 4 5 6 7 8 9 10 11 12 13 14 15 16 17 18 19 20 21 22 23 24 25 26 27 |
# Configure firewall uci rename firewall.@zone[0]="lan" uci rename firewall.@zone[1]="wan" uci del_list firewall.wan.network="${WG_IF}" uci add_list firewall.wan.network="${WG_IF}" uci commit firewall /etc/init.d/firewall restart # Configure network uci -q delete network.${WG_IF} uci set network.${WG_IF}="interface" uci set network.${WG_IF}.proto="wireguard" uci set network.${WG_IF}.private_key="${WG_KEY}" uci add_list network.${WG_IF}.addresses="${WG_ADDR}" # Add VPN peer uci -q delete network.wgserver uci set network.wgserver="wireguard_${WG_IF}" uci set network.wgserver.public_key="${WG_PUB}" uci set network.wgserver.preshared_key="${WG_PSK}" uci set network.wgserver.endpoint_host="${WG_SERV}" uci set network.wgserver.endpoint_port="${WG_PORT}" uci set network.wgserver.route_allowed_ips="1" uci set network.wgserver.persistent_keepalive="25" uci add_list network.wgserver.allowed_ips="0.0.0.0/0" uci commit network /etc/init.d/network restart |
This sets up a full tunnel VPN configuration. If you want to permit a split-tunnel then we need to change one line in the above script.
|
1 |
uci add_list network.wgserver.allowed_ips="0.0.0.0/0" |
The allowed_ips needs to change to specify the subnet you want to route over this wireguard connection.
One important note. You need to ensure that your home network and remote network do not have overlapping IP ranges. This would introduce confusion about where to route what. Let’s assume that the home network lives on 192.168.1.0/24 – we’d want to ensure that our remote network did not use that range so let’s assume we’ve configure the remote OpenWRT setup to use 192.168.4.0/24. By doing this – we make it easy to know which network we mean when we are routing packets around.
Thus if we wanted to only send traffic destined for the home network over the wireguard interface, we’d specify:
|
1 |
uci add_list network.wgserver.allowed_ips="192.168.1.0/24" |
As another way of viewing this configuration, let’s go take a peek at the config files on the OpenWRT router.
/etc/config/network will have two new sections
|
1 2 3 4 5 6 7 8 9 10 11 12 13 |
config interface 'wg0' option proto 'wireguard' option private_key 'SECRETPRIVKEY=' list addresses '10.13.13.4/32' config wireguard_wg0 'wgserver' option public_key 'SECRETPUBKEY=' option preshared_key 'SECRETPRESHARE=' option endpoint_host 'mydomain.com' option endpoint_port '51820' option route_allowed_ips '1' option persistent_keepalive '25' list allowed_ips '192.168.1.0/24' |
and the /etc/config/firewall will have one modified section
|
1 2 3 4 5 6 7 8 9 10 |
config zone 'wan' option name 'wan' list network 'wan' list network 'wan6' list network 'wg0' option input 'REJECT' option output 'ACCEPT' option forward 'REJECT' option masq '1' option mtu_fix '1' |
You’ll note that the wg0 device is part of the wan zone.
It really is pretty cool to have IoT devices at a remote site, magically controlled over the internet – and I don’t need any cloud services to do this.
My ‘home’ site had some sort of network outage – the IP didn’t change, but the main gateway needed to be reboot. Either the outage, or the reboot resulted in the wireguard connection being broken.
Using the wireguard_watchdog script that is part of the OpenWRT wireguard package seems like the right fix here. It’ll also help when/if my home IP changes.
https://forum.openwrt.org/t/wireguard-problem-with-resolving-peer/40830/3
https://forum.openwrt.org/t/wireguard-connection-not-being-restored/62452
But in this case – the state is correctly detected (that wireguard needs a kick) but the attempt to use “wg set wginterface peer … ” isn’t doing the trick
Based on https://forum.openwrt.org/t/restart-wireguard-via-cli/51935/10 it seems adding
ifdown wginterface
ifup wginterface
helped kick things and I’m good to go.
Notes for future me:
Shifting the wg0 from the wan to the lan is just a matter of changing these two lines in the script from wan to lan. This has the benefit of allowing you to access the ssh on the lan side via the remote wireguard connection. Very useful.
uci del_list firewall.wan.network=”${WG_IF}”
uci add_list firewall.wan.network=”${WG_IF}”
The configuration setup has entries like
WG_KEY=”SECRETPRIVKEY=”
Don’t get confused with the = sign at the end, the whole string is the secret (doh).
The wireguard watchdog script is triggered by cron.
Well – I goofed. While switching the wg0 from wan to lan did work to allow me to do the ssh trick back over the wireguard connection, it broke clients on the remote lan side from being able to see the home network over wireguard.
If I ssh’d into the openwrt box – I could see the home network – but that was not useful.
So – I left that alone, and simply added a firewall rule to allow ssh to be visible from the wan side.
Lots of discussion here: https://forum.openwrt.org/t/openwrt-as-wireguard-client-firewall-blocking-wifi-clients/222739/9?u=r00