
 If you buy something, you expect to own it – this means being able to decide what it’s doing or not doing. If you can’t open it, you don’t own it. I think this is really important when we consider IoT devices that you add to your home. You should have 100% control over your light switches, not be reliant on some company to allow you to manage them.
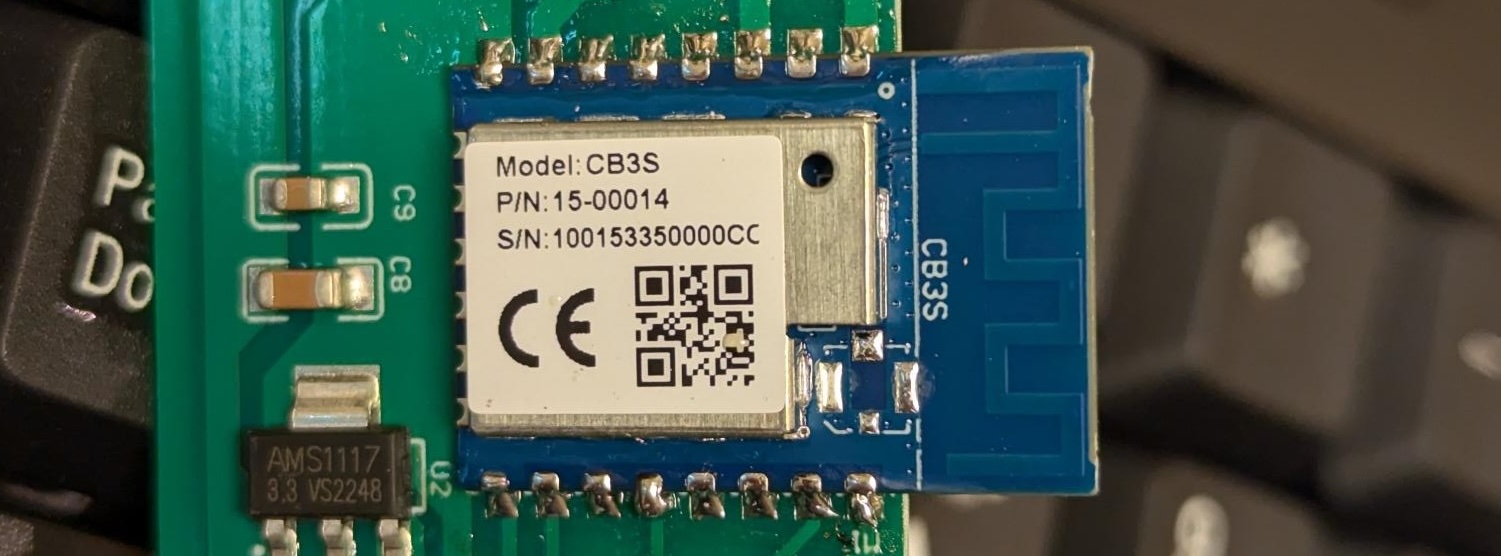
In the past I’ve used Tasmota to replace the firmware in some commodity devices with good success. I wanted a new light switch and found the Martin Jerry S01 switch, so I ordered one. Unfortunately when it arrived, I opened it up and discovered the control module was no longer an ESP 8266 – but a Tyua CB3S device.
Some searching turned up the OpenBeken project. This is an open firmware that supports a number of Tuya devices. It appears to be possibly inspired by Tasmota which I found attractive, but the fact that there was a way to run open firmware on this device was the big draw.
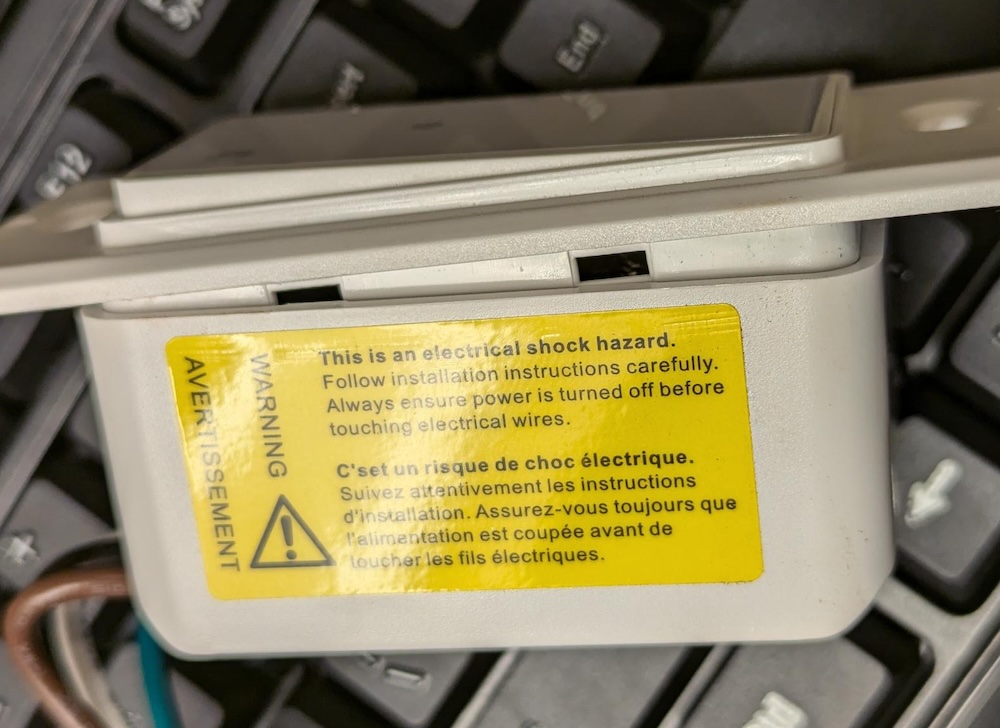
Let me back up a little. Opening the MJ-S01 is quite easy. I used a putty spatula (thin metal blade) to pry the side clips. There are 4 clips, two per side.
 Once you’ve got the clips released, you can easily remove the switch plate. There is a metal grounding plate you’ll have to un-hook from the switch plate. There is a cable with a 3 pin connector to separate the switch plate from the base, this is optional but makes it easier to work with the switch plate that has the controller.
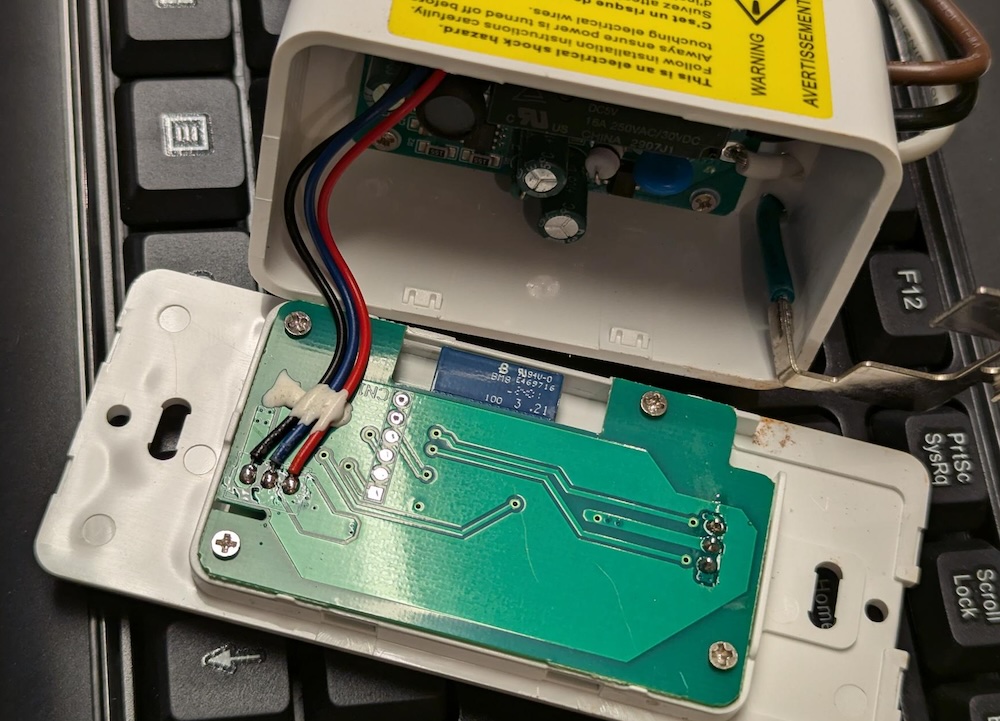 I went further and removed the screws holding the circuit board to the switch plate in order to see the other side where the CB3S is attached. In the picture above you can see the blue circuit board in the middle. You don’t need to do this extra disassembly as the row of 6 pads exposes the right pins we want to work with.
In order to flash new firmware, I need to find and connect 4 pins: 3.3v, GND, TX, and RX. To identify these I referenced the Tuya documentation on this module which listed the pin outs on the module. Using my multi-meter to check connectivity, I was able to map the pin outs on the module to the pads on the circuit board.
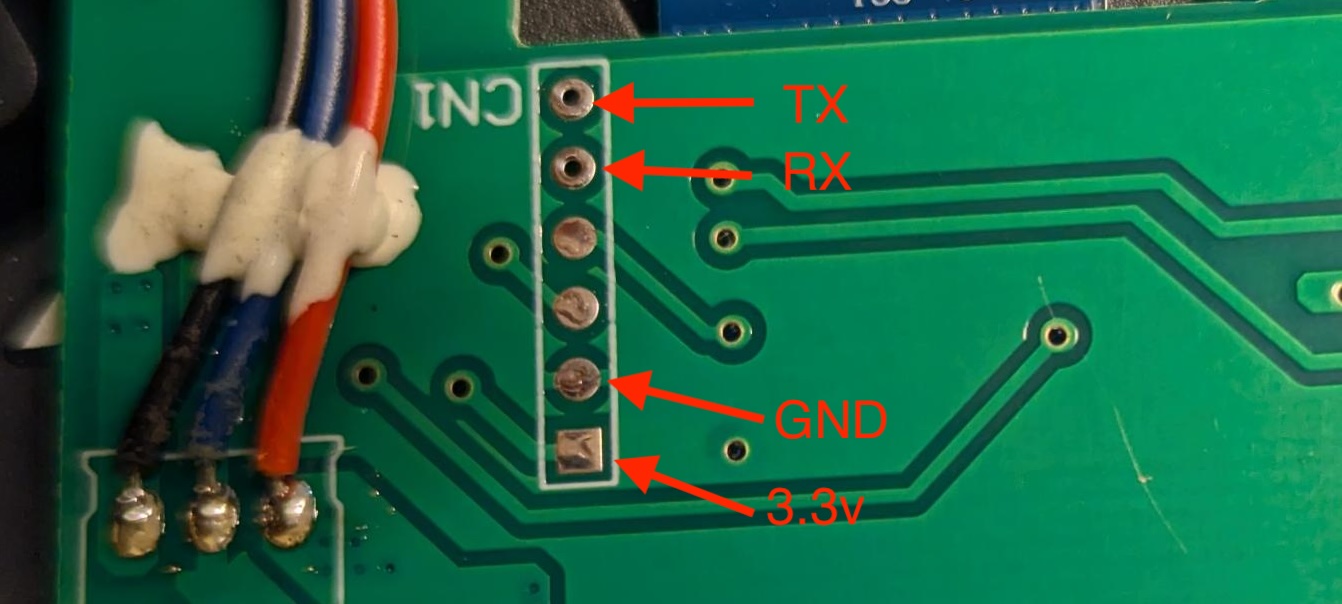 Now it’s a simple matter of heating up the soldering iron and hooking up some wires to these pads.
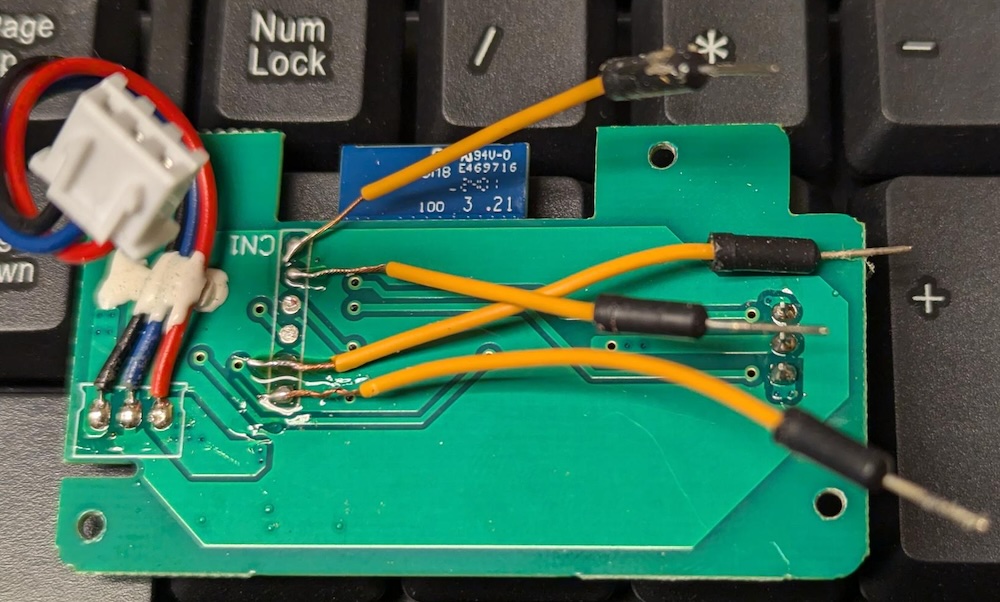 A bit ugly, but it works. Now I can test that I’ve got things correct by hooking up just 3.3v and GND. Success! When I power on the device this way I get the expected blinking LED, and I can long-press the button to enter setup mode. Getting the stock firmware into AP (access point) mode – I see the expected “Smart_XXXX” access point become available to my laptop WiFi.
Next we get to experience the adventure of setting up the application on Windows. I’m going to gloss over this because it’s both a bit complicated and also my experience is likely to be different than yours. We are trying to get the GUI based flash tool installed. I needed to install some .net framework, and tell Windows it was ok to run this un-trusted application. I was lucky that my USB<->serial dongle was recognized by Windows and showed up as COM6.
Assuming you are able to run the app, get your serial connection sorted out, and provide 3.3v power to the device – we are very close to being able to get things going. One note: I connected the TX of my serial device to the RX of the CB3S board, and RX to TX. Crossing the connection seemed to work for me.
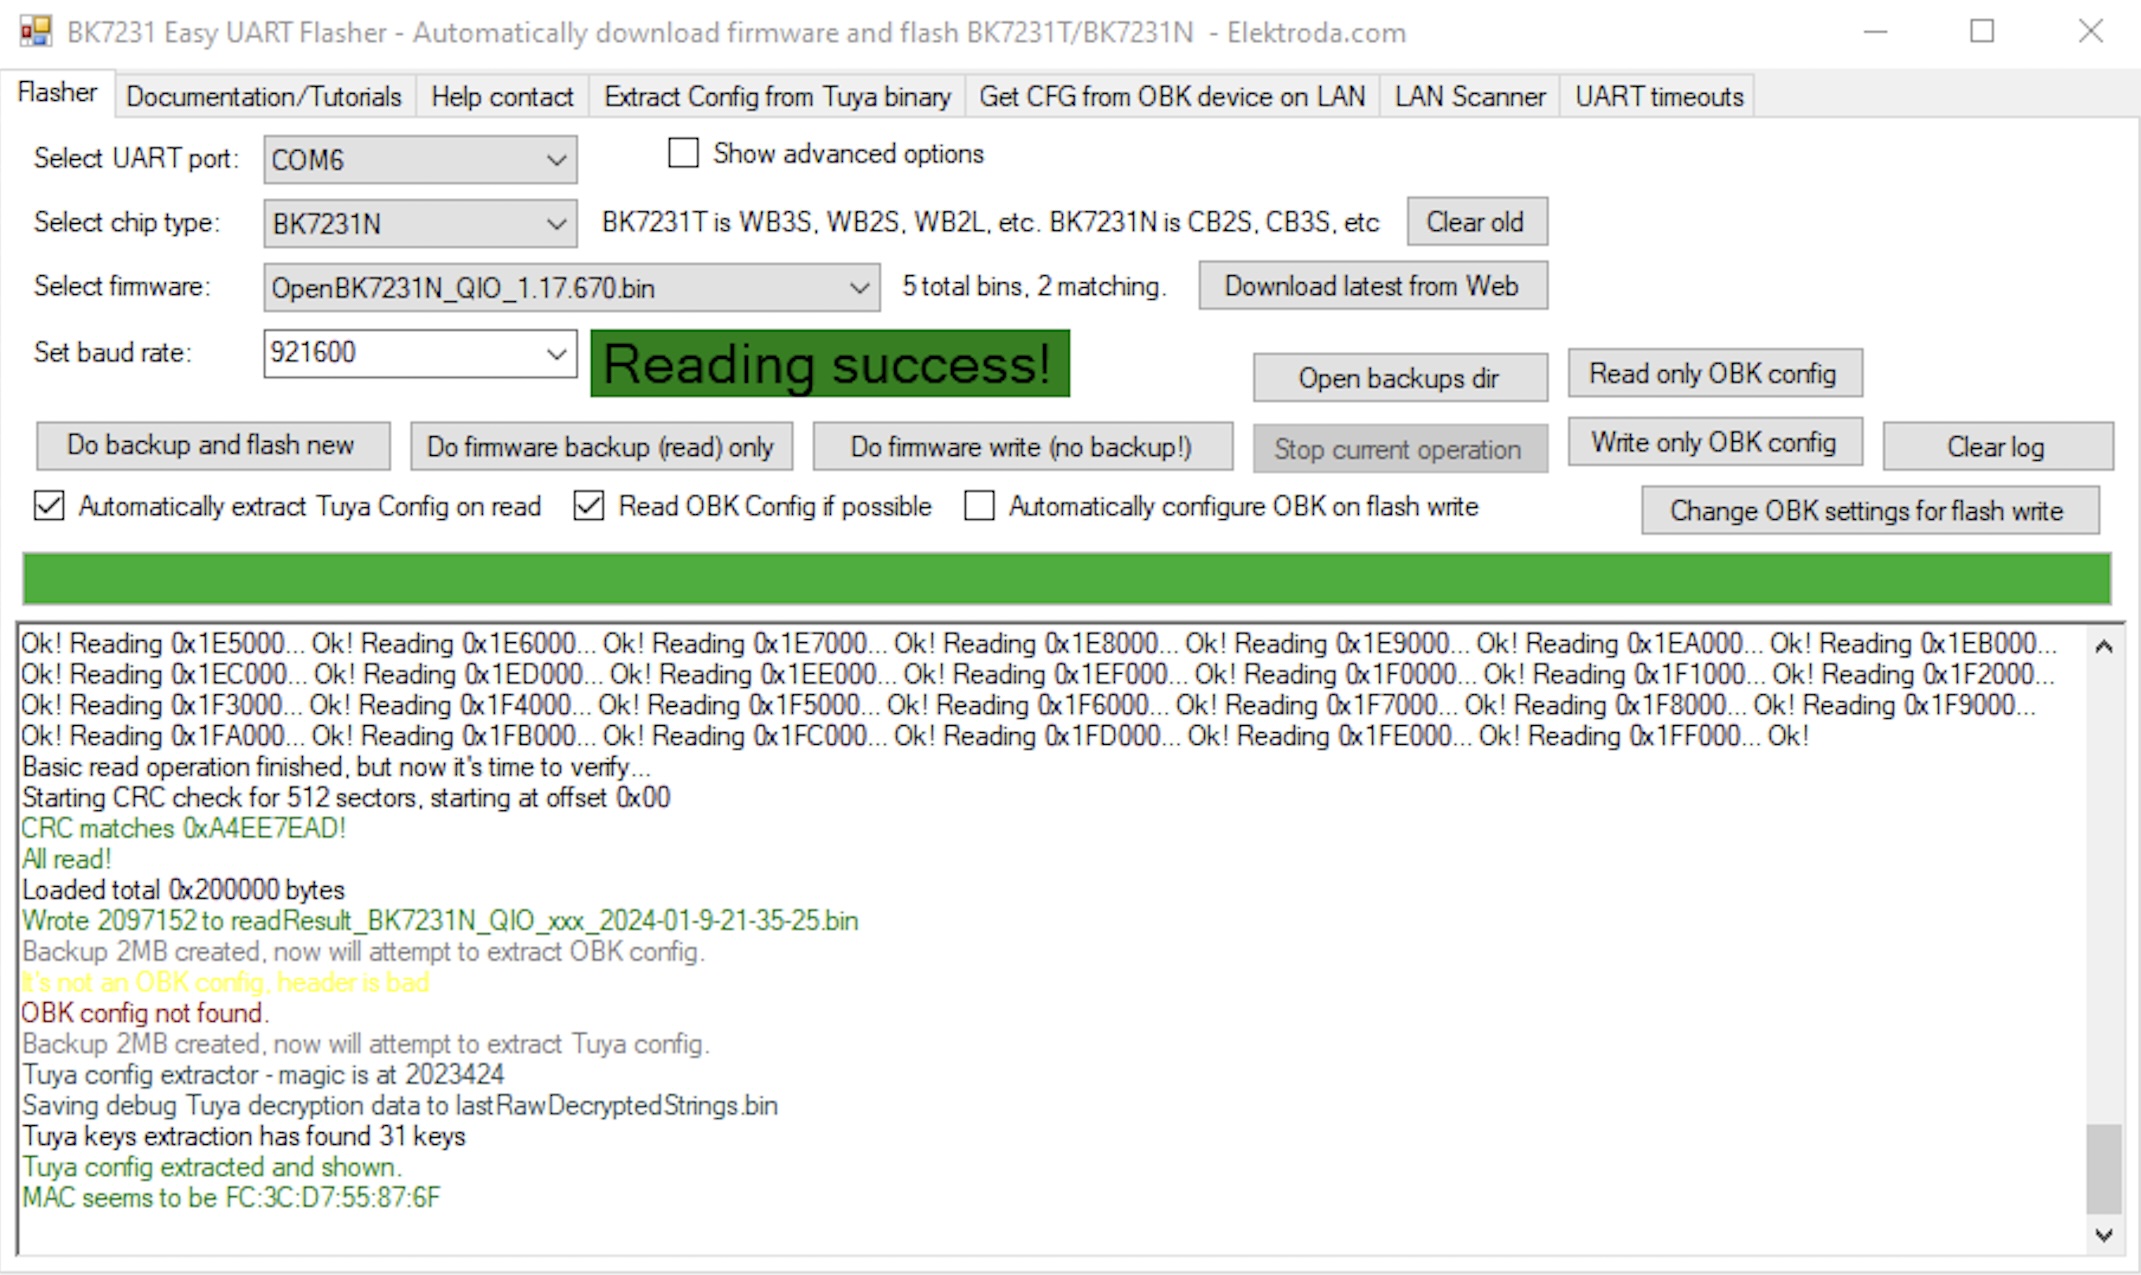 There is quite a bit to unpack from the image above. First you can see that my Serial UART was correctly detected and setup as COM6. I expect your configuration here will be different, and I hope it works easily for you but USB serial devices and windows can be frustrating.
The second key thing is to pick the right “chip type”. The CB3S contains a BK7231N, thus I selected that from the list of supported chips. I suggest you then “Download latest from Web” which in my case upgraded me from version 606 to version 670.
At this point everything seemed OK, but I wanted to proceed cautiously. The CB3S apparently enters programming state upon power on. I had this all hooked up, and tried “Do firmware backup (read) only”. This just worked for me, and I was greeted with the screen capture I took above showing “Reading success!” – so I knew now that I had at least all of the right connections made. The other thing that reading the firmware did was give the tool something to parse and discover the Tuya settings, this data appeared in a second dialog box and provided a JSON payload for me to save away.
Now we need to be brave and flash the latest version of the open firmware. This time it seemed to get stuck trying to enter programming mode and I needed to very (very) briefly disconnect/reconnect power to reset it. This worked great and I held my breath while it flashed.
I had not checked off the box “Automatically configure OBK on flash write” so once it was flashed, I then did a second operation of “Write only OBK config” to write the discovered values (that JSON payload). I didn’t need to configure anything, the tool had already initialized the values internally after the firmware backup step.
In theory, I have the original firmware downloaded to my machine in case I want to revert. If you care about this, maybe track down that file and save it. I personally don’t think I’d ever go back.
One more power cycle, and I’m very happy to see a WiFi access point appear named “OpenBK76231N_XXXXX”. Connecting my laptop to this I’m able to visit the IP address of the gateway (http://192.168.4.1) and am greeted by a very Tasmota looking web page to configure the device.
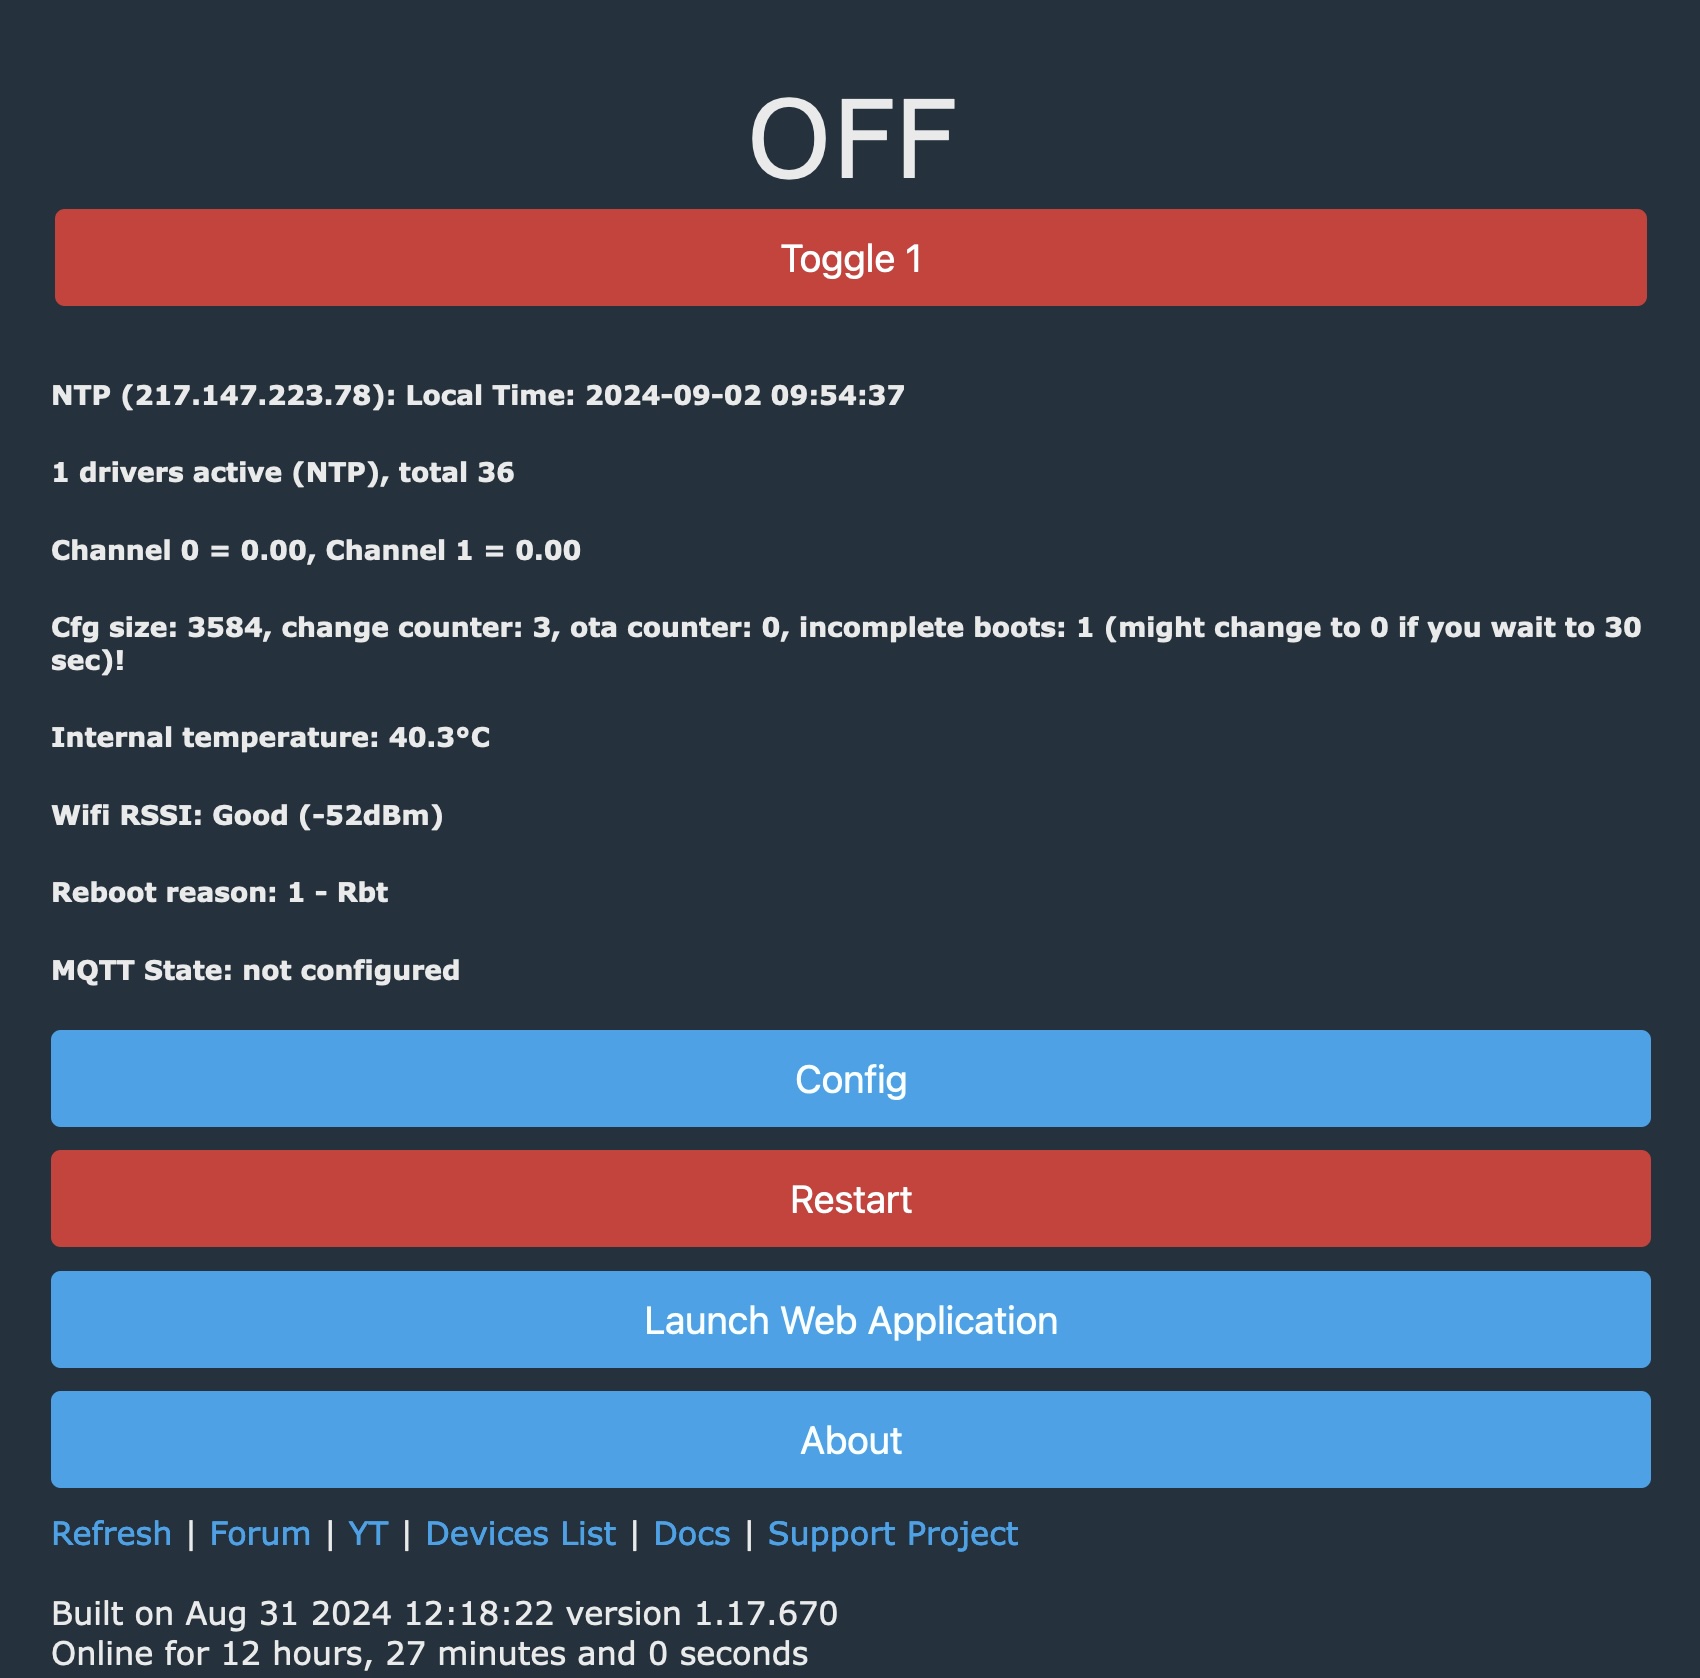 Now I can remove my patch wires from the solder pads, re-assemble the device and test that things still work end-to-end (they do). While there are similarities to Tasmota, things are quite different. There isn’t a built in timer facility which I was hoping for, but it turns out that via some simple scripting I can program in a timer schedule. You can even change the built in web UI via scripting which is pretty cool.
There is also very nice Home Assistant integration built in. The CB3S controller appears to be more snappy than the Tasmota ESP-8266 based devices I have, so while this device wasn’t what I expected when I ordered it – with a bit of work it seems I’m in a pretty good place.
Footnote: There is a forum which seems fairly active on the OpenBK firmware and various supported devices.