Ok, maybe it’s not very pretty – but it’s a science project you can put together in about 10 minutes once you’ve got the parts together AND those parts are likely things you’ve got around your home now. It was a long weekend and the kids and I were looking for something to make, this fit the bill and just maybe taught them a little bit about science (maybe I learned something too). The original article is a great reference, as usual I’ll repeat the steps here with my notes.
Parts list:
- Box – large enough for a CD
- CD, used or not
- Toilet paper tube
- Two razor blades
- Tape: scotch tape & silver foil tape (but masking + duct will work too)
For reference, in the picture at the top of the post – the bottom of the box is facing us, and the tube is coming out of the right side.
First we cut an oval hole for the paper tube in the right side. Choose a side, and use the CD as a guide – place it in the lower left corner and mark the center hole. Now use that as a guide to center the paper tube and mark the outside of the tube. Shift the tube left so it’s touching the center of the CD hole marking and mark the outside of the tube. You should have two outlines of the paper tube that you can make into an oval.
The next hole is for the razor blades, it goes on the side to the left of the oval hole. It should be 1/2 inch wide by 2 inches high – give or take a bit. It should the same height up the box as the tube hole (use the CD as a guide) but about 1/2 inch in from the edge. We’re going to cover this slot with the razor blades in a minute.
Now place the razor blades over the second hole and tape them in place. They should fully cover the hole and be spaced as closely together as possible, almost but not quite touching. It is important to have an even spacing top to bottom.
Orient the box as seen in the picture at the top of the post. Place the CD on the side of the box that is lying on the ground now, label side down. Shine a flashlight into the razor blade slit, and hold the tube in the oval at an angle. You may need to close the box to see this, but you should see a rainbow of sorts when you look through the tube at the CD.
Once you’ve got this basically aligned (and don’t sweat it too much), tape things in place. Use the foil tape to seal the box up to prevent any light leaks.
That’s it, we’ve built a spectrometer!
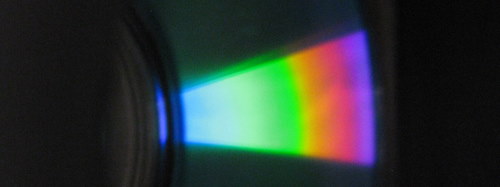
Above is a full spectrum resulting from sunlight. If you look carefully you’ll notice there are clouds as the razor blade slit (diffraction grating) also acts as a pinhole camera.
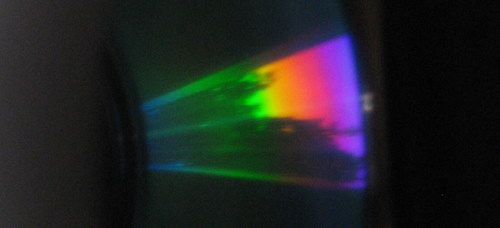
The pinhole effect is much more obvious in this photo which shows some trees blocking some of the light.
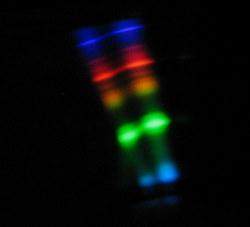
The image on the left is a normal 4′ fluorescent bulb, the one on the right is a T4 fluorescent bulb. The gas signature is pretty much identical.
The image on the left is a CFL bulb, exhibiting the basic fluorescent gas signature. The one on the right is a regular incandescent bulb, notice it is quite similar to sunlight.


Wow, that’s so interesting and really, science is not about expensive equipment, – well done !