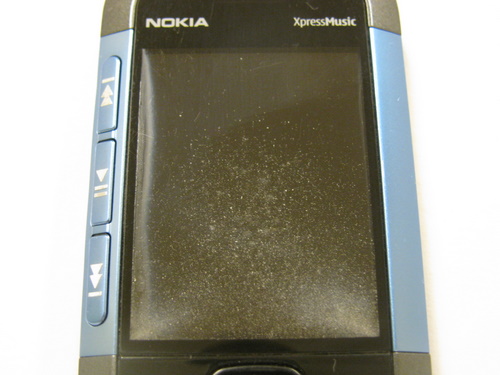
 While the Nokia 5310 hasn’t been my daily phone in over a year, it remains one of my favorites. It is very small, the voice quality is good, a nice loud speaker phone, and the battery lasts week. It’s not a smart phone, but it has some nice features like mp3 playback and MIDP application support. Unfortunately being carted everywhere in my pocket meant it picked up some lint / dust that managed to get between the LCD screen and the external cover / faceplate. Mostly when the screen was on, this wasn’t a big deal – but in certain lighting conditions it was very obvious.
Nearly a year ago I set out to figure out how to take the phone apart and clean it. It wasn’t hard to find a site describing replacement of the keypad that gave enough instructions to strip the phone down. Of course, it took me nearly a year to get around to doing this. I was somewhat motivated by wanting to put it up for sale on eBay, figuring a clean phone might be worth more. I ended up following some slightly different instructions, but both sites are accurate and should work for anyone wanting to disassemble a Nokia 5310.
 Here is the phone in mid-disassembly. This is just after the front cover has been removed. I was surprised how full of lint / dust the phone had gotten. There is almost an organic quality to a well loved gadget (ok, maybe that much dust is just gross).
 At this point I’ve managed to get the phone stripped down to the point where the LCD is separated from the outer cover. On the left you can see the faceplate (face down) and the LCD on the right along with the circuit board. Both the inside of the faceplate needed to be cleaned, as well as the LCD (which is a bit more obvious in the picture). Looking carefully you can see the foam that surrounds the faceplate, this presses up against the LCD and is intended to keep dust and stuff out. The dust seemed to mostly get in from the bottom corners of the screen. I suspect that due to button (opening) placement there just was more opportunity for dust to get in there – it is possible this is a minor defect but I doubt it.
 One last shot of the phone, fully reassembled. You can see how big a difference there is when compared to the 1st photo at the top of this post. Overall I was very pleased with the results, and I did sell it on eBay just the other day.
The whole process took me about 40 minutes, maybe a bit less. Very few tools were required – I will recommend the LeeValley micro-tip screwdriver as it was very handy. Some patience is needed when removing the front cover, as well the removal of the back of the phone from the main body needed care. Work slowly and don’t force things. It really is quite impressive how compact the whole unit is. I think there was a total of 6 screws holding it all together, sort of like a high tech jigsaw puzzle.
