 A couple of years ago I added a second drive to my server in a RAID1 (mirror) configuration. Originally I was using the single drive for logs, but with a more durable mirror setup I moved more (important) data to it.
RAID is not a backup story, if you really care about the data you want to back it up. There are two hard lessons I learned with this recent failure (and my recovery). Two valuable to me bits of data I’m storing on this mirrored volume are email, and photoprism storage (but not the photos themselves). Stupidly I did not have regular backups of either of these, please learn from my mistake.
The two lessons I hope to learn from this are:
- Backup your data, even a bad backup is better than nothing
- Do not ignore any signs of problems, replace any suspicious hardware ASAP
If you read the comments on my previous post, you will see a history of minor failures that I clearly willfully ignored. I mean, hey – it’s a mirrored setup and mostly I had 2 drives working fine.. right? Stupid me.
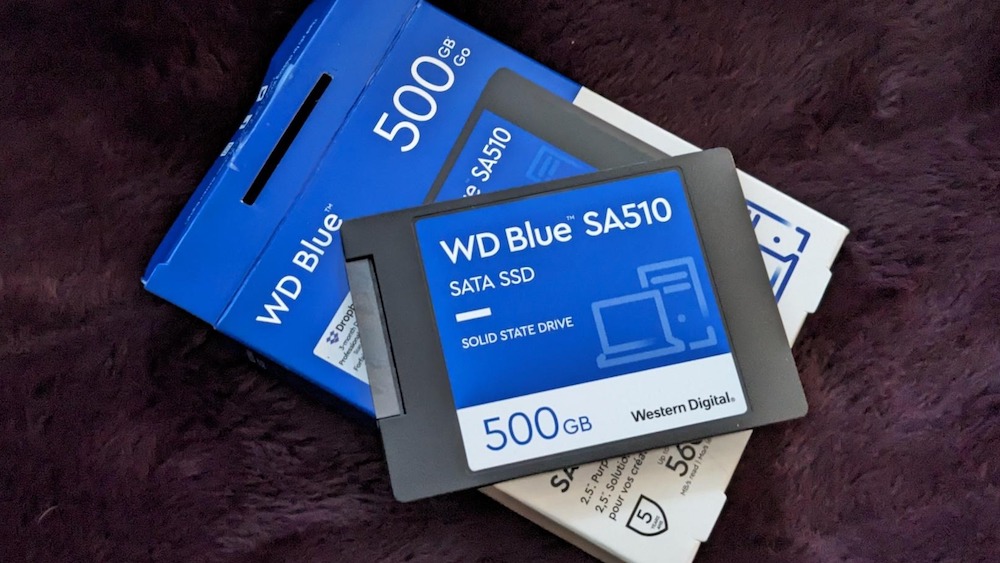
The replacement 500GB SSD drive cost me $56.49 taxes in, it even has a 5 year manufacturer warranty in comparison to the 3 year warranty on the failed ADATA drive. Sadly checking the ADATA warranty shows me it made it just path the 3 year mark (not that a ‘free’ replacement drive would fix my problem)

While ADATA has been mostly reliable for me in the past, I’ll pick other brands for my important data. The ADATA products are often very cheap which is attractive, but at the current cost of SSDs it’s easy to pay for the premium brands.
Here is a brief replay of how the disaster rolled out. The previous day I had noticed that something was not quite right with email, but restarting things seemed to resolve the issue. The next morning email wasn’t flowing, so there was something wrong.
Looking at the logs, I was seeing a lot of messages “structure needs cleaning” – which is an indicator that there is some sort of ext4 filesytem problem and it needs to run a check to clean things up. It also appeared that the ADATA half of the mirror had failed in some way. Rebooting the system seemed like a good idea and everything seems to have come back.
Checking the logs for the mail system showed all was well, but then I checked email on my phone, and there were no messages? Stupidly I then opened up my mail client on my laptop, which then proceeded to synchronize with the mail server and delete all of the email stored on my laptop to mirror the empty mailbox on the server.
What was wrong? It took a while, but I figured out that my RAID1 array had completely failed to initialize, both volumes were marked as ‘spare’.
|
1 2 3 4 5 6 |
$ cat /proc/mdstat Personalities : [linear] [multipath] [raid0] [raid1] [raid6] [raid5] [raid4] [raid10] md0 : inactive sdf1[2](S) sde1[0](S) 937435136 blocks super 1.2 unused devices: <none> |
Ugh, well that explains what happened. When the system reboot the mount failed – and my mail server just created new data directories on the mount point (which are on my root volume).
At this point I realize I’m in a bad place, having potentially flushed decades of email. Have I mentioned that running your own email is a bad idea?
Time to start capturing things for recovery. I did a copy of the two drives using dd:
|
1 2 |
$ sudo dd if=/dev/sde1 of=/other/volume/sde1-dd.img $ sudo dd if=/dev/sdf1 of=/other/volume/sdf1-dd.img |
In the process of doing this, it became obvious that sdf (the ADATA drive) had hard read errors, where in contrast I was able to complete the image creation of sde (a Kingston drive).
Once I had some time to think about the situation, I was able to re-add the good drive to the array to make it become active. This let me mount the volume and make a copy of the email for backup purposes. Once this was done I unmounted and ran a fschk -y /dev/md0 to fix all of the filesystem errors.
I then stopped the currently running mail server, renamed the mount point directory to keep the email that had come into the system while I was doing repairs, and created a new (empty) mount point. Then a reboot.
Sigh of relief as all of my mail appeared back. Sure, I’m running with a degraded RAID1 array and the fschk clearly removed some corrupted files but at least the bulk of my data is back.
Fixing the broken mirror was relatively straight forward. I bought a new drive. Then I captured the output of ls dev/disk/by-id/ before powering down the system and physically swapping the bad drive for the good drive. I could then repeat the ls dev/disk/by-id/ and look at the diffs, this allowed me to see the new drive appear, and inspect which drive letter it mapped to.
|
1 2 |
ls -l /dev/disk/by-id/ata-WD_Blue_SA510_2.WD_Blue_SA510_2.5_500GB_224753806202 lrwxrwxrwx 1 root root 9 Aug 9 19:12 /dev/disk/by-id/ata-WD_Blue_SA510_2.5_500GB_224753806202 -> ../../sdf |
Nice, it appears to have slotted in just where the previous ADATA drive was, not important but comforting. I then dumped the fdisk information of the healthy Kingston drive.
|
1 2 3 4 5 6 7 8 9 10 11 |
$ sudo fdisk -l /dev/disk/by-id/ata-KINGSTON_SA400S37480G_50026841D62B77E8 Disk /dev/disk/by-id/ata-KINGSTON_SA400S37480G_50026841D62B77E8: 447.13 GiB, 480103981056 bytes, 937703088 sectors Disk model: KINGSTON SA400S3 Units: sectors of 1 * 512 = 512 bytes Sector size (logical/physical): 512 bytes / 512 bytes I/O size (minimum/optimal): 512 bytes / 512 bytes Disklabel type: gpt Disk identifier: 6C260AF2-796D-5E49-8CB0-6E95DA5C3900 Device Start End Sectors Size Type /dev/disk/by-id/ata-KINGSTON_SA400S37480G_50026841D62B77E8-part1 2048 937701375 937699328 447.1G Linux filesystem |
We want our new drive to be partitioned the same way, luckily the new SSD is even bigger. Mostly this is accepting defaults with the exception of typing in the last sector to match the Kingston drive.
|
1 2 3 4 5 6 7 8 9 10 11 12 13 14 15 16 17 18 19 20 21 22 23 24 25 26 27 28 29 30 31 32 |
$ sudo fdisk /dev/disk/by-id/ata-WD_Blue_SA510_2.5_500GB_224753806202 Welcome to fdisk (util-linux 2.34). Changes will remain in memory only, until you decide to write them. Be careful before using the write command. Device does not contain a recognized partition table. Created a new DOS disklabel with disk identifier 0xad299882. Command (m for help): p Disk /dev/disk/by-id/ata-WD_Blue_SA510_2.5_500GB_224753806202: 465.78 GiB, 500107862016 bytes, 976773168 sectors Disk model: WD Blue SA510 2. Units: sectors of 1 * 512 = 512 bytes Sector size (logical/physical): 512 bytes / 512 bytes I/O size (minimum/optimal): 512 bytes / 512 bytes Disklabel type: dos Disk identifier: 0xad299882 Command (m for help): g Created a new GPT disklabel (GUID: 300BCC0D-C0F3-A640-B717-DFBB3311378F). Command (m for help): n Partition number (1-128, default 1): First sector (2048-976773134, default 2048): Last sector, +/-sectors or +/-size{K,M,G,T,P} (2048-976773134, default 976773134): 937701375 Created a new partition 1 of type 'Linux filesystem' and of size 447.1 GiB. Command (m for help): w The partition table has been altered. Calling ioctl() to re-read partition table. Syncing disks. |
This is similar to the original creation of the RAID1 post, but we can now skip to step 8 and add the new volume.
|
1 |
sudo mdadm /dev/md0 --add /dev/disk/by-id/ata-WD_Blue_SA510_2.5_500GB_224753806202-part1 |
And that’s it, now we just wait for the mirror to re-sync. It is interesting to note that while I can talk about the device ‘by-id’, mdstat uses the legacy drive letters.
|
1 2 3 4 5 6 7 8 |
$ cat /proc/mdstat Personalities : [raid1] [linear] [multipath] [raid0] [raid6] [raid5] [raid4] [raid10] md0 : active raid1 sdf1[2] sde1[0] 468717568 blocks super 1.2 [2/1] [U_] [>....................] recovery = 0.1% (862656/468717568) finish=36.1min speed=215664K/sec bitmap: 4/4 pages [16KB], 65536KB chunk unused devices: <none> |
And a short while later, it’s nearly done.
|
1 2 3 4 5 6 7 8 |
$ cat /proc/mdstat Personalities : [raid1] [linear] [multipath] [raid0] [raid6] [raid5] [raid4] [raid10] md0 : active raid1 sdf1[2] sde1[0] 468717568 blocks super 1.2 [2/1] [U_] [===================>.] recovery = 97.5% (457392384/468717568) finish=3.7min speed=50854K/sec bitmap: 4/4 pages [16KB], 65536KB chunk unused devices: <none> |
At this point my email appears to be working correctly. The ext4 filesystem corruption I blame on the failing ADATA drive in the mirror, but this is a guess. The corruption caused a few emails to be ‘lost’, but had a bigger impact on the photoprism data which in part was the mariadb storage. I also noticed that both my prometheus data and mimir data were corrupted, neither of these are critical though.
Backups are good, they don’t have to be perfect – future you will be thankful.