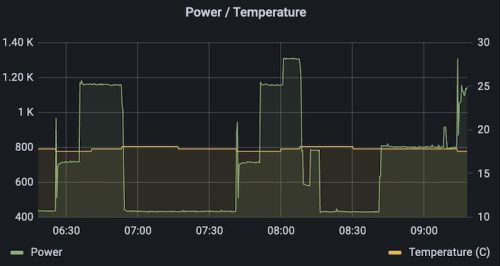
As part of my self hosted infrastructure I’ve got prometheus setup gather metrics from various sources, and Grafana to visualize them. My TED5000 gives me power usage information for the whole house, and my thermostat provides temperature data.
When using prometheus, you need exporters to provide metric data. There is an existing TED5000 exporter that I’m using, but there wasn’t one that I found for the thermostat – so I created one. The initial implementation was in python, and this worked fine. However I’d see in my pi-hole dashboard that lookups of the thermostat name were high in the stats (22000+ lookups per 24hr period). Looking at the logs, it seems every 15 second four lookups would happen, two pairs (A and AAAA) separated by 2 seconds. I suspect this was a side effect of the radiotherm library I was using in my code.
The exporter is very simple, it’s just a webserver that responds by making a web request to the thermostat, and responding with the data formatted for prometheus. The response payload looks like:
|
1 2 |
radio_thermostat_temperature 64.500000 radio_thermostat_state 0.000000 |
I figured that this was a good opportunity for me to learn Rust with a practical project.
The first thing I did was get myself setup to compile Rust code. I did this using a docker container as inspired by my previous post.
|
1 2 3 4 5 |
# Create the container docker create -it --name rust -v $PWD:/data -u $UID:`id -g` rust bash # Run the container to get a shell docker start -ai rust |
At this point I was able to create my first hello world rust code. I went from printing “hello” to following a tutorial to create a very simple webserver – which will be sufficient for a prometheus exporter.
I then started to learn about cargo and the crates.io site. It turns out there are a few prometheus crates out there, I found one that looked like a good match but after looking at it in more details I decided it was a lot more code and capability than I was looking for. Consider again the very simple response payload above, I really need very little help from a library.
I located a tutorial on reading data from a URL in Rust. This tutorial was less complete as it made assumptions you had more knowledge of managing crates than I did at the time. In order to take the code snippet and get working code you needed to add two lines to your Cargo.toml file. Furthermore, the code makes use of the blocking feature in the reqwest library which is not on by default. Using crates.io you can find the libraries (error-chain, reqwest) and details on how to configure them. This ends up being what you need:
|
1 2 3 |
[dependencies] error-chain = "0.12.4" reqwest = { version = "0.11.9", features = ["blocking"] } |
At this point I now have two samples of code. One which is a single threaded web server, and a second which can read from a URL (the thermostat) and parse out the JSON response. A little bit of hacking to figure out return syntax in Rust and I’ve managed to smash these together and have a basic exporter working.
The existing exporter runs as a container on my server, so all that remains is to wrap this Rust code up in a container and I’ve got a complete replacement.
Looking at the binary I’d been running with cargo run I was a little surprised to see it was 60MB, I was quick to rationalize that this was in the debug tree. Compiling a release version (cargo build --release) resulted in a much smaller binary (8.5MB). This size reduction sent me off to see how small a container I could easily create.
Two things I want: a) a multi-stage build Dockerfile b) a static binary that will run in a scratch image. Luckily this is well travelled ground and is concisely explained in this blog post for creating small rust containers.
The result was a 12MB docker image that only contains the one binary that is my code.
|
1 2 3 |
$ docker images REPOSITORY TAG IMAGE ID CREATED SIZE exporter-radio-thermostat latest d54faa1d2663 42 hours ago 12MB |
The previous python based implementation built on an alpine base image was 126MB in size, so a 10x reduction in size – plus this new image runs without privilege (ie: as a user). This means this container has a very small attack surface. It appears to use %0.01 CPU vs. the previous %0.02. You can check the complete code out on github.
My pi-hole is showing me that it is still one of the higher names resolved with 11520 lookups in a 24hr period. This maps out to 24 hours * 60 minutes * 4 (every 15 seconds). I’ve improved on the DNS lookups, but it still feels like I can further improve this with a some clever coding.


