
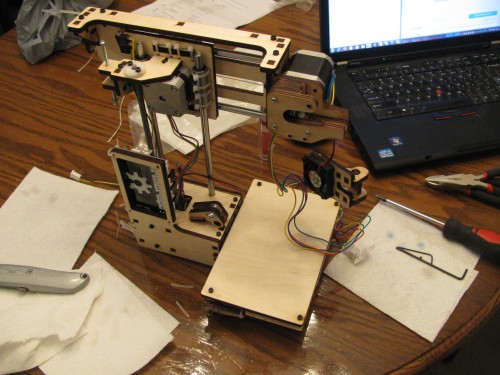
This is the second day of the my build. I originally anticipated finishing the build but hit a few snags right near the end so I stopped before completing it. I didn’t want to rush so as to avoid mistakes, and I was having a blast putting the kit together.
The laser-cut 1/4″ plywood has a wonderful burnt wood smell. The precision of the parts is awesome, things fit perfectly together. I can see why some folks really get into rapid prototyping with laser cut parts, but buying/building a laser cutter is further down my list.
I took a lot fewer notes this round. Again, I reference the steps from the instructions for the Printrbot Simple with Large Motors.
Step 36 – I found the initial photo misleading as you actually attach parts #10 and #3 on the side of the part that is not shown in the picture (it’s against the table).
Step 47 should probably come after 51. No need to thread wires until we’re installing the motor.
Step 48/49 – Yes, you need an imperial hex set as well as a metric one!
Step 52 – time to grow a few more fingers / suspend gravity. this was an interesting challenge to get together. This is one that could use more suggestions to assist people in getting it to work out.
Step 53 – Back on step 47 it is suggested that we thread the wires for the motor and the fan. We didn’t need to do this until just before step 52. In this step we’re gluing something to the fan assembly, this would have been better done earlier with the fan wiring not being held up. I was using Krazy glue as my super glue, this doesn’t work with the wood parts. I ended up using some epoxy.
Step 55 – also has a glue step. Again I’ve got to wait until this glue sets. So that’s it for today.
So, your 3D printer was a kit, and does requires some assembly, not so simple, I might add. That raise a interesting question regarding calibration of the printer. I assume that have a standard template/model to be use as a first print and calibration of the mechanical fine adjustment.
The PrintrBot have a range of kits, price from few hundred to thousands of dollar. Still not yet within reach of most push button end user. It will be interesting to follow some of your 3D printing projects as a follow up posting.
Well Done, brave indeed.
You can buy the Simple fully assembled if you want. It’ll cost an extra $100, but for those that don’t enjoy kits it’s well worth the extra cost. http://printrbot.com/shop/assembled-printrbot-simple/
I really enjoyed building the kit, but I like stuff like that.
Even with a pre-built kit, you’ve got to get your hands dirty with the software / modelling / actually printing things. If you want the easy path – consider http://www.shapeways.com/ where you submit a model, and they print it.