Until recently, the PS3 was one of the cheaper options for Blu-ray playback and it has high quality playback. Today there are stand alone players which will match the quality of playback, but not the boot / menu speed the PS3. Still, the PS3 goes beyond movies by providing game play and media center duties.
One of the drawbacks to the PS3 is integration with standard universal remote controls, not having an IR control story. The official Sony PS3 remote uses the same bluetooth connectivity as the wireless game controllers. To work around this there are several 3rd party solutions exist such as IR2BT, ps3toothfairy, Schmart and IR4PS3, I chose to go with the latter.
I first found out about the IR4PS3 option via remotecentral.com, a site I’ve often referenced ever since I invested in a Phillips Pronto TSU2000. Having a complex audio/video setup is one thing, but it becomes a much bigger problem if my wife can’t make use of it – a fully programmable remote such as the Pronto makes the whole setup easy to use. After reading the AVSForum thread on IR4PS3, I felt confident that it would be a good match for my setup.
The short version of the review is that ordering it was easy, it was shipped quickly, and works exactly as I would expect. You do need to provide your own power supply, but the manual lists several low cost and easy to find options. As it uses the bluetooth module from the Sony remote, compatibility with the PS3 firmware upgrades should be a non-issue. I now can use my IR based universal remote control with the PS3. Response time feel good, exactly as if the PS3 actually had IR support built in. I would not hesitate to recommend it to others.
Read on for a full review with pictures..
My purchase experience was trouble free. There is no website for IR4PS3, you simply email ir4ps3@hotmail.com. My basic inquiry about availability was answered within the day with a form letter pointing me at the manual and configuration fiiles. Once I had made my decision to purchase one, I sent another email indicating what I wanted and received PayPal information (again within the day). After my payment was submitted, I received shipping confirmation within 24hrs and the package showed up the day after. It was very well packaged with multiple layers of bubble wrap.
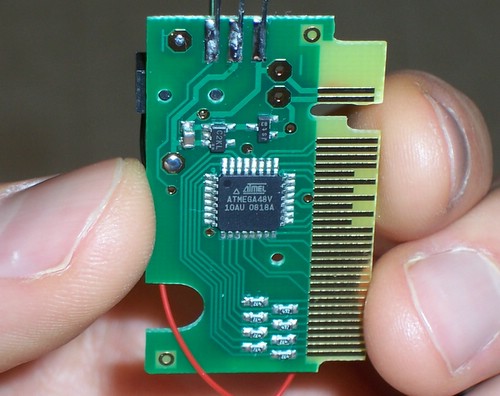
The unit itself is surprisingly small, and if you look carefully you will see the surface mount chip is from the Atmel AVR family. It is a 8bit microcontoller with support for 8k of programmable flash, and it is where the magic of processing the IR signal and interfacing to the bluetooth module is done.
I chose the DIY route as I had the Sony remote already. For a very reasonable increase in price, you can purchase a complete unit. So for those of you who don’t like to take things apart (and put them together) you can just read the remainder of this posting for entertainment value – the rest of you might find this walk-through helpful.
There is a YouTube video pointed at by the documentation which details the DIY installation
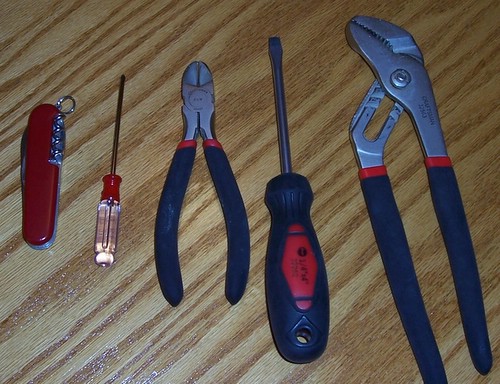
Here is a picture of the tools I used: pocket knife, Phillips screwdriver, wire cutters, slotted screwdriver and channel lock pliers.
You might want to grab a similar set so you don’t waste time going back and forth to get the right tools.
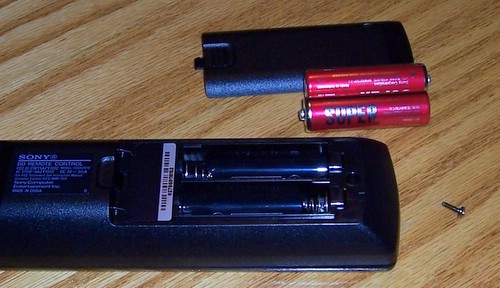
Step 1 – Remove batteries and phillips screw that is under battery cover.
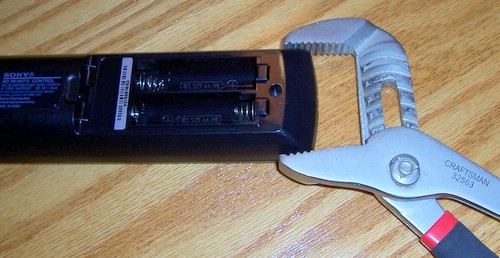
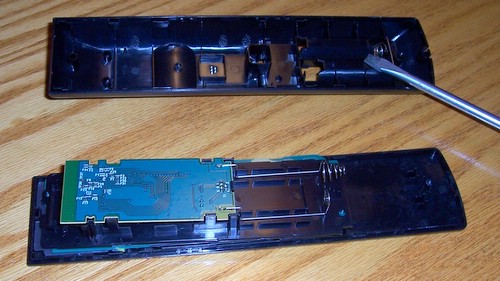
Step 2 – Open the remote using pliers. The video shows other methods as well. All it will take is a gentle squeeze, and its a little bit like opening a Mac mini – you’re going to hear a ‘crack’ sound when you get it right. The remote will have split apart (the top and bottom) enough to put the slotted screwdriver inbetween the two halves.
Step 3 – Separating the two halves. Take your time here, and work your way around the edge of the remote with the slotted screwdriver. The remote is made to snap together, and what you are doing here is unsnapping all those little tabs. The circuit board you see in the lower half of the picture is the bluetooth module. The keypad of the sony remote is face down underneath the module.
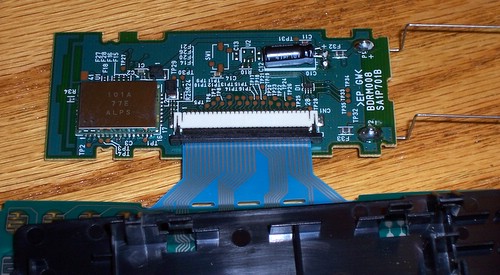
Step 4 – Remove the ribbon cable. The first step here is to free the bluetooth module from the remote itself, it is held down with some clips and should be fairly self evident how to pop it off. Now onto the ribbon cable – the black plastic bar will slide down toward the bottom of the picture, it will take some careful force to make this happen. Finger nails help here, and patience.
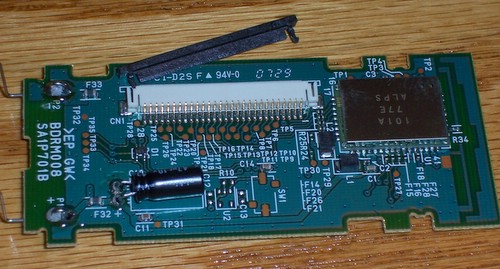
Step 5 – Remove the black plastic retainer. If you look closely at the white connector, you’ll notice that the black plastic snaps into it. I used the blade of my knife to bend the white tabs open to allow the black plastic to wiggle out – a toothpick would have worked too. Not much force is needed here, it should come away fairly easily if you get it right.
Step 6 – Cut battery pins. You want to leave enough height on the pins to accept the solderless connections from the IR4PS3 power wires, but short enough to still fit inside of the enclosure. As you can see I cut them a little longer than half way and that seemed to work fine. While we have the wire cutters out, let’s also flip the bluetooth module over and trim any “long” pins that are sticking out – this will let the module sit flat in the enclosure.
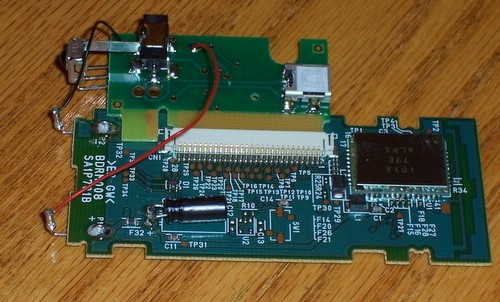
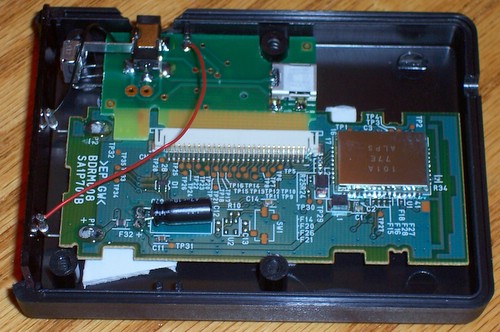
Step 7 – Connect the IR4PS3 board to the white connector and hook up the power wires. The red wire is positive (+) and the black is negative (-).
Step 8 – Mount in enclosure. There is some red plexiglass on the left side, mine came with the protective tape on which I removed. The foam tape on the bottom of the enclosure you leave there, it helps provide a snug fit once we put the cover on. Near the power connector there is a small black notch that the circuit board will fit under. I suggest you fiddle around with fit a little – when you get it right you’ll know it as the boards will fit securely.
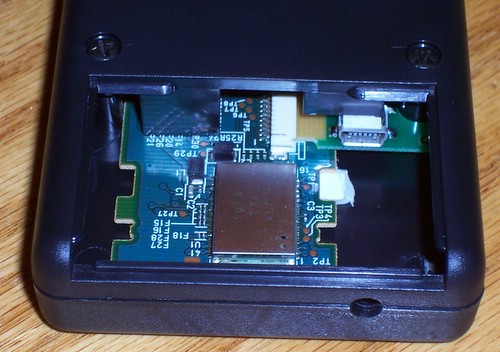
Step 9 – Install cover. There are 4 screws that hold the enclosure together. If you look closely at the picture, you’ll see that there are plastic tabs which are pushing down on the circuit board and mini-USB connectors. Things should be a nice snug fit, but no force should be required to make it come together. Snap on the “battery” door and you’re done.
There are two options for providing power to the unit. If you happen to have a set  top box or similar that has an always on USB port, you can use that as a power source. The PS3 does have USB ports, but they are not powered when the PS3 is off. I used an external power adapter, specificaly the one mentioned in the IR4PS3 manual from The Source (Canada’s RadioShack). There were two parts I needed to buy, catalog numbers 2731755N and 2731704. The adapter is listed as 500mA 3V, but when I measured – it was putting out a healthy 7.1 volts.
 Since you do need to assemble the two parts of the power supply, make sure you get the polarity correct. This is well documented in the manual – and should be clear from the picture on the left.
The power requirements seem to be fairly flexible, it can be powered by a 3V to 9V DC power supply of at least 100 mA. Several other external power options are specified in the manual.


One thought on “IR4PS3 Review”