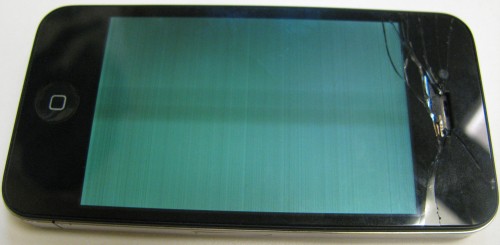
I had the chance to help out with a neighbours iPhone 4 that had a broken screen. This gave me an excuse to pick up the pentalobe screwdriver to add to my collection of useful tools. The phone came to me in the state shown at the top of this post, the screen would light and you’d get lines as the image but the touch functions seems to be non-responsive. The phone was still working and you’d hear text message notifications and the like, I didn’t bother to plug it into a PC but I’m certain you could still sync it to a PC.

The pentalobe screwdriver is essential for opening up the iPhone. Those screws are really, really small. Disassembly is pretty straight forward, I made use of a pair of YouTube videos to help me out: the first video covers both tear down and rebuild; the second one is shorter and covers only the tear down.
Immediately after removing the back cover, I was amused to find the following warning:

If you’ve gone to the trouble of removing those darn screws, is a little plastic tab with a warning really going to deter you? At this point in the disassembly I started to get the feeling that I wasn’t the first person to have ventured inside of this phone. The plastic tab with the warning actually was busted off already, the battery wasn’t very tightly glued in and the water damage dot was entirely missing.
Once you’re inside the back cover a small Phillips screwdriver will handle almost all the screws. In my case the correct sized Phillips came along with the pentalobe. In the second video they talk about a single screw needing a small flat head jewellers screwdriver, this puzzled me until I got to that part of the disassembly. A rather ‘large’ small flat head is all I needed.

You can see the screw that needs this flat head in the center of the picture above, it’s looks like a big plus sign with a hole in the middle. The 3.5mm jack is visible in the picture.
To replace the screen you need to work your way through from the back of the phone to the front, this requires taking almost everything out of the phone. At this point it was clear that not only had someone been in this phone before, but that they had skipped over some of the reassembly steps. The screen should be fastened with 10 screws, this phone only had 7 and one of those that has a washer was missing the washer.
In my case, it turns out this phone had already had a replacement screen put in so there wasn’t any glue / stickiness holding the screen to the frame. Removing the two ribbon cables is a little fiddly, take your time and they’ll side out easily.

Re-installing the screen be very careful of the ribbon cables. It is very easy to get them pinched behind if they are not pulled through completely. If you don’t have them complete through they will not stretch far enough to connect to the motherboard. There is barely any slack in the ribbon cables, so if they are not routed correctly they simply won’t reach. This is one of those things that you can’t rush and taking your time when doing the disassembly (and taking pictures) can be a big time saver when re-assembling.
This was the 1st time I’d done this type of repair and it took me a little over 2 hours. I did fail to get one of the screws to install, it felt like the hole had been stripped. I’m not sure this was me or the previous repair job, but I still was frustrated to have it happen. Oh yeah, and work on a surface that will help you find those tiny little screws, even if you drop them – I worked on the floor with really good lighting and no clutter around me.
Unfortunately a bit over a week later I was back inside the same phone. Apparently while it looked and worked fine once I was done, over the next couple of days it started to exhibit ‘strange’ behaviour: fuzzy screen, non-working screen. These problems could be resolved by giving the phone a whack, but sometimes the whack caused it to be worse. Finally after one whack too many the screen went dark and that was it. [Please, don’t whack things to fix them!]
I was hopeful that it was simply a loose connector, but after reseating the various connectors I wasn’t able to bring it back to life. The owner took the phone to a repair shop that replaced the screen again and commented that some of the ‘knock off’ replacement parts had this type of problem.
In summary – I can’t claim that I really fixed it, but it was fun taking the phone apart and putting it back together again. I’ve got the tools I need now, and the experience. I was also pleased to find out that the 4 / 4s screens are fairly cheap, even locally. The screen for the 5 is much more expensive.


