

The Bluemix platform is expanding from being a simple Cloud Foundry (CF) based PaaS, to one with a range of runtime platforms. Today you can pick one of: app, container or virtual machine (VM). I like to think of this as a continuum, sometimes you want the simplicity of an application – or the control of a virtual machine. The decision is really based on a number of factors, but as you gain more control over the environment you also take on more responsibility for securing and maintaining the environment.
If you don’t have a Bluemix account, then you’ll need one (there is a free 30 day trial).
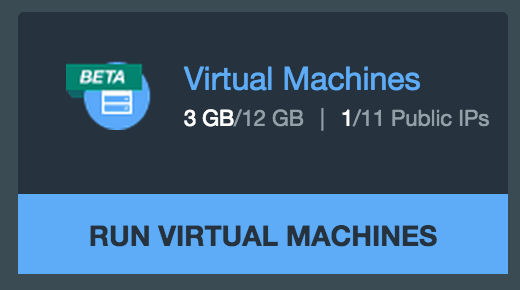
From your bluemix dashboard you should see the Virtual Machine (beta) button. Click on the Run Virtual Machines tile.
This in turn will take you to a sign up page which will allow you to submit a request to be enabled for VM access. Within a few minutes you should receive an email thanking you for your interest in virtual machines on Bluemix.
Now you must be patient while the elves that run the service get things ready and then send you another email indicating “You are now ready to start creating virtual machines on Bluemix!” — once you get this you’ll be ready to go. It’s probably worth emphasizing the point that this is a service in BETA, so getting access might take some time, patience is a virtue.
Now let’s look at what it takes to create a VM on Bluemix. Login to Bluemix and click on the Run Virtual Machines tile (same path we took to sign up for access to the service). You should arrive at this screen
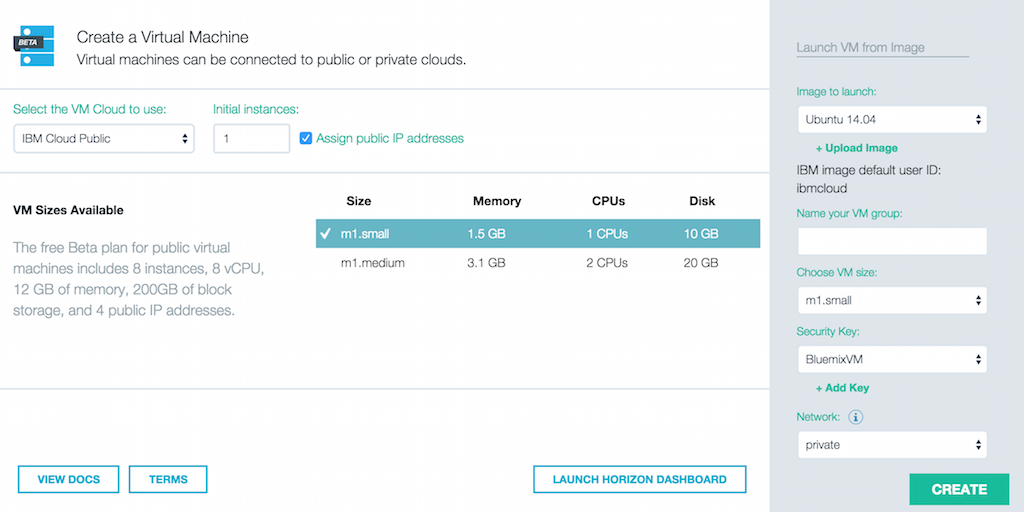
As this will be your first time, you’ll need to add a security key. This screen capture shows my key named “BluemixVM”. To add a key, click on the +Add Key which appears under the Security Key box. You can choose to import or create a key. The easy path is to create a key – which will trigger the download of a key in your browser. I used BluemixVM as the key name and the file that was downloaded was BluemixVM.pem.
You can also upload an existing image – but to keep things simple, let’s pick Ubuntu 14.04 from the set of images that are available.
The last thing you need is to “Name your VM group” – for this post I’ll pick RooVM. Then it’s simply a matter of pressing the Create button. There are other options for size etc, but you can play with those another time.
[Insert Jeopardy ‘think’ music here..it’ll take a couple of minutes]
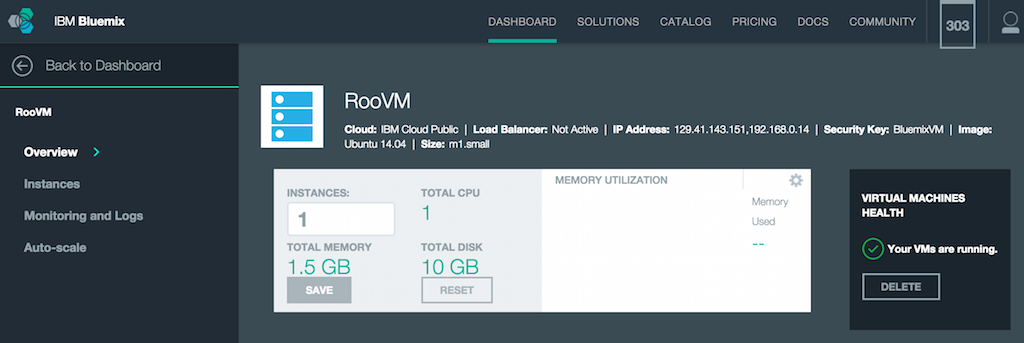 So now we have a VM running in the cloud! You can see a public IP address has been assigned and it is using our BluemixVM security key.
Now let’s login, I’ll show examples from a linux machine and leave other OSes as an exercise for the user.
|
1 2 3 4 5 6 7 8 9 10 11 12 13 14 15 |
$ ssh -i BluemixVM.pem ibmcloud@129.41.143.151 The authenticity of host '129.41.143.151 (129.41.143.151)' can't be established. RSA key fingerprint is 76:00:7e:b3:77:4f:37:fd:ca:5f:6b:a8:a0:8f:7f:66. Are you sure you want to continue connecting (yes/no)? yes Warning: Permanently added '129.41.143.151' (RSA) to the list of known hosts. Welcome to Ubuntu 14.04.1 LTS (GNU/Linux 3.13.0-24-generic x86_64) * Documentation: https://help.ubuntu.com/ The programs included with the Ubuntu system are free software; the exact distribution terms for each program are described in the individual files in /usr/share/doc/*/copyright. Ubuntu comes with ABSOLUTELY NO WARRANTY, to the extent permitted by applicable law. |
So now you’ve got a ssh session into the cloud based VM.
There are a couple of things you might want to do:
Let’s run a quick update to make sure that we’ve got all the latest patches
|
1 |
$ sudo apt-get update && sudo apt-get upgrade |
Set the default shell for your ibmcloud user
|
1 |
$ sudo vi /etc/passwd |
and change the last line to look like this
|
1 |
ibmcloud:x:1000:1000::/home/ibmcloud:/bin/bash |
Let’s also install my favourite shell mosh.
Mosh
(mobile shell)
Remote terminal application that allows roaming, supports intermittent connectivity, and provides intelligent local echo and line editing of user keystrokes.
|
1 2 3 4 |
$ sudo apt-get install python-software-properties $ sudo add-apt-repository ppa:keithw/mosh $ sudo apt-get update $ sudo apt-get install mosh |
The VM image we’re using has an iptables firewall. However, ufw is also installed and being used to manage the firewall — the nice thing about ufw is that by default it will persist our changes. Mosh uses the same ports as ssh, but it additionally uses some UDP ports.
|
1 |
$ sudo ufw allow 60000:60020/udp |
Note: the mosh installation appears to add some rules to /etc/ufw/applications.d but I don’t understand why ufw isn’t picking those up. Manually adding them as above works fine.
Now you can use mosh to connect (assuming you have mosh installed on your local laptop)
|
1 |
mosh --ssh='ssh -i BluemixVM.pem' ibmcloud@129.41.143.151 |
You still might want to combine mosh with tmux or screen as mosh doesn’t provide a scroll back buffer.
Last tweak – you might have noticed that sudo is providing a warning every time you use it
|
1 2 |
$ sudo ls sudo: unable to resolve host roovm-40273122 |
This is because the /etc/hosts file is badly formed. Edit it such that your hostname appears on the second line (we could probably replace ubuntu, but this is easy and won’t break anything). Below is my modified file
|
1 2 3 4 5 6 7 |
127.0.0.1 localhost 127.0.1.1 ubuntu roovm-40273122 # The following lines are desirable for IPv6 capable hosts ::1 localhost ip6-localhost ip6-loopback ff02::1 ip6-allnodes ff02::2 ip6-allrouters |
Now sudo executes without warning.
Footnote: this is a BETA service, don’t be surprised if some of what I show above does change. Please provide feedback via comments to this post and I’ll update accordingly.