Wiistar HDMI Audio Extractor teardown (WS-E11B)

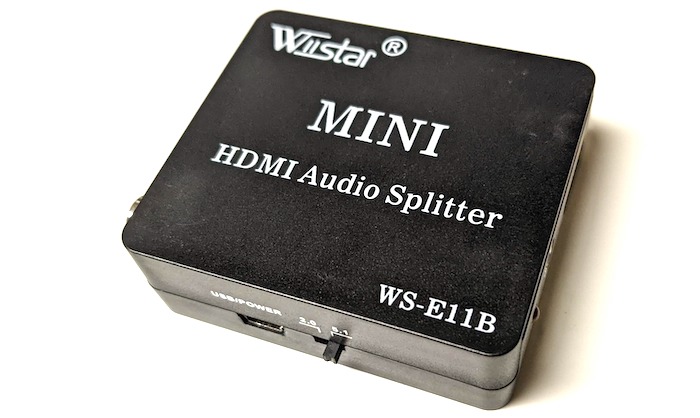
Back in 2020 I moved to a Roku Premiere as my primary streaming device. As my audio gear is older (pre-HDMI) I required something to split out the audio from the HDMI signal and the Wiistar HDMI Audio Extractor was a good fit.

At the time I mentioned that the device was a little suspicious, but it worked and kept working just fine for some time. After a year of trouble free operation, I did have a couple of times when the box would give up and pulling the power and rebooting it seemed to fix things. Stuff happens, no problem.

More recently it’s been acting up a lot. Blanking out, then coming back or not. Tapping or banging on the case seems to help ‘fix’ things temporarily. It appears that there is something not quite right with the power connection. This meant it was time to take things apart!

There is a horizontal seam on both sides of the device, you can see it right by the mini-USB connection and the switch. By pressing with a knife blade on this seam, I was able to un-snap the sides. This took a little doing, but was pretty easy. Some gentle wiggling freed the circuit board from the snap case.

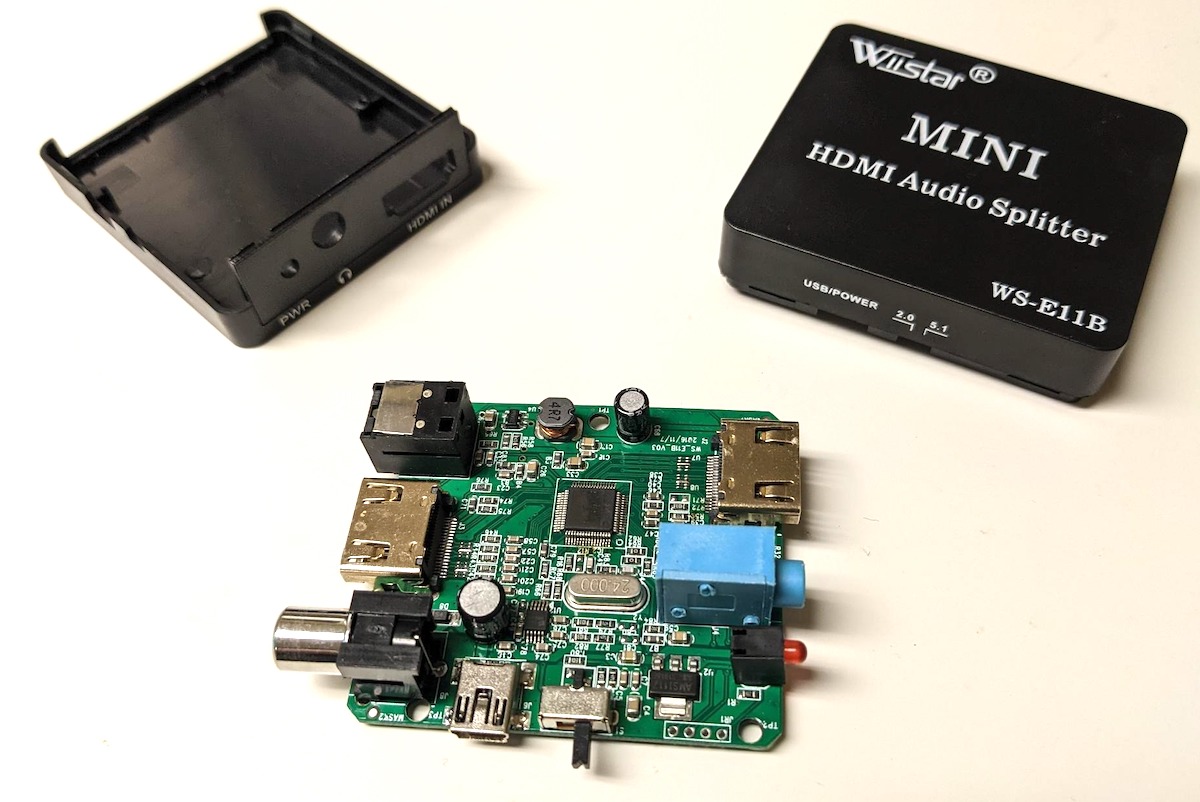
No surprises here. It’s a single chip solution, likely decode HDMI, re-encode HDMI. There is likely a small audio amplifier circuit here to feed the 3.5mm jack. It’s pretty amazing that you can get something like this for the price.

The USB-mini power jack seems to be well affixed to the circuit board (no bad joints). I inspected the cable as well, and it looks to be a power only cable – only two pins on the plug. I tried adjusting the connector fit a little which might help my power problem (and I could have done from the outside of the case).

Then I took a closer look at that one chip..

Yup, that’s a blank, unbranded chip. I’m guessing this is a chip that failed QC and was discarded or sold off as seconds. Bunnie wrote about counterfeit chips which will give you an idea of how this chip may have ended up being used. In this case, they aren’t even trying to fake the chip – they just are trying to use one that was cheaper.

Well – it was interesting to open it up which turned out to be easy. I may have improved the power connection, but first try and it’s not working. Meanwhile I’ve ordered an AmazonBasics HDMI audio extractor as a replacement. The AmazonBasics device has a lot of (mostly) positive reviews. There is a youtube video teardown which while it’s terrible, does give a peek inside. There seems to be QC stickers on the circuit board, and the underside of the case appears to have FCC logos etc.

It’s likely a very similar solution, also needing a 5V 1A power supply. The pictures show you powering it from a laptop USB port, which is only going to provide 500mA – so there is some suspicious stuff going on here too with the marketing. Also, I suspect based on the comments it accepts up to 4k input, but can only output 1080p – which is fine for my needs.

Knowing when to update your docker containers with DIUN

DIUN – Docker Image Update Notifier. I was very glad to come across this particular tool as it helped solve a problem I had, one that I felt strongly enough about that I’d put a bunch of time into creating something similar.

My approach, was to build some scripting to determine the signature of the image that I had deployed locally, and then make many queries to the registry to determine what (if any) changes were in the remote image. This immediately ran into some of the API limits on dockerhub. There were also other challenges with doing what I wanted. The digest information you get with docker pull doesn’t match the digest information available on dockerhub. I did fine this useful blog post (and script) that solves a similar problem, but also hits some of the same API limitations. It seemed like maybe a combination of web scraping plus API calls could get a working solution, but it was starting to be a hard problem.

DIUN uses a very different approach. It starts by figuring out what images you want to scan – the simplest way to do this is to allow it to look at all running docker containers on your system. With this list of images, it can then query the docker image repository for the tag of that image. On the first run, it just saves this value away in a local data store. Every future run, it compares the tag it fetched to the one in the local data store – if there is a difference, it notifies you.

In practice, this works to let you know every time a new image is available. It doesn’t know if you’ve updated your local image or not, nor does it tell you what changed in the image – only that there is a newer version. Still, this turns out to be quite useful especially when combined with slack notifications.

Setting up DIUN for my system was very easy. Here is the completed Makefile based on my managing docker container with make post.

I started very simply at first following the installation documentation provided. I used a mostly environment variable approach to configuring things as well. The three variables I need to get started were:

  • DIUN_WATCH_SCHEDULE – enable cron like behaviour
  • DIUN_PROVIDERS_DOCKER – watch all running docker containers
  • DIUN_PROVIDERS_DOCKER_WATCHBYDEFAULT – watch all by default

Looking at the start-up logs for the diun container is quite informative and generally useful error messages are emitted if you have a configuration problem.

I later added the:

  • DIUN_NOTIF_SLACK_WEBHOOKURL

in order to get slack based notifications. There is a little bit of setup you need to do with your slack workspace to enable slack webhooks to work, but it is quite handy for me to have a notification in a private channel to let me know that I should go pull down a new container.

Finally I added a configuration file ./data/config.yml to capture additional docker images which are used as base images for some locally built Dockerfiles. This will alert me when the base image I’m using gets an update and will remind me to go re-build any containers that depend on them. This use the environment varible:

  • DIUN_PROVIDERS_FILE_FILENAME

My configuration file looks like:

I’ve actually been running with this for a couple of weeks now. I really like the linuxserver.io project and recommend images built by them. They have a regular build schedule, so you’ll see (generally) weekly updates for those images. I have nearly 30 different containers running, and it’s interesting to see which ones are updated regularly and which seem to be more static (dormant).

Some people make use of Watchtower to manage their container updates. I tend to subscribe to the philosophy that this is not a great idea for a ‘production’ system, at least some subset of the linuxserver.io folks agree with this as well. I like to have hands on keyboard when I do an update, so I can make sure that I’m around to deal with any problems that may happen.


Hacking an old HP Chromebook 11 G5

When it was time to get one of the kids a Chromebook for school years ago, I made sure to purchase a 4GB memory model with an Intel chip. I’m a fan of ARM devices, but at the time (6+ years ago) there was some real junk out there. There was also a price factor and I was looking at the lower end market, durability was also a concern.

I remember the Dell Chromebook 11″ was a hot item back then, but the pricing was higher than I wanted. Same for the Lenovo Chromebooks. After a bunch of searching around I found a nice HP Chromebook 11 G5 (specs) – if my memory is correct I got this well under $300 at the time.

This HP 11 G5 worked well, survived a few drops, and made it until it’s end of life – when Google stops providing OS updates. I’ve since replaced it with a nice Lenovo IdeaPad Flex 5 Chromebook – a nice step up, and there was a refurb model available for a great price (under $350).

For a long time there has been Neverware CloudReady – a neat way to get ChromeOS on old laptops. I always worried that there were security concerns with some random company offering ‘Google’ logins, but Neverware worked well. Google has since bought CloudReady, and seems to have turned around and created Chromeos Flex as the successor.

I figured that I could use Chromeos Flex on the HP 11 G5 to continue to get updates. Another solution would be to look at turning it into a GalliumOS machine. I actually have another old 14″ Chromebook I have run GalliumOS on, but have since moved to Linux Mint and use it as a generic Linux laptop.

I would recommend reading through the GalliumOS wiki information carefully to learn about the process of converting a Chromebook into a useful generic low end laptop. Specifically the Preparing section, a review of the Hardware Compatibility section and Firmware sections. Inevitably you’ll also end up on MrChromeBox’s site – which is where you’ll get the firmware replacement you’ll need.

While you can in some cases get alternative firmware running on the Chromebook hardware, it’s much easier if you go remove the hardware write protect. There wasn’t a specific guide to doing this, but the iFixit site was useful for the tear down aspect.

You will want to remove the black screw pointed at by the arrow. It’s near the keyboard ribbon cable connector. This is the hardware write protect.

Once I’d done this, it was simply a matter of installing the
“UEFI (Full ROM) firmware” using the MrChromeBox scripts. This is not for the faint of heart, and I do recommend making a backup of the original firmware in case you want to go back.

At this point you can install any old OS distribution you want. In my case I wanted to install Chromeos Flex, so I’d downloaded that and created a USB drive with it ready to roll. Installing it on my newly firmware updated Chromebook was easy.

I then ran into trouble. While Chromeos starts up fine, it was quickly clear that sound didn’t work. The video camera was working fine, but I couldn’t get any output or input for sound. I found that others had this same issue. I even tried using wired headphones (same problem) and bluetooth headphones (sound out was fine, sound in didn’t work at all)

This is a bummer, but understandable. Chromebook hardware is not really the target for Chromeos Flex. I figured it was worth trying out a generic Linux distro, so I picked Linux Mint. Booting from a USB drive with Mint on it was again easy with the new firmware. Sound output worked fine, as did web cam video – but the mic was still a problem, again something others had discovered.

At this point Chromeos Flex was a dead end. I can’t give someone a Chromebook that doesn’t have audio in or out and no reasonable work-arounds to get there. Installing Linux won’t trivially solve the problem because I get sound out, but no mic.

Remember when I said it was a good idea to backup the original firmware? Yup, we’re returning this Chromebook to stock (but I’ll leave the write protect screw out – because why not?). The MrChromeBox FAQ walks you through restoring that firmware. Since I had Linux Mint on a bootable USB I just used that to start up a shell and pull the script. Once I’d restored the stock firmware, I needed to build a ChromeOS recovery image and then return to a totally stock setup.

Now this old HP 11 G5 Chromebook has all of it’s features working, video, sound, mic.. but is trapped on an expired version of ChromeOS. Eventually the browser will become annoyingly old and at that point you’ll have to decide between the limitations of the browser, or losing your mic (and possibly sound).