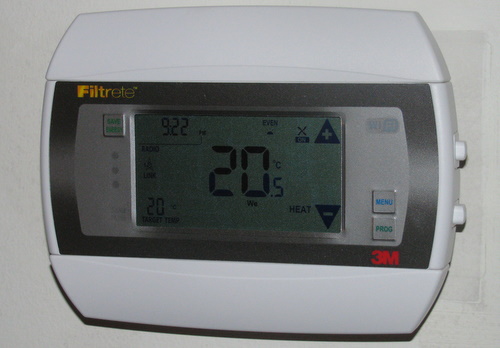
I came across this particular wifi enabled thermostat a year or so ago, unfortunately they are not available in Canada. I’d guess this is simply the additional headache of bringing an electronic device to market in Canada (yes, different hoops than what is needed in the USA) and the market size. On my last trip to the states I took the opportunity to drop into a HomeDepot and pick one up. There was only 1 unit in the entire city I was in (I had to go to both HomeDepot stores!) – so you may have trouble getting one even if you live in the US, I suggest you call ahead.
The sales pitch on having your home thermostat wifi enabled is to make it simpler to program, and easier to adjust from anywhere in the house or out of the house. When we leave on vacation, turning down the heat and reprogramming the 7 day schedule is pretty low on the priority list. Being able to do so from the hotel over the internet would be handy. I’m looking forward to the ability to pull out more statistics from the device and surface them in graphs, for example yesterday my furnace was on for 4hrs 47mins and today it ran 2hrs 46mins (it was much warmer today).
Most of this post will discuss the installation process, as this is primarily my experience with it so far. Some of this will be specific to my particular install but I’ll try to walk you through the process I used to arrive at a successful result. If you want to stop reading here the short version is that it’s pretty cool, you probably want one.
The first step is to read (or at least flip quickly) through the manuals included. The packaging strongly indicates you need a C wire, the manual lists it as optional. The C wire is required, don’t get confused by the manual. Next take a look the wiring for your existing thermostat.
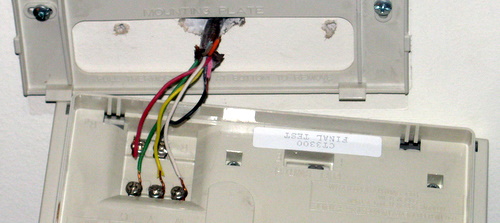
The good news is that the wire coming out of the wall has more than enough conductors to carry a C wire if I need to add one. The bad news is that I’m standing there scratching my head because I don’t really understand the current wiring. My existing thermostat is a Honeywell MagicStat CT 3300 for which I was able to easily find a manual online. This helped me identify the wiring that was connected.
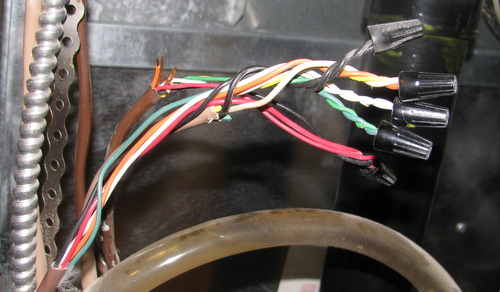
Next stop is to go take a look at the furnace, to map the other end of the wires. Unfortunately between the furnace and the thermostat I found this, something I’ll call the mess-o-wires.
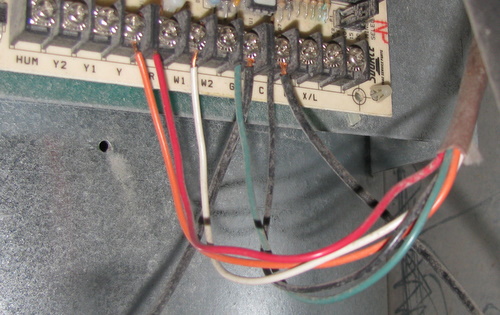
The mess-o-wires ties in my A/C unit to the furnace and the thermostat. Opening up the furnace I get to the control board where the wiring starts.
So basically I have my furnace, connected to a wire A, this in turn heads to the mess-o-wires, then connects to wire B, this runs upstairs to the thermostat. Mapping the wire colors and connections results in the following table. The last column is the CT3300 hook ups. I also found a helpful reference to understand what the wiring names were.
| Color | Wire A | Wire B | CT 3300 |
| Y | orange | yellow | Y |
| R | red | red + black | Rh + Rc |
| W1 | white | white | W |
| G | green | green | G |
| C | black |
This lead to an ah-hah moment. So I’m basically running in a 4 wire mode at the thermostat W Y RH G. The RH and RC are bridged back in that mess-o-wires. Knowing this helped me map to the 3M-50 manual for how to properly hook things up. The solution is that I need to fix the mess-o-wires to allow the C wire to run up to the thermostat using the black wire. Let me stress that this is unlikely to be your solution, but the process of wire tracing and mapping should help you understand your current setup and how to perform the install. If this is over your head, call your furnace service folks to do this part.
Once I was past this part, the actual installation went very smoothly – just follow the manual. The wifi unit ships along with the unit, but is not installed and the manuals don’t seem to reference it beyond providing a URL: www.radiothermostat.com/wifi. I inserted the wifi module while the thermostat was on and running, it seemed to handle that just fine. When you do visit www.radiothermostat.com/wifi you’ll find a friendly 3 step process:
- Register for an account on the web
- Verify Thermostat Installation
- Use laptop to connect your thermostat to your local wifi, and then to the internet
It’s not really three steps since step three contains more sub steps. My notes are a bit sketchy here, but it didn’t seem to provide much in the way of hand holding – they assume you know what you’re doing when it comes to wireless setup. At this point I’ll deviate from how I did the setup and talk about the iOS app. If you have an iDevice, then you should do step 3 above entirely using it. I’m not sure how smoothly a second iOS device will work out as it seemed that I was forced to re-setup the wifi connection (step 3) on the iPad even though it seemed to be working fine over a web browser. (again my notes are a bit rough as to what happened) I’m certain you can have multiple iOS devices, you just might have to go through the setup phase more than once.
There is also an Android app. This seems to be poorly advertised as I only found it while writing this post, they should really add it to the website. Adding the app to my phone and logging in, I’m able to view my thermostat without any network re-setup required. So my iOS app experience above of needing to re-setup the wifi must have been due to some other issue I was having.
I will say that I really like the wireless configuration approach. Much better than the Logitech HarmonyLink mess with a USB cable and browser plugins. The HarmonyLink could easily adopt this style of setup – creating an ad-hoc network to do the wireless configuration. The thermostat generates a 5 digit verification code to ensure that it’s really you, the HarmonyLink could simply flash the led to give you a verification pattern.
For some reason Chrome didn’t seem to work to create an account. Switching to Firefox solved this. After I had created the account, Chrome worked just fine. In fact, the website has a reasonable mobile layout as well. So a strike against them for doing something odd with account sign ups, but kudos for getting it mostly right no matter what device you visit the website with.
The iOS app is very simple, it lets you control the basic functions: temperature up/down; home/away; fan on/off/auto; heat/cool. You cannot set a schedule with the app it seems. The schedule can be set on the device (but who would do that?) and via a full web browser. The mobile version of the website is limited in a similar manner as the iOS app. The Android app appears to offer the same functions as the iOS app.
Configuration of Celcius vs. Fahrenheit is supported by the web/iOS/Android app in a single setting. The physical display on the thermostat requires you configure this as is shown on this youtube video. This had me puzzled for a bit until I found the video link, it is also mentioned in the FAQ.
There is a developer API available and folks who’ve created impressive private versions of a web UI. Interesting that temperatures are all Fahrenheit in the developer API, so I assume that’s how it is stored internally. I’ll certainly be experimenting in this direction when I have some time. The forums seems to be fairly active and have some good content in them from the quick browsing I’ve done.

