You can run, but you can’t hide from the cloud

Excited about my new Android based phone, I wanted to get it setup with my address book.

Now, one of my criteria for a cell phone is to be able to sync my contact information with a computer.  My Nokia 6585 supported irDA and could sync with my thinkpad.  When I replaced that phone with the Nokia 5310 I was able to sync over bluetooth.  Now I need to figure out how to get the data to and from my G1.

By default, the answer with an Android handset is to use Gmail Contacts.  Android is setup to guide you down the path of full Google integration, even asking you to setup the association during the phones initial setup.  Initially I wanted to avoid this route as I run my own mail server and prefer to keep my data on servers that I own (its a hobby, I know its the hard path).  I figured it couldn’t be that hard to sync the phone to my Ubuntu desktop.

One solution that looked possible was Funabol. I may still play with this, but before I even got to the point of setting up a synchronization server I ran into the problem of moving my address book data from Windows to Linux.  The Nokia PC Suite let me store all of my contacts into the Windows Address Book, and iTunes could also sync with this so my contacts were all on my iTouch.  It should be a simple thing to take the Windows Address book and move it into Linux right?

There were two problems.

  1. Windows Address book has a death grip on your data and won’t export it into a useful format.
  2. Linux has no reasonable address book story, Evolution seems to be close – but it won’t easily import anything that Windows will export.

The solution turned out to be Google. iTunes will happily sync to Google contacts.  Evolution will also sync to Google contacts.
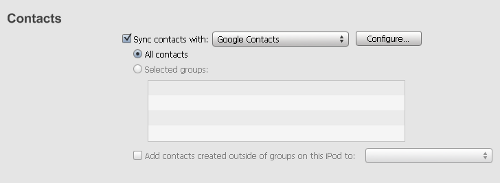
Setting up iTunes with your Google account is straight-forward.  You just choose Google Contacts, punch in your credentials and away you go.  As my iPod Touch had lots of contact information and my Gmail account had very little, the large scale change was detected – and I was given the choice to over-write or merge (I wanted to merge).  Once the data was in Gmail, going into the Settings on the G1 and configuring the Data synchronization for Contact information let the bits flow down to my new phone.

It turns out Google has the best Linux friendly address book, better than any of the stand-alone solutions I looked at. Today the cloud won.

Google Android Dev Phone 1

I’m stoked – I’ve got a G1!  This is actually a Google Android Dev Phone 1 that I purchased second hand from a friend.  Back in January 2009 I had a chance to play around with one of these while in California (borrowed from a Googler who got it from work), my impression then was “ok, neat – but its basically a computer in your hand” – a different reaction than what I had with the iPhone.  At the time both were at a premium price and I had only recently bought my Nokia 5310.  Between then and now I bought an iPod Touch that I have enjoyed a lot yet had nearly endless frustration with iTunes.

My G1 is running cyanogenmod v4.2.15.1.  The hardware is very similar to the iPhone/iPod Touch.  CPU is 528MHz ARM 11, 192MB RAM, 320 x 480 capacitive touch screen. One bonus feature is that this version of the phone supports AWS/1700megahertz/BandIV which is the frequency that WindMobile is using in Canada (T-Mobile uses this in the US).

Today my service provider is Fido.  I’m on the $15 plan ($16.95 after taxes), this is sufficient for my phone usage as I’m a light user. Unfortunately it doesn’t include call display or voicemail (+$10 option), nor is any data included.  The phone had been wiped and reset when I got it, and I needed to get past the “Welcome to T-Mobile G1” screen.  Unfortunately the built in menus only provide the option to configure an APN.  Not wanting to incur any data charges (last time I did this on my 5310 it was $12 for a few hundred kb!) – I wanted to figure out how to hack around this.

Not surprisingly I was able to find a solution online that allows you to activate your G1 without using any mobile data.  I’m using Ubuntu 9.10 (and the phone is running cyanogenmod) so the directions there were not exactly what I needed, so I’ll briefly repeat them here with the changes.

1) Grab the Android SDK. Install it following the directions, which really boils down to extracting the archive.

2) Now we’re going to modify /etc/udev/rules.d to give normal users (ie: you) permission on the USB port the phone will use.
Create the file /etc/udev/rules.d/50-android.rules with the contents (permissions 644).

SUBSYSTEM==”usb”, SYSFS{idVendor}==”0bb4″, MODE=”0666″

$sudo restart udev

You can skip this step if you want to run steps 4 and 5 as root.

3) Connect the phone and your PC using a USB cable.  The phone does need a SIM card installed.  Boot the phone.

4) Now we run <install path>/android-sdk-linux_86/tools/adb devices to check if we’re properly connected to the device

$ ./adb devices

List of devices attached
HTxxxxxxxxxx device


(where the x’s are your actual device number)

5) Now back to the phone, tap on the “Welcome to T-Mobile G1” screen to get to the setup page.  Then issue the following command on your PC from the tools directory:

$ ./adb shell

# am start -a android.intent.action.MAIN -n com.android.settings/.Settings

The “am” command is actually executing on the phone itself.  This should start up the configuration dialog that allows you to setup a wireless 802.11b/g network.  After this point it should be pretty self explanatory to get yourself setup with the phone.

The screenshot in this post was done using the Android SDK as well.  I’m sure I’ll have more to say about Android and this phone soon.