Today it’s fairly typical to have an always on, high speed internet connection. Many geeks like myself will run a Linux box 24/7 at home that acts as a file server, media server, and possibly a few other roles like email and web. Enabling ssh access it extremely handy for when you’re away from home, not only does it give you secured shell access but it enables tunneling over ssh. A secondary but also valuable ability of this type of setup is online file storage that is on hardware you own (or more specifically, not owned by someone random).
You might want to enable friends of yours to also enjoy the benefits of having online file storage, but you might not want them tinkering around inside your system with full shell access. Whatever the reason for your paranoia, scponly is a great solution.
scponly is an alternative ‘shell’ (of sorts) for system administrators who would like to provide access to remote users to both read and write local files without providing any remote execution priviledges. Functionally, it is best described as a wrapper to the tried and true ssh suite of applications.
It is quite easy to install and configure scponly on Ubuntu:
$ sudo apt-get install scponly
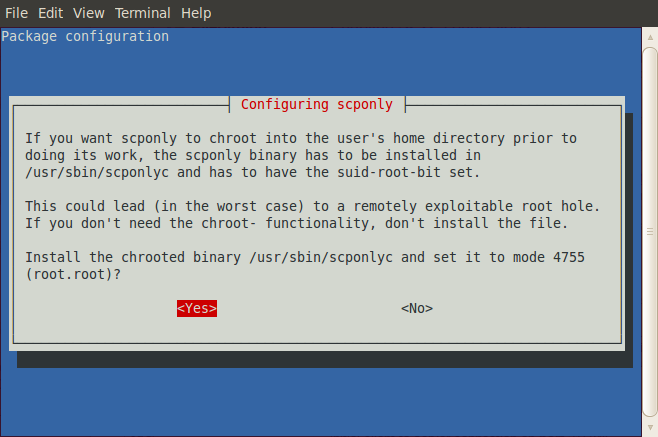
During the package configuration step that is triggered automatically on the install, you’ll be asked if you want chroot or not.
While the warning appears to be quite dire, choosing yes has some advantages. In a chroot jail the apparent root directory is modified, this limits the users visibility to the filesystem – often to their home directory. The security warning is due to the implementation of scponly needing suid-root privileges in order to create the chroot jail. You need to assume that the scponly code doesn’t contain any potential exploits, a trade off for the reduced filesystem visibility that in turn increases system security. In the end, as scponly is wrapping the well known and validated ssh suite we’re in a fairly good place.
Next we need to uncompress and modify the setup helper script to be executable:
$ cd /usr/share/doc/scponly/setup_chroot

$ sudo gunzip setup_chroot.sh.gz

$ sudo chmod +x setup_chroot.sh
Use the helper script to create a chroot restricted user (frank).
$ sudo ./setup_chroot.sh
Next we need to set the home directory for this scponly user.

please note that the user's home directory MUST NOT be writeable

by the scponly user. this is important so that the scponly user

cannot subvert the .ssh configuration parameters.
for this reason, a writeable subdirectory will be created that

the scponly user can write into.
-en Username to install [scponly]

frank

-en home directory you wish to set for this user [/home/frank]
-en name of the writeable subdirectory [incoming]

backup

-e

creating /home/frank/backup directory for uploading files
Your platform (Linux) does not have a platform specific setup script.

This install script will attempt a best guess.

If you perform customizations, please consider sending me your changes.

Look to the templates in build_extras/arch.

- joe at sublimation dot org
please set the password for frank:

Enter new UNIX password:

Retype new UNIX password:

passwd: password updated successfully

if you experience a warning with winscp regarding groups, please install

the provided hacked out fake groups program into your chroot, like so:

cp groups /home/frank/bin/groups
In the above I provided a username (frank) and I accepted the defaults except for the writeable subdirectory (backup) and password.
On my test system, an Ubuntu 11.04 (Natty) desktop install I wasn’t able to connect using scp, or sftp.
$ scp testfile.txt frank@desktop:testfile.txt

frank@desktop's password:

unknown user 1001

lost connection
It turns out I was hit by a reported problem, and it was a simple matter of copying some missing files into the chroot jail:
$ sudo cp -av /lib/i386-linux-gnu/libnss_files* /home/frank/lib/i386-linux-gnu/
Now everything worked. I could scp, sftp and mount using sshfs (one of my favorite utilities).
Bonus round
If you want the writeable subdirectory to be the default directory, simply modify the system /etc/passwd file to have a double slash followed by the directory:
frank:x:1001:1001::/home/frank//backup:/usr/sbin/scponlyc
Changing the password is also supported by scponly:
$ ssh -t frank@desktop passwd


