Like many folks my internet connection is connected to a router/gateway. The router acts as the hub of my internal network providing both access to other machines on my local network as well as the internet. In my case I have a SpeedTouch 516 DSL modem, plugged into a Linksys WRT54GL router/gateway, and an assortment of PCs plugged into the router.
If you have a single PC, then it makes sense to plug your DSL modem directly into your computer. This has the advantage of making it easy to talk directly to your DSL modem for configuration (usually via a web interface on the modem itself). Some modems provide various statistics about your connection. There is also a tool called DMT which gives you a nice graphical interface to the data.
Now if your network is at all configured like mine, you can’t easily talk to the DSL modem since the router is in the way. Assuming you are running the alternate router firmware DD-WRT, there is a solution that will expose your DSL modem to your network.
You need to gather two bits of information about your DSL modem, and the easiest manner to do this is to plug it directly into a PC via an ethernet cable. The modem should act as a DHCP server and hand out an address to your PC. You want to collect both the IP (cilent) address that your PC was assigned, and the gateway address (the IP of the DSL modem).
In my case I had:
client IP address 192.168.1.64

gateway IP address 192.168.1.254
Then we telnet to the DD-WRT enabled Linksys box (yup, telnet is always enabled for the local network). You log in using user root (even if you have changed the web interface user name) and the password you use for the web interface.
We are going to temporarily modify the routers configuration with the following two commands:
/sbin/ifconfig vlan1:1 192.168.1.64 \

netmask 255.255.255.0
/usr/sbin/iptables -I POSTROUTING -t nat -o vlan1 \

-d 192.168.1.0/24 -j MASQUERADE
If you want to make this more permanent, the DD-WRT wiki has some instructions on how to do this along with a few more details as to what we’re doing in the commands above. Assuming all went well, we can now visit the DSL modem’s web interface at http://192.168.1.254 – do this to validate that you’ve got things working ok.
Now we go grab a copy of DMT (this is a windows only program). For the SpeedTouch 516 you want version 7.35. By running this on a windows PC connected to your network, you should get some data out of your DSL modem in a nice graphical form.

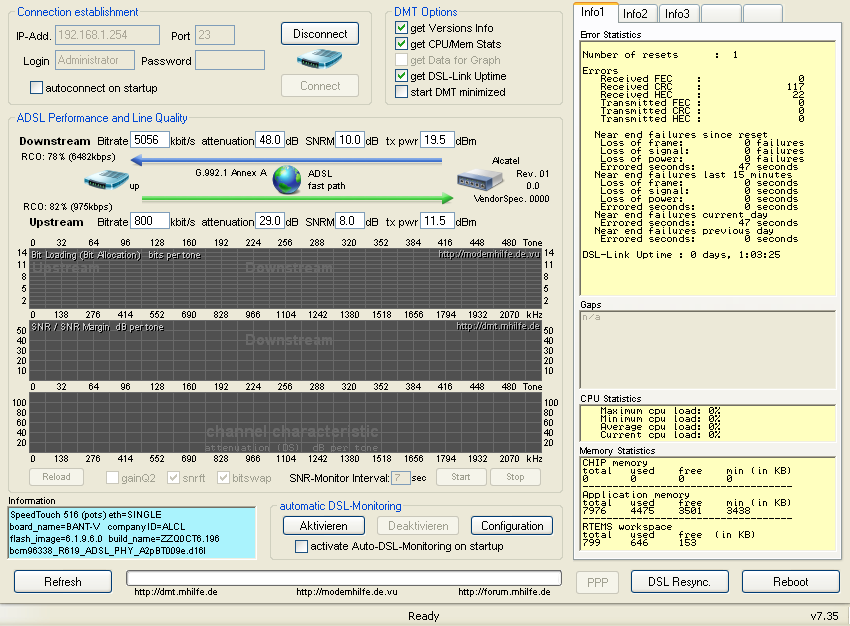
So neat-o, we’ve got some nice data here. What does it mean? A good reference can be found here – let’s look at my results using that reference. The downstream attenuation of 48.0dB falls into the ‘good’ category, a lower value is better and much higher than 50 is not so good. The Signal to Noise Ratio Margin (SNRM) of 10.0dB rates as fair, with this value bigger is better – a result of 6dB or less would be very bad. The last area I’ll talk about is the upper right yellow box showing errors – ideally you want no errors, any increase in CRC errors after your initial connection is established is a problem and usually points to a physical issue somewhere between the modem and the telephone companies equipment.
What if you don’t like Windows? You’re in luck – all of this data can be gathered via telnet. Simply telnet 192.168.1.254 and log into the modem:
$telnet 192.168.1.254

Trying 192.168.1.254...

Connected to 192.168.1.254.

Escape character is '^]'.

Username : Administrator

Password :
{Administrator}=>adsl info
Modemstate : up
Operation Mode : G.992.1 Annex A
Channel Mode : fast
Number of resets : 1
Vendor Local Remote
Country : 0f 0f
Vendor : TMMB ALCB
VendorSpecific : 3c61 0000
StandardRevisionNr : 00 01
Downstream Upstream
Margin [dB] : 10.0 8.0
Attenuation [dB] : 48.0 29.0
OutputPower [dBm] : 19.5 11.5
Intrinsic/Actual Bandwidth %
Upstream : 82
Downstream : 78
Available Bandwidth Cells/s Kbit/s
Downstream : 11924 5056
Upstream : 1886 800
Transfer statistics
Errors
Received FEC : 0
Received CRC : 117
Received HEC : 22
Transmitted FEC : 0
Transmitted CRC : 0
Transmitted HEC : 0
Near end failures since reset
Loss of frame: 0 failures
Loss of signal: 0 failures
Loss of power: 0 failures
Errored seconds: 47 seconds
Near end failures last 15 minutes
Loss of frame: 0 seconds
Loss of signal: 0 seconds
Loss of power: 0 seconds
Errored seconds: 0 seconds
Near end failures current day
Errored seconds: 47 seconds
Near end failures previous day
Errored seconds: 0 seconds
{Administrator}=>
So in my case, I’ve got CRC errors happening at a low rate indicating there is possibly some physical problem (ie: wiring). This is probably what led to a rash of recent DSL disconnect problems that prompted me to investigate this far in terms of self diagnosing the problem (because who wants to sit on hold with your ISP all day?).
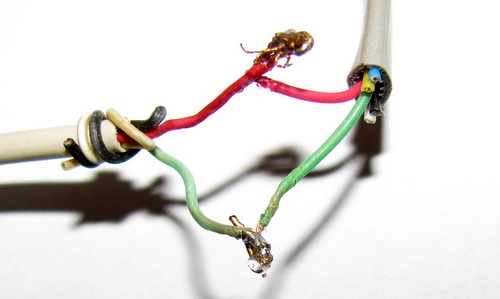
So this is what the phone line connected to my DSL modem looks like:
 Look suspicious? Ok, so I’ve been meaning to fix that for a while.
I also started searching on potential firmware upgrades, and came across some data that indicates that my current 6.1.9.6.0 revision may not be all that stable. I’ll have to tinker with that soon too.
I need to share one more goof with you. Jenn told me today that her email wasn’t working. I looked on the server and all appeared to be well, and it turns out it was her Mac acting up – it couldn’t see the mail server anymore. I checked with nslookup and the name was resolving fine, but ping to the same machine failed to map the name. Strange, I thought it was specific to the Mac until I later tried my linux box and it failed too… Huh? Turns out that I had reboot my router last night to clear some of the settings, since the router acts as my local DNS server/cache it had forgotten the email servers IP address. Renewing the IP address on the email server cause the DNS entry on the router to refresh and all was well again. The lesson? Remember your network topology.
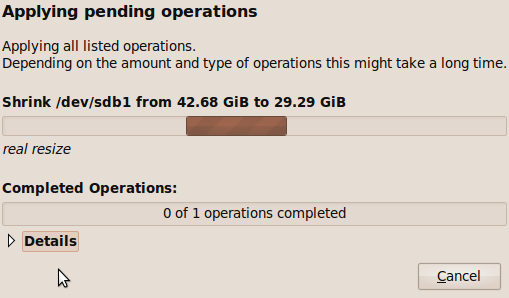
 The NTFS resize option of GParted is scary, but oh so very useful.


