Nintendo DS Lite (NDS)

Gaming is what got me into computers, I was facinated by the idea that it was possible to create your own games.  I started out with the Commodore-64 which let me play lots of games, but also gave me a chance to learn a lot of programming.  My next computer was a PC (386sx) and by this time I was more focused on programming than gaming.  Later on after university I picked up a Nintendo 64, which in its day was a ground breaking console.  This was also around the time that id Software was reinventing the PC gaming market with Doom and later Quake – this resulted in many late nights sessions at work where we’d setup a network game after hours.

Having met some seriously fanatical gamers, I can’t call myself one.  I like to play from time to time, but the constant hardware upgrades and time investment keep me from being very serious.  In late 2004 I picked up a GameBoy Advance SP – it was a great way to kill time in an airport.  Ken had purchased a few MovieAdvance carts, which let me play some homebrew and movies (poor quality, but this is a 16MHz ARM chip!).  For my birthday in 2006 Jenn got me Nintendo DS Lite, and it is so much more than just a simple game machine..

When I got a copy of Super Mario 64 for the NDS, it completely blew my socks off.  Here is a game that in 1996 was one of the coolest looking (and fun) games I’d ever played – and now 10 years later its running on a handheld.  Of course there is also the well known side scrolling New Super Mario Bros and of course The Legend of Zelda: Phantom Hourglass which are must have games on the NDS.  Moving a bit away from games, the BrainAge series are very addictive – and the web browser gets regular use by me.

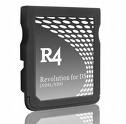
In my opinion a must have is one of the many flash cartridges for the NDS.  I bought an R4DS from consolesource.com back in early 2007.  The flash cart world is a bit odd, there is a very strong homebrew scene – but an even stronger pirate community.  The flash carts themselves live in a gray area, and are illegal to sell in some countries.  Some of companies making these products tend to seem a little shady as well, often creating cheap knock-offs so there is an element of buyer beware.

The R4DS takes a microSD card, which is almost hilariously small.  Let’s take a quick look at some of the software I have loaded on mine today.

There is plenty of other stuff as well, but those are a few highlights – every one is worth the time to download and install.

I also use the NDS as a reading light – so while I don’t play games every day, I do use it almost every night.  The new DSi looks very tempting, but I suspect I’ll wait until the price comes down a bit – and we start to see more software which is unique to the DSi.  I can’t wait to see what the homebrew community cooks up for it.

FrankenPod

This is the follow up posting to my tale of two iPods.  Tonight I used the ‘extra hour‘ to perform the logic board swap on my busted iPod from the ‘used’ one I picked up a week ago.

The first step was to take the used iPod apart.  By starting with the used one, I could learn how to do it before taking mine apart. I knew the used one was a little beat up, but I was still surprised by how dirty it was inside as well (mostly lint).  Below is a picture of it fully disassembled.

I found a pretty good .pdf file on powerbookmedic.com that documented the tear down, but found I had to also refer to the ifixit.com site to get a better idea of how some of the cable clips worked.  Now that I’ve got hands on experience doing it, the process is pretty straight forward.  Even cracking the iPod apart is quite easy now.  I do need to point out how insanely small those 6 screws are.

After taking everything apart – I wanted to verify the donor logic board was working. In the picture below you should be able to see the “Please Wait.  Very Low Battery.” message.  If I tried this with my non-working logic board, the screen did not light up at all.

Once I had both iPods completely disassembled, I performed the logic board swap and began to re-assemble my (hopefully working) iPod.  The reason for going to this extreme is that the used iPod was pretty beat up, and the only part I wanted to take from it was the logic board.  In the picture below, I’ve swapped the logic board and reassembled the click-wheel and screen into the front panel.

From this point it was only a matter of minutes before I had a completely assembled iPod and was able to connect it to my PC.  Again I was greeted by the ‘very low battery’ messaage and a pretty long wait – long enough I was starting to think I had done something wrong.

I was relieved when enough juice had made it into the battery and my Ubuntu system recognized the device.  From this point on things were pretty smooth sailing.  I booted up my vmware image of WindowsXP that I use for iTunes and there were no problems connecting and synchronizing the iPod.  I had wondered if the logic board would be tied into my serial number, but apparently the data on the drive alone defines the iPod.

I then proceeded to reassemble the used iPod using the bad logic board.  While I will likely sell this used one for parts, I figure it may as well be together instead of a jumble of parts.  Once I did this, I was surprised to hear whirring coming from the device (sounded like the hard drive spinning).  It was unresponsive to the reboot sequence (menu + center) and continued to whirr away.  I figured this explains why my iPod had such a flat battery, clearly when the logic board failed – it went into this mode and drained the battery completely.

A few minutes later I realized that the used iPod was getting warm to the touch.  This was a little bit alarming, so I popped the cover off and disconnected the battery.  The battery was quite hot, clearly some unexpected load being drawn by the bogus logic board.

At this point it looks like things went as planned.  I was able to transplant the logic board from the used iPod which was pretty beat up into my “like new” iPod.  I also have pretty good evidence to back up my guess that it was the logic board.  And I was able to do it for less than a refurb nano would cost me.

I may still use the shuffle as it is certainly easy to carry around, but I’ll certainly appreciate the video capability on my next boring plane ride.


A Tale of Two iPods

So a while back I posted about my how my video iPod had stopped working.  My investigations pretty much pointed at the logic board being bad.  I do have a classic 512MB shuffle that I’ve been rocking, but I miss the display to figure out what album (or even sometimes artist) I’m listening to – also I had been using the video feature to watch transcoded TV shows from my MythTV PVR.

This had me surfing the apple refurb store and considering the $89 nano there since a replacement logic board will run somewhere around $90 (and I don’t get a warranty).  The local used market also was very tempting as video iPods seem to run around $100 – $120.

The usedottawa.com site seems to generally have the best local prices, but I really wanted to find one for less than $100.  As luck would have it, someone posted a black 30G video iPod for $60 the other day – I leapt on the opportunity.  I figured at this price, it was going to be a little banged up, but as long as it worked I could do a transplant.

My busted iPod is on the left, the used (but working) iPod on the right.  Note the scratch on the screen area and tape on the lower right side.  Generally the surface has been badly scratched up, this iPod has had a rough life.

Even the metal back shows serious signs of wear.  There is also gunk inside of the dock connector making the cable connection a bit tricky (I’m pretty sure if I clean out the gunk – it will be fine).

Even the side of this case is starting to bust apart (thus the tape).  I’m sort of amazed that this unit still works – it sort of restores my faith in the quality of the iPod devices.  While $60 might have sounded like a too good to be true deal, based on its condition I paid a fair price for it.

Well, next step is to strip both units down and do a little transplant surgery…