Growing a WindowsXP VMWare GuestOS in Ubuntu

vmware_ubuntuMy desktop at home is based on Ubuntu and generally its a good end user experience.  The bonus to running Linux is it gives me a unix system to hack around with and I avoid some of the malware nonsense the plagues the much more popular Windows operating system.  Of course, Linux is a poor second cousin and there is a lot of software that is only for Windows.  The suite of work-alike applications under Linux is improving, but most people can’t quite get away from Windows entirely.

For my part, one of the key applications is iTunes.  Sure you can sort of get by with pure Linux, buts its still pretty messy.  Running the real application is much easier.  There are a few other less frequently used applications that require me to have a Windows install around too.

Quite some time ago, I took a physical install of WindowsXP Home and virtualized it to run under VMWare Player (you can also choose to use VMWare Server).  I’ve lost track of the specific steps I did, but the following how to seems to cover basically what I did.  One footnote to this process is that it appears to Windows as if you’ve changed the hardware significantly enough to require revalidation of your license – this shouldn’t be a big deal if you’ve got a legitimate copy.

Now back then, I figured that a 14Gb disk would be plenty of space for Windows.  (Ok, stop laughing now).  So this worked fine for a couple of years, but the cruft has built up to the point where I’m getting regular low disk warnings in my WindowsXP image.  Time to fix it.

You’ll need to get a copy of VMWare Server.  This is a free download, but requires a registration that gives you a free key to run it.  You actually don’t need the key – as we only need one utility out of the archive:  vmware-vdiskmanager.  This will allow us to resize the .vmdk file – which will take a little while.


./vmware-vdiskmanager -x 36Gb WindowsXP.vmdk

The vmware server archive also contains another very useful tool: vmware-mount.  This allows you to mount your vmware disk and access the NTFS partitions under Linux.  Very nice for moving data in or out of your virtualized Windows machine.

I need to credit the blog post which pointed me at the vmware-vdiskmanager, but it goes on to talk about using the Windows administration tools to change the type of the disk from basic to dynamic.  This is a feature not available in XP Home.

The .vmdk file represents the raw disk, so we’ve now got more drive space avilable but the Windows partition is still stuck at 14Gb.  No problem, the Ubuntu live CD contains a copy of GParted which can resize NTFS for us.  We need to edit the .vmx file to add the .iso file and boot from it.

ide0:0.present = "TRUE"
ide0:0.fileName = "/MyData/ISOs/ubuntu-9.04-desktop-i386.iso"
ide0:0.deviceType = "cdrom-image"

I did also have to fiddle with the VMWare BIOS (F2 on boot) to enable booting from the CDRom.  You may or may not need to do this step.

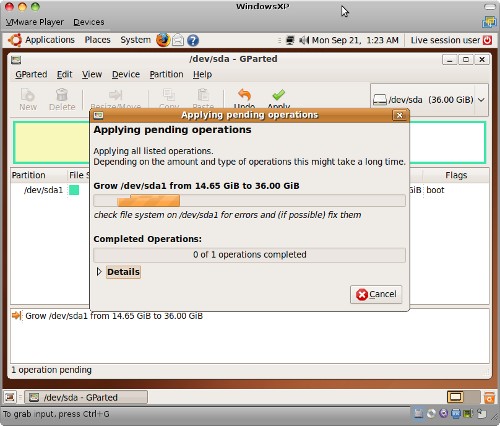
Once you have the Ubuntu Live CD running, run the partition editor under System->Adminstration->Partition Editor.  This is GParted and its got a pretty friendly graphical UI.  It may take some time to apply the change.

WindowsXP_Growing

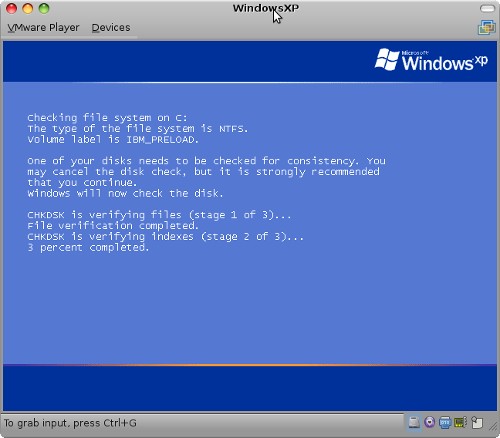
Once you are done, you need to re-edit your .vmx file to remove the .iso and boot Windows once again.  Don’t Panic.  Windows will detect that there is something amiss on your file system and want to run a check / repair on it.  This is normal.  Let it run through this process, it is a one time fix up and you’ll boot clean afterwards.

WindowsXP-Chkdsk

Start to end it takes a couple of hours, but most of that is waiting for longish disk operations.  Worth it to now have plenty of drive space available for my Windows VMware image.

Mounting a Wheelbarrow Wheel

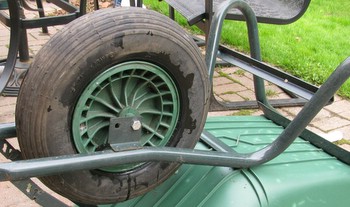
We left our wheelbarrow out in a corner of the backyard all winter.  In the spring the tire had completely deflated, and as it is a tubeless tire (similar to car tires) it had come off the rim as well.  Simply sticking an airpump on the valve did nothing as the tire no longer touched the rim in a number of places letting all of the air out.

One solution img_1396would have been to simply buy a new tire.  I thought that being like a car tire, I could probably take it by a local garage and have them do it for me.  However, I had a nagging feeling there was some way to DIY so I finally got to searching for a solution.

It was very easy to find some good advice on the net (this is as you know, not always true).  So the value of this post is probably limited, but I learned something today so I thought I’d share.

Tools you need: rope, air pump, long screwdriver or sturdy stick, soapy water.

  1. Use the soapy water (1/2 water, 1/2 dish soap) to coat the beads of the tire (both sides) and the rim where it will mate up.
  2. Tie the rope snugly around the circumference of the tire.
  3. Stick the screwdriver through the rope and twist, causing the rope to tighten.  This should help you get the bead onto the rim on both sides [in my case, it was not quite there – but close enough to seal the gaps]
  4. Pump the tire.  This should cause the bead to set onto the rim.  Slowly release the twist while you pump.

That’s it – easy to fix with stuff you should be able to find around the workshop.

The New Server

I had previously posted about the server than runs lowtek.ca and that it had been given me trouble.   Well, the new parts came pretty quickly and it was a good thing – as just last week the old server packed it in.  It turns out that the most likely reason for the instability was the CPU fan, as it totally seized on the failure day and my CPU temperature climbed up past 90C.  An $8 fan might have solved my immediate problem, and been a lot less headache — having temperature graphs of the server would have helped spot this, something I plan to do with the new one.

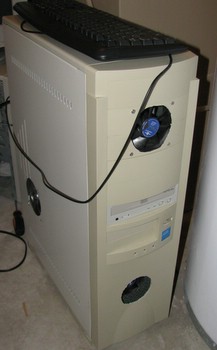
At least I had a good excuse to buy new hardware.img_1086 So here is a picture of it hanging out in my furnace room next to the water heater.  While the new system is based on a MiniITX mainboard, I’ve opted to use a full size ATX tower case to house it (the case was a free hand me down from a friend).

I did modify the case quite heavily.  The stock fan grills were simply holes drilled in the case – it was more grill than not, so the airflow was pretty poor.  A couple of minutes with the dremel removed the grills entirely.  I also opened up the front bezel to provide easy inflow of air for the lower case fan.  The upper case fan is mounted to a pair of drive bay covers I’ve glued together.

This case has 6 x 5.25 drive bays, and 3×3.5 bays.  My system drive lives down in the bottom and the data drives are up where the top fan is.

I also cut a fan vent in the side panel to blow down onto the mainboard itself.  This I did with a jigsaw, and I think it turned out well considering it was my first attempt a something like this.

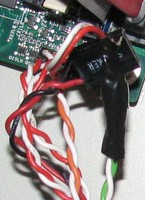
img_1071This older ATX tower case had all of the right connections for this new motherboard.  Power, reset and HDD connectors hooked up no problem.  The power LED was a 3 pin connector vs. the required 2 pin connector.  Karl was able to hook me up with a spare HDD connector that I spliced onto the power LED.

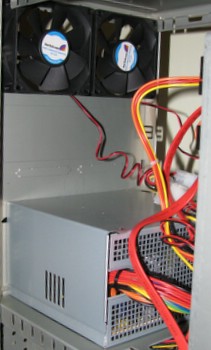
Since there were mounting locaimg_1074tions for 2 more exhaust fans, I couldn’t help myself and added two more at the top/back of the case.

If we count fans, I’ve got 5 case fans, 1 more in the power supply, and a chipset fan on the mainboard.  Overkill?  Yes. Required?  No, probably not.  There seem to be plenty of folk out there running exactly the same board with very minimal cooling.

My motivation here was the current system failing due to heat death, and I’d like this new system to run problem free for years.  The extra cost of a few fans isn’t a big deal, and its very quiet relative to the furnace.  I may further duct / optimize the cooling as the measurements thus far don’t show much of a delta from other peoples numbers on the net.

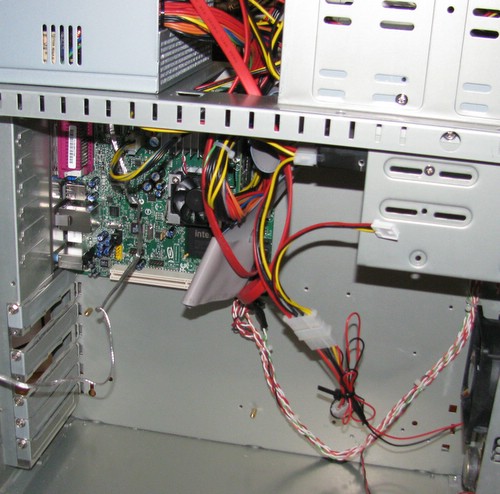
One more picture of the guts, to give you a sense of how small the MiniITX board is:

img_1070The transition from the old system to the new one should have been as simple as dropping in the drives and booting.  Unfortunately the old version of Ubuntu (Dapper) didn’t have support for the new Atom board and couldn’t make use of its network drivers etc.

Worse still, the system drive refused to boot in the new machine.  It is something that still has me scratching my head.  I even went to the effort of cloning the boot drive onto another which I had proven would boot with the new system – and still no go.  It was almost as if the MBR was in an unexpected location.  Last week I lost a bunch of sleep.

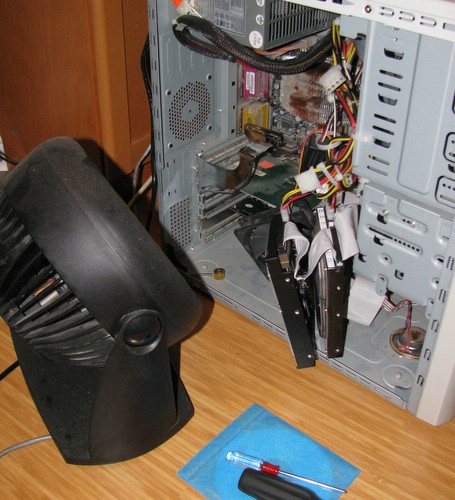
img_1075Above is a picture of the old server while it was cloning the boot drive (which as I mentioned, turned out to be a waste of time).  After five hours of beating my head on the problem, I simply moved the data drives to the new system – and did a clean install on a fresh boot drive.  The old server continued to host lowtek.ca on the old system drive using the external fan to keep the CPU cool.

Yesterday I turned off the old server.  Here are a few URLs that I found helpful in the migration:

As I host a number of wordpress blogs here migrating them required a database backup / restore.  I simply copied over the /var/www directory data instead of re-installing the blog software itself.

Backup:

mysqldump --add-drop-table -h localhost -u sql_username \
--password=sql_passwd sql_database_name > blog.bak.sql

Create DB on new host:

$ mysql -u root -p

mysql> CREATE DATABASE sql_database_name;

mysql> GRANT ALL PRIVILEGES ON sql_database_name.* TO “sql_username”@”localhost”
-> IDENTIFIED BY “sql_passwd”;

mysql> FLUSH PRIVILEGES;

mysql> exit

Restore:

mysql -h localhost -u sql_username  -p sql_database_name < blog.bak.sql

Well, if you’re still hanging in there – let’s talk about power consumption.  I borrowed Trent’s Kill-A-Watt meter and did some measuring.  My home desktop machine draws around 150Watts, and up to 200Watts of power when loaded (and using the CD drive).  The old server machine used 2W in standby, 120W during boot (loaded) and 112W steady state.  The new machine uses 1W in standby, a peak of 100W at boot (when the drives are spinning up), and 60W steady state.

In conclusion: Server machines need to have monitoring setup to track potential problems (temperature).  Migration of your data is less painful if you keep an install log with notes and links (thank goodness I did one last time).  New hardware usually needs a new software install, don’t fight it.