Printrbot Simple – part 3 – more building

IMG_2904

This is the second day of the my build. I originally anticipated finishing the build but hit a few snags right near the end so I stopped before completing it. I didn’t want to rush so as to avoid mistakes, and I was having a blast putting the kit together.

The laser-cut 1/4″ plywood has a wonderful burnt wood smell. The precision of the parts is awesome, things fit perfectly together. I can see why some folks really get into rapid prototyping with laser cut parts, but buying/building a laser cutter is further down my list.

I took a lot fewer notes this round. Again, I reference the steps from the instructions for the Printrbot Simple with Large Motors.

Continue reading “Printrbot Simple – part 3 – more building”

Printrbot Simple – part 2 – the build

IMG_2899

Printrbot has been continuing to refine their printers as they go along. Since the original Simple beta, they’ve gone through a few revisions. The original didn’t have end stops, this now comes as part of the kit. A fan was added to help temperature control. They’ve added tension adjustment on the strings they use to attach the platforms to the motors. On October 23rd they change the design to use large motors – and even though my order was a day prior, I still received the large motor kit.

These improvements they’ve managed to fold into the same cost, keeping the price the same for the improved product. For previous customers, they offer reasonably priced upgrade options (and instructions) to update their printers. For some parts, they provide the files needed to print your own.

I promise I’ll get off the fan boy soapbox soon, but I need to also mention that they’ve released the designs under a Creative Commons non-commercial license. This is a company that not only delivers great value, but has embraced the community. I’m quite happy to jump in and participate when things are like this, and I’m sure a lot of others are too – this creates a great feedback loop to the company that benefits them via support and (potential) improvements from the community.

On to day one of my Printrbot Simple build – I followed their build instructions and will reference steps (hopefully they don’t renumber / edit the document too heavily). [Edit – it does appear they’ve added some steps, as my numbering appears to be currently ‘off by 2’ later in the instructions – that or my notes were sloppy]

The remainder of this post is terse details with my comments on each step. Not much to see here unless you’re building your own Printrbot Simple. This was the first of three nights I took to do the build (a bit at a time) – for me it was like reading a good book, I didn’t want it to end so I stretched it out a bit.

Continue reading “Printrbot Simple – part 2 – the build”

Printrbot Simple – part 1 – ordering

I’ve actually been quite active tinkering with things, even keeping notes on what I’ve done with the intention to post here — but I’ve not been getting around to posting anything.

My twitter followers will know I’ve recently got myself a 3D printer and that along with the rest of life has been keeping me busy. This is the first in a multi-part series of posts about my recent adventure.

In October, one of my birthday presents was “go buy yourself a 3d printer”. Super cool! I’ve been drooling over them for a while. First following the Solidoodle, then the Printrbot Simple, MakiBox, and even this $100 3d printer on KickStarter.

Of course with me, there is a big difference between wanting to buy something and actually putting down the money to buy it. Agonizing over a purchase is probably half the fun. You’ll note that all of the choices were fairly economical, this is a toy for me – not a serious tool.

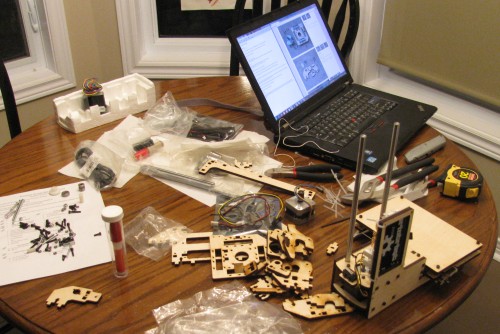
In the end the Printrbot Simple won out. Some were eliminated on price or availability, but the Simple also came in a kit form – and for me building the printer is half the fun.

I ordered it on October 22nd. The order was fulfilled on October 29th and delivered (inside the USA) on November 5th. While I live in Canada, the border is only about an hour away, and sometimes it makes sense to avoid (excessive) cross border shipping fees and simply use a parcel holding service – in this case I used The Corporate Center. When bringing the kit across the border I did pay some taxes on it (about $40) but given that I didn’t pay any tax on the purchase because it came “from out of state” it didn’t feel like a big deal. The shipping cost to Canada was more than I saved, plus there was an ‘unknown’ cost to do the duty/taxes.

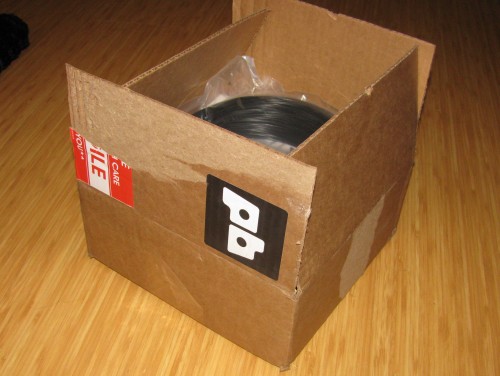
The box itself was surprisingly compact: 4.5″x10.5″x10.5″ – weighing in under 8lbs.

IMG_2887

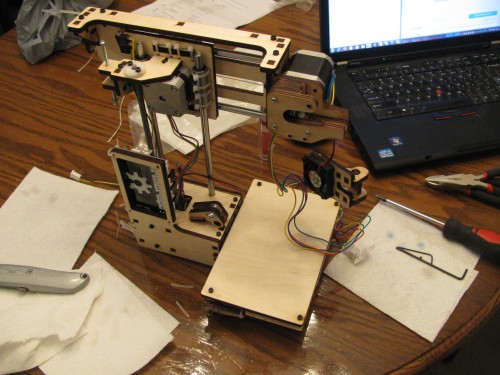
Next up, we’ll start assembling the kit.