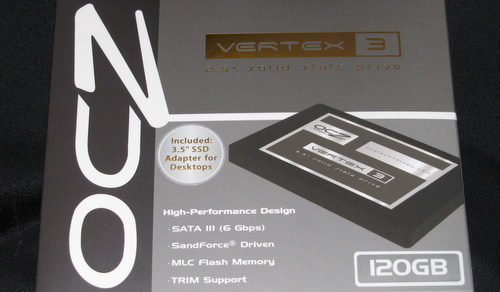
I’m not entirely certain which event triggered my gear lust for a solid state drive (SSD), it was probably a mix of Jeff Atwood’s post, TechReport’s storage section, and the falling prices resulting in smaller SSDs down below the $100 price point. Whatever it was, I couldn’t really shake the idea of having a SSD in my work laptop – so I decided to get one.
Initially I had thought that a 60G-64G drive would fit the bill, being under the $100 price point and just big enough to hold the OS plus my Lotus Notes mail installation. After reviewing benchmarks, and reviews I decided to focus on the 120G size – in part due to a general recommendation that the 60G size is a bit small for most, and the benchmark numbers on the 120G are a bit better. The price was higher, but still within a very reasonable budget as SSDs are approaching $1 a Gig. The TechReport comparison of 120G-128G size helped me narrow my choice down to the OCZ Vertex 3.
While the Vertex 3 has been on the market a year, it still ranks as one of the fastest drives available. There were some issues with the SandForce SF-2881 controller, but firmware 2.15 is reported to be solid.
My laptop was running a 500G SATA2 Toshiba drive, configured as a single large partition running Windows 7. I had no interest in re-installing from scratch so my approach was to clone the working system onto the smaller drive. There are likely plenty of ways to do this, I was able to easily find a blog post describing how to do it – I roughly followed those steps but will document exactly what I did here.
Step 1) Reduce the partition on the big hard drive to be a bit less than the formatted capacity of the SSD. Initially after reading a bit I was hesitant to use GParted to do this as it seemed some folks had had problems with Windows 7 and GParted. Windows 7 also has a built in partition resize capability.
I ran into several issues trying to use the built in Windows 7 functionality. First up was some unmovable files causing issues. Even after turning off virtual memory and system restore, I still had issues. The Event Viewer was a help in identifying Chrome as holding onto some unmovable files, then I hit what I believe was an issue with NTFS Metafiles being unmovable and blocking my ability to shrink the partition smaller than 245G. At this point I threw my hands in the air and ran GParted from an Ubuntu Live USB key.
GParted ran to completion, but oddly gave me an error indicating something was wrong – but I couldn’t spot anything actually wrong. [Normally GParted should not give an error] The damage was done so I just rebooted and let Windows perform the necessary chkdsk activity. Things were fine, so either I mis-read that there was an error or it was something that was recoverable. Either way I was now happily running with a 100G partition.
Step 2) Use Clonezilla‘s “savepart” option to capture an image of the partition. Since I had a 500G drive which now had lots of empty space after the 100G system partition, I created a 2nd volume to store the captured image to. You can use a second USB mounted drive, or any number of other options including ssh with Clonezilla to store your image.
I will comment that Clonezilla is not for the timid, the user interface appear very complex and requires some careful reading to make sure you’re doing what you think you’re doing. Youtube has a number of walk throughs. For the 100G partition it took about 1:35 to backup.

Above you see the SSD attached to the ultra slim sled that the laptop hard disk was in, this is a very slim metal sleeve with a pull tab and some rubber bumpers. It fit nicely into my W520.
Step 3) Swap the drives. If you have a password on the drive, it’s a good idea to disable before removing it as USB enclosures and passworded drives don’t mix well. Install the new SSD, and place the existing drive into a USB enclosure. Boot the laptop into Ubuntu Live again and partition the new SSD drive, make sure to tag the new partition as with the ‘boot’ flag.
Step 4) Restore the image you saved with Clonezilla’s “restore part” option. In this case I was restoring from the 2nd partition on the original hard drive that is now mounted as a USB volume. Clonezilla warns you twice when restoring a partition to validate you’ve got the correct destination, a nice paranoid touch.
The restore ran nearly 3x faster taking about 37 minutes.
Step 5) Boot into windows, chkdsk may have run again but with the SSD it seemed to take no time at all. You might want to visit the OCZ site and grab the toolbox utility to validate you’ve got the latest firmware, I did this to verify I had 2.15.
Performance
After I did the clone, I ran some boot time tests on the hard drive. I tested immediately after I had completed step 5 with the SSD. For work I need Lotus Notes up and running to access my calendar etc, so that was a logical pattern to benchmark – how long to get back to key information? I used a stop watch, and the times include the time I spent typing in the two passwords and navigating to the icon to launch Notes. It’s not terribly scientific, but I think the results still speak for themselves.
|
Disk test 1 |
Disk test 2 |
Disk test 3 |
SSD test 1 |
SSD test 2 |
SSD test 3 |
| Cold boot to Windows login |
1:22 |
1:24 |
55 |
23 |
23 |
23 |
| Login to launch of Notes |
1:42 |
1:13 |
1:44 |
10 |
10 |
10 |
| Lotus Notes ready |
40 |
44 |
40 |
10 |
10 |
11 |
| Total time |
3:45 |
3:22 |
3:19 |
43 |
43 |
44 |
This is crazy hot – more than 3x faster, under a minute from a cold boot.
Now certain operations don’t seem any faster. Resuming from hibernation feels to be about the same speed. This makes sense as the performance difference for sequential reads isn’t much different. It seems in normal usage, lots of little things are more immediate too. Some of this is likely simply moving from a SATA2 to a SATA3 drive, but I’m convinced no spinning platter could keep up with the SSD.


